# LLM Gateway — Full Documentation
> LLM Gateway is an open-source, OpenAI-compatible API gateway that routes, manages, and analyzes LLM requests across 40+ providers (OpenAI, Anthropic, Google, and more) through a single unified API. Switch providers without changing code, manage API keys centrally, track usage and cost, add caching and guardrails, and self-host or use the managed cloud.
API base URL: https://api.llmgateway.io/v1 · Docs: https://docs.llmgateway.io · Site: https://llmgateway.io
This file concatenates the full text of every documentation page below.
# Introduction to LLM Gateway
URL: https://docs.llmgateway.io/
LLM Gateway is an open-source API gateway that sits between your applications and LLM providers like OpenAI, Anthropic, Google AI Studio, and more. It provides a unified, OpenAI-compatible API interface with built-in cost tracking, caching, and intelligent routing.
## Features [#features]
All features are documented under https://docs.llmgateway.io/features; each feature page is included in full in this file.
## AI Tooling [#ai-tooling]
LLM Gateway is built to work seamlessly with AI agents and development tools.
AI tooling: https://docs.llmgateway.io/llms.txt (docs index for LLMs), https://docs.llmgateway.io/llms-full.txt (this file), https://docs.llmgateway.io/guides/mcp (MCP server), https://docs.llmgateway.io/guides/agent-skills (agent skills), and https://llmgateway.io/templates (templates and agents).
## Next Steps [#next-steps]
* [**Quickstart**](https://docs.llmgateway.io/quick-start) — Get up and running in minutes
* [**Overview**](https://docs.llmgateway.io/overview) — Learn more about what LLM Gateway offers
* [**Self-Host**](https://docs.llmgateway.io/self-host) — Deploy on your own infrastructure
# Overview
URL: https://docs.llmgateway.io/overview
LLM Gateway is an open-source API gateway for Large Language Models (LLMs). It acts as a middleware between your applications and various LLM providers, allowing you to:
* Route requests to multiple LLM providers (OpenAI, Anthropic, Google AI Studio, and others)
* Manage API keys for different providers in one place
* Track token usage and costs across all your LLM interactions
* Analyze performance metrics to optimize your LLM usage
## Analyzing Your LLM Requests [#analyzing-your-llm-requests]
LLM Gateway provides detailed insights into your LLM usage:
* **Usage Metrics**: Track the number of requests, tokens used, and response times
* **Cost Analysis**: Monitor spending across different models and providers
* **Performance Tracking**: Identify patterns and optimize your prompts based on actual usage data
* **Breakdown by Model**: Compare different models' performance and cost-effectiveness
All this data is automatically collected and presented in an intuitive dashboard, helping you make informed decisions about your LLM strategy.
## Getting Started [#getting-started]
Using LLM Gateway is simple. Just swap out your current LLM provider URL with the LLM Gateway API endpoint:
```bash
curl -X POST https://api.llmgateway.io/v1/chat/completions \
-H "Content-Type: application/json" \
-H "Authorization: Bearer $LLM_GATEWAY_API_KEY" \
-d '{
"model": "gpt-4o",
"messages": [
{"role": "user", "content": "Hello, how are you?"}
]
}'
```
LLM Gateway maintains compatibility with the OpenAI API format, making migration seamless.
## Hosted vs. Self-Hosted [#hosted-vs-self-hosted]
You can use LLM Gateway in two ways:
* **Hosted Version**: For immediate use without setup, visit [llmgateway.io](https://llmgateway.io) to create an account and get an API key.
* **Self-Hosted**: Deploy LLM Gateway on your own infrastructure for complete control over your data and configuration.
The self-hosted version offers additional customization options and ensures your LLM traffic never leaves your infrastructure if desired.
# Quickstart
URL: https://docs.llmgateway.io/quick-start
Welcome to **LLM Gateway**—a single drop‑in endpoint that lets you call today’s best large‑language models while keeping **your existing code** and development workflow intact.
> **TL;DR** — Point your HTTP requests to `https://api.llmgateway.io/v1/…`, supply your `LLM_GATEWAY_API_KEY`, and you’re done.
***
## 1 · Get an API key [#1--get-an-api-key]
1. Sign in to the dashboard.
2. Create a new Project → *Copy the key*.
3. Export it in your shell (or a `.env` file):
```bash
export LLM_GATEWAY_API_KEY="llmgtwy_XXXXXXXXXXXXXXXX"
```
***
## 2 · Pick your language [#2--pick-your-language]
```bash
curl -X POST https://api.llmgateway.io/v1/chat/completions \
-H "Content-Type: application/json" \
-H "Authorization: Bearer $LLM_GATEWAY_API_KEY" \
-d '{
"model": "gpt-4o",
"messages": [
{"role": "user", "content": "Hello, how are you?"}
]
}'
```
```typescript
const response = await fetch("https://api.llmgateway.io/v1/chat/completions", {
method: "POST",
headers: {
"Content-Type": "application/json",
Authorization: `Bearer ${process.env.LLM_GATEWAY_API_KEY}`,
},
body: JSON.stringify({
model: "gpt-4o",
messages: [{ role: "user", content: "Hello, how are you?" }],
}),
});
if (!response.ok) {
throw new Error(`HTTP error! status: ${response.status}`);
}
const data = await response.json();
console.log(data.choices[0].message.content);
```
```tsx
import { useState } from "react";
function ChatComponent() {
const [response, setResponse] = useState("");
const [loading, setLoading] = useState(false);
const sendMessage = async () => {
setLoading(true);
try {
const res = await fetch("https://api.llmgateway.io/v1/chat/completions", {
method: "POST",
headers: {
"Content-Type": "application/json",
Authorization: `Bearer ${process.env.REACT_APP_LLM_GATEWAY_API_KEY}`,
},
body: JSON.stringify({
model: "gpt-4o",
messages: [{ role: "user", content: "Hello, how are you?" }],
}),
});
if (!res.ok) {
throw new Error(`HTTP error! status: ${res.status}`);
}
const data = await res.json();
setResponse(data.choices[0].message.content);
} catch (error) {
console.error("Error:", error);
} finally {
setLoading(false);
}
};
return (
Full self-hosting capabilities, giving you complete control over your
infrastructure
Enhanced analytics with deeper insights into your model usage and
performance
No fees when using your own provider keys, maximizing cost efficiency
Greater flexibility and customization options for enterprise deployments
Our pricing structure is designed to be flexible and cost-effective: See the
[Pricing section](https://llmgateway.io#pricing).
***
## 6 · Next steps [#6--next-steps]
* Read [Self host docs](https://docs.llmgateway.io/self-host) guide.
* Drop into our [GitHub](https://github.com/theopenco/llmgateway) for help or feature requests.
Happy building! ✨
# Health check
URL: https://docs.llmgateway.io/health
{/* This file was generated by Fumadocs. Do not edit this file directly. Any changes should be made by running the generation command again. */}
# Create speech
URL: https://docs.llmgateway.io/v1_audio_speech
{/* This file was generated by Fumadocs. Do not edit this file directly. Any changes should be made by running the generation command again. */}
# Create transcription
URL: https://docs.llmgateway.io/v1_audio_transcriptions
{/* This file was generated by Fumadocs. Do not edit this file directly. Any changes should be made by running the generation command again. */}
# Chat Completions
URL: https://docs.llmgateway.io/v1_chat_completions
{/* This file was generated by Fumadocs. Do not edit this file directly. Any changes should be made by running the generation command again. */}
# Embeddings
URL: https://docs.llmgateway.io/v1_embeddings
{/* This file was generated by Fumadocs. Do not edit this file directly. Any changes should be made by running the generation command again. */}
# Edit image
URL: https://docs.llmgateway.io/v1_images_edits
{/* This file was generated by Fumadocs. Do not edit this file directly. Any changes should be made by running the generation command again. */}
# Create image
URL: https://docs.llmgateway.io/v1_images_generations
{/* This file was generated by Fumadocs. Do not edit this file directly. Any changes should be made by running the generation command again. */}
# Retrieve key status
URL: https://docs.llmgateway.io/v1_key_retrieve
{/* This file was generated by Fumadocs. Do not edit this file directly. Any changes should be made by running the generation command again. */}
# Anthropic Messages
URL: https://docs.llmgateway.io/v1_messages
{/* This file was generated by Fumadocs. Do not edit this file directly. Any changes should be made by running the generation command again. */}
# Models
URL: https://docs.llmgateway.io/v1_models
{/* This file was generated by Fumadocs. Do not edit this file directly. Any changes should be made by running the generation command again. */}
# Moderations
URL: https://docs.llmgateway.io/v1_moderations
{/* This file was generated by Fumadocs. Do not edit this file directly. Any changes should be made by running the generation command again. */}
# OCR
URL: https://docs.llmgateway.io/v1_ocr
{/* This file was generated by Fumadocs. Do not edit this file directly. Any changes should be made by running the generation command again. */}
# Rerank
URL: https://docs.llmgateway.io/v1_rerank
{/* This file was generated by Fumadocs. Do not edit this file directly. Any changes should be made by running the generation command again. */}
# Video content
URL: https://docs.llmgateway.io/v1_videos_content
{/* This file was generated by Fumadocs. Do not edit this file directly. Any changes should be made by running the generation command again. */}
# Create video
URL: https://docs.llmgateway.io/v1_videos_create
{/* This file was generated by Fumadocs. Do not edit this file directly. Any changes should be made by running the generation command again. */}
# Video log content
URL: https://docs.llmgateway.io/v1_videos_log_content
{/* This file was generated by Fumadocs. Do not edit this file directly. Any changes should be made by running the generation command again. */}
# Retrieve video
URL: https://docs.llmgateway.io/v1_videos_retrieve
{/* This file was generated by Fumadocs. Do not edit this file directly. Any changes should be made by running the generation command again. */}
# Image Generation with the AI SDK
URL: https://docs.llmgateway.io/developers/ai-sdk-images
The `@llmgateway/ai-sdk-provider` package supports image generation both through the AI SDK's dedicated `generateImage` function and through chat-based image models that stream images as part of a conversation.
## generateImage [#generateimage]
Use `llmgateway.image()` to get an image model:
```typescript
import { createLLMGateway } from "@llmgateway/ai-sdk-provider";
import { generateImage } from "ai";
import { writeFileSync } from "fs";
const llmgateway = createLLMGateway({
apiKey: process.env.LLM_GATEWAY_API_KEY,
});
const result = await generateImage({
model: llmgateway.image("gemini-3-pro-image-preview"),
prompt:
"A cozy cabin in a snowy mountain landscape at night with aurora borealis",
size: "1024x1024",
n: 1,
// aspectRatio and quality are model-specific — only some providers honor them.
// aspectRatio works on Gemini image models; OpenAI gpt-image-2 ignores it
// (use a literal WxH `size` instead).
aspectRatio: "16:9",
// quality works on OpenAI gpt-image-2 ("low" | "medium" | "high" | "auto").
// The AI SDK only forwards it through providerOptions.
providerOptions: {
llmgateway: { quality: "high" },
},
});
result.images.forEach((image, i) => {
const buf = Buffer.from(image.base64, "base64");
writeFileSync(`image-${i}.png`, buf);
});
```
Which sizes, aspect ratios, and quality settings a model accepts depends on
the model — see [Image Generation](https://docs.llmgateway.io/features/image-generation) for the full
parameter reference and per-model behavior.
## Chat-based image models [#chat-based-image-models]
Multimodal models like `gemini-3-pro-image-preview` can return images inside a chat conversation. Use `llmgateway.chat()` with `streamText` in a route handler:
```typescript
// app/api/chat/route.ts
import { createLLMGateway } from "@llmgateway/ai-sdk-provider";
import { convertToModelMessages, streamText } from "ai";
const llmgateway = createLLMGateway({
apiKey: process.env.LLM_GATEWAY_API_KEY,
});
export async function POST(req: Request) {
const { messages } = await req.json();
const result = streamText({
model: llmgateway.chat("gemini-3-pro-image-preview"),
messages: convertToModelMessages(messages),
});
return result.toUIMessageStreamResponse();
}
```
On the client, image parts arrive as message file parts that you can render with the AI Elements `Image` component or a plain `` tag with a data URL. See [Image Generation](https://docs.llmgateway.io/features/image-generation) for the complete `useChat` frontend example.
## Video and audio [#video-and-audio]
The AI SDK does not yet cover the gateway's video and speech endpoints — call them over REST instead:
* [Video Generation](https://docs.llmgateway.io/features/video-generation) — `POST /v1/videos` (async jobs with optional signed callbacks)
* [Speech Generation](https://docs.llmgateway.io/features/speech-generation) — `POST /v1/audio/speech`
* [Transcription](https://docs.llmgateway.io/features/transcription) — `POST /v1/audio/transcriptions`
# Using the AI SDK
URL: https://docs.llmgateway.io/developers/ai-sdk
LLM Gateway ships a first-party provider for the [Vercel AI SDK](https://ai-sdk.dev): [`@llmgateway/ai-sdk-provider`](https://github.com/theopenco/llmgateway-ai-sdk-provider). One provider instance and one API key reach every model in the catalog.
## Install [#install]
```bash
pnpm add ai @llmgateway/ai-sdk-provider
```
Set your API key (create one from the [dashboard](https://llmgateway.io/dashboard)):
```bash
export LLM_GATEWAY_API_KEY=llmgtwy_your_key_here
```
## Generate text [#generate-text]
```typescript
import { createLLMGateway } from "@llmgateway/ai-sdk-provider";
import { generateText } from "ai";
const llmgateway = createLLMGateway({
apiKey: process.env.LLM_GATEWAY_API_KEY,
});
const { text } = await generateText({
model: llmgateway("openai/gpt-4o"),
prompt: "Hello!",
});
```
Switching models is a one-line change — the same provider serves every model:
```typescript
const { text } = await generateText({
model: llmgateway("anthropic/claude-3-5-sonnet-20241022"),
prompt: "Hello!",
});
```
## Model ID formats [#model-id-formats]
LLM Gateway supports two model ID formats:
* **Root model IDs** (`gpt-4o`) — smart routing picks the best provider based on uptime, throughput, price, and latency
* **Provider-prefixed IDs** (`openai/gpt-4o`) — routes to a specific provider with automatic failover if uptime drops below 90%
See the [routing documentation](https://docs.llmgateway.io/features/routing) for details and the [models page](https://llmgateway.io/models) for the full catalog.
## Stream responses [#stream-responses]
```typescript
import { createLLMGateway } from "@llmgateway/ai-sdk-provider";
import { streamText } from "ai";
const llmgateway = createLLMGateway({
apiKey: process.env.LLM_GATEWAY_API_KEY,
});
const { textStream } = await streamText({
model: llmgateway("anthropic/claude-3-5-sonnet-20241022"),
prompt: "Write a poem about coding",
});
for await (const text of textStream) {
process.stdout.write(text);
}
```
## Next.js route handler [#nextjs-route-handler]
```typescript
// app/api/chat/route.ts
import { createLLMGateway } from "@llmgateway/ai-sdk-provider";
import { streamText } from "ai";
const llmgateway = createLLMGateway({
apiKey: process.env.LLM_GATEWAY_API_KEY,
});
export async function POST(req: Request) {
const { messages } = await req.json();
const result = await streamText({
model: llmgateway("openai/gpt-4o"),
messages,
});
return result.toDataStreamResponse();
}
```
## Tool calling [#tool-calling]
```typescript
import { createLLMGateway } from "@llmgateway/ai-sdk-provider";
import { generateText, tool } from "ai";
import { z } from "zod";
const llmgateway = createLLMGateway({
apiKey: process.env.LLM_GATEWAY_API_KEY,
});
const { text, toolResults } = await generateText({
model: llmgateway("openai/gpt-4o"),
tools: {
weather: tool({
description: "Get the weather for a location",
parameters: z.object({
location: z.string(),
}),
execute: async ({ location }) => {
return { temperature: 72, condition: "sunny" };
},
}),
},
prompt: "What's the weather in San Francisco?",
});
```
## Without the provider package [#without-the-provider-package]
If you prefer not to add a dependency, point `@ai-sdk/openai` at the gateway with a custom base URL:
```typescript
import { createOpenAI } from "@ai-sdk/openai";
import { generateText } from "ai";
const llmgateway = createOpenAI({
baseURL: "https://api.llmgateway.io/v1",
apiKey: process.env.LLM_GATEWAY_API_KEY,
});
const { text } = await generateText({
model: llmgateway("openai/gpt-4o"),
prompt: "Hello!",
});
```
Every request made through the AI SDK shows up in your
[Activity](https://docs.llmgateway.io/learn/activity) and [Usage & Metrics](https://docs.llmgateway.io/learn/usage-metrics)
dashboards like any other gateway request — with per-request cost, tokens, and
latency.
## Next steps [#next-steps]
* [Image generation with the AI SDK](https://docs.llmgateway.io/developers/ai-sdk-images)
* [Migrate from Vercel AI Gateway](https://docs.llmgateway.io/migrations/vercel-ai-gateway)
* [Reasoning support](https://docs.llmgateway.io/features/reasoning) and [caching](https://docs.llmgateway.io/features/caching)
# Overview
URL: https://docs.llmgateway.io/developers
This section is for developers building applications on top of LLM Gateway — with a focus on the [Vercel AI SDK](https://ai-sdk.dev) and our first-party provider package, [`@llmgateway/ai-sdk-provider`](https://github.com/theopenco/llmgateway-ai-sdk-provider).
## Why the AI SDK [#why-the-ai-sdk]
The AI SDK gives you one TypeScript interface for text generation, streaming, tool calling, and image generation. Combined with LLM Gateway, a single provider instance and one API key reach every model in the catalog — see the [models page](https://llmgateway.io/models) for what's available.
## Guides [#guides]
* [**Using the AI SDK**](https://docs.llmgateway.io/developers/ai-sdk) — Install the provider, generate and stream text, call tools, and wire up Next.js routes
* [**Image Generation with the AI SDK**](https://docs.llmgateway.io/developers/ai-sdk-images) — Generate images with `generateImage` and stream image output through chat
## Other ways to integrate [#other-ways-to-integrate]
If you're not using the AI SDK:
* Use any OpenAI-compatible SDK against `https://api.llmgateway.io/v1` — see the [Quickstart](https://docs.llmgateway.io/quick-start)
* Use the Anthropic SDK against the [Anthropic-compatible endpoint](https://docs.llmgateway.io/features/anthropic-endpoint)
* Call the REST API directly — see the API reference in the sidebar
# Anthropic API Compatibility
URL: https://docs.llmgateway.io/features/anthropic-endpoint
# Anthropic API Compatibility [#anthropic-api-compatibility]
LLMGateway provides a native Anthropic-compatible endpoint at `/v1/messages` that allows you to use any model in our catalog while maintaining the familiar Anthropic API format
This is especially useful for applications designed for Claude that you want to extend to use other models.
Enjoy a 50% discount on our Anthropic models for a limited time.
## Overview [#overview]
The Anthropic endpoint transforms requests from Anthropic's message format to the OpenAI-compatible format used by LLMGateway, then transforms the responses back to Anthropic's format. This means you can:
* Use **any model** available in LLMGateway with Anthropic's API format
* Maintain existing code that uses Anthropic's SDK or API format
* Access models from OpenAI, Google, Cohere, and other providers through the Anthropic interface
* Leverage LLMGateway's routing, caching, and cost optimization features
## Basic Usage [#basic-usage]
## Configuration for Claude Code [#configuration-for-claude-code]
This endpoint is perfect for configuring Claude Code to use any model available in LLMGateway:
```bash
export ANTHROPIC_BASE_URL=https://api.llmgateway.io
export ANTHROPIC_AUTH_TOKEN=llmgtwy_your_api_key_here
# optional: specify a model, otherwise it uses the default Claude model
export ANTHROPIC_MODEL=gpt-5 # or any model from our catalog
# now run claude!
claude
```
### Choosing Models [#choosing-models]
You can use any model from the [models page](https://llmgateway.io/models). Popular options for Claude Code include:
```bash
# Use OpenAI's latest model
export ANTHROPIC_MODEL=gpt-5
# Use a cost-effective alternative
export ANTHROPIC_MODEL=gpt-5-mini
# Use Google's Gemini
export ANTHROPIC_MODEL=gemini-2.5-pro
# Use Anthropic's actual Claude models
export ANTHROPIC_MODEL=claude-3-5-sonnet-20241022
```
## Environment Variables [#environment-variables]
When configuring Claude Code or other Anthropic-compatible applications, you can use these environment variables:
### ANTHROPIC\_MODEL [#anthropic_model]
Specifies the main model to use for primary requests.
* **Default**: `claude-sonnet-4-20250514`
* **Example**: `export ANTHROPIC_MODEL=gpt-5`
### ANTHROPIC\_SMALL\_FAST\_MODEL [#anthropic_small_fast_model]
Specifies a smaller, faster model used for background functionality and internal operations.
* **Default**: `claude-3-5-haiku-20241022`
* **Example**: `export ANTHROPIC_SMALL_FAST_MODEL=gpt-5-nano`
```bash
# Example configuration
export ANTHROPIC_BASE_URL=https://api.llmgateway.io
export ANTHROPIC_AUTH_TOKEN=llmgtwy_your_api_key_here
export ANTHROPIC_MODEL=gpt-5
export ANTHROPIC_SMALL_FAST_MODEL=gpt-5-nano
```
## Advanced Features [#advanced-features]
### Making a manual request [#making-a-manual-request]
```bash
curl -X POST "https://api.llmgateway.io/v1/messages" \
-H "Authorization: Bearer $LLM_GATEWAY_API_KEY" \
-H "Content-Type: application/json" \
-d '{
"model": "gpt-5",
"messages": [
{"role": "user", "content": "Hello, how are you?"}
],
"max_tokens": 100
}'
```
### Response Format [#response-format]
The endpoint returns responses in Anthropic's message format:
```json
{
"id": "msg_abc123",
"type": "message",
"role": "assistant",
"model": "gpt-5",
"content": [
{
"type": "text",
"text": "Hello! I'm doing well, thank you for asking. How can I help you today?"
}
],
"stop_reason": "end_turn",
"stop_sequence": null,
"usage": {
"input_tokens": 13,
"output_tokens": 20
}
}
```
### Prompt Caching [#prompt-caching]
For Claude models, `cache_control` markers on `system` and message content blocks are forwarded to the provider unchanged, including the optional `ttl` (`5m` or `1h`):
```json
{
"model": "claude-sonnet-4-6",
"max_tokens": 100,
"system": [
{
"type": "text",
"text": "",
"cache_control": { "type": "ephemeral" }
}
],
"messages": [{ "role": "user", "content": "Hello!" }]
}
```
Cache usage comes back in Anthropic's native fields: `usage.cache_creation_input_tokens` (tokens written to the cache this request, billed at the write premium), `usage.cache_read_input_tokens` (tokens served from cache at the discounted rate), and `usage.cache_creation` (the per-TTL write breakdown).
Each Claude model has a minimum cacheable prompt length (4,096 tokens on
current-generation models such as Opus 4.5+, Sonnet 5, and Haiku 4.5). A
`cache_control` marker on a shorter prompt is accepted but silently not cached
— both cache usage fields stay `0`. See [Provider Cache
Control](https://docs.llmgateway.io/features/caching/provider-cache-control) for the per-model
thresholds and details.
### Web Search [#web-search]
Anthropic's server-side web search tool works on this endpoint. Pass it as usual and the response carries `server_tool_use` and `web_search_tool_result` blocks before the text that cites them, so Anthropic SDK clients surface sources:
```json
{
"model": "claude-haiku-4-5",
"max_tokens": 400,
"messages": [{ "role": "user", "content": "What shipped in Node 24?" }],
"tools": [{ "type": "web_search_20250305", "name": "web_search" }]
}
```
Replaying the assistant turn verbatim on the next request is supported: the `server_tool_use` and `web_search_tool_result` blocks are accepted and dropped, since the provider re-runs the search rather than reusing the previous results.
### Gateway Response Cache [#gateway-response-cache]
If [gateway caching](https://docs.llmgateway.io/features/caching/gateway-caching) is enabled on the project, a byte-identical request is replayed from cache instead of being sent upstream. Because the replayed body is identical (same `id`, same `usage`), the `x-llmgateway-cache: HIT` response header is the marker to check. Send `x-no-cache: true` to bypass the cache for a single request.
# API Keys & IAM Rules
URL: https://docs.llmgateway.io/features/api-keys
# API Keys & IAM Rules [#api-keys--iam-rules]
API keys are the primary method for authenticating with the LLM Gateway. This guide covers creating API keys, managing them, and configuring IAM rules for fine-grained access control.
## Overview [#overview]
LLM Gateway provides comprehensive API key management with the following features:
* **Basic API Key Management**: Create, list, update, and delete API keys
* **Usage Limits**: Set lifetime and recurring spending limits on individual API keys
* **Expiration (TTL)**: Give a key a time-to-live so it disables itself automatically
* **IAM Rules**: Fine-grained access control for models, providers, and pricing
* **Usage Tracking**: Monitor API key usage and costs
* **Status Management**: Enable/disable keys without deletion
## Creating API Keys [#creating-api-keys]
### Via Dashboard [#via-dashboard]
At this time, API keys can only be created via the dashboard.
1. Navigate to your project in the LLM Gateway dashboard
2. Go to the **API Keys** section
3. Click **Create API Key**
4. Provide a description for your key
5. Optionally set an all-time usage limit
6. Optionally set a recurring usage limit such as `$10 / day` or `$500 / month`
7. Optionally set an expiration (TTL) such as `30 minutes`, `12 hours`, or `7 days`
8. Click **Create**
API keys are shown in full only once during creation. Make sure to copy and
store them securely.
## Using API Keys [#using-api-keys]
Once you have an API key, use it in the `Authorization` header of your requests:
```bash
curl -X POST "https://api.llmgateway.io/v1/chat/completions" \
-H "Authorization: Bearer llmgtwy_your_api_key_here" \
-H "Content-Type: application/json" \
-d '{
"model": "gpt-4o",
"messages": [{"role": "user", "content": "Hello!"}]
}'
```
## Disabling/Enabling API Keys [#disablingenabling-api-keys]
You can disable an API key to stop it from being used, but the key is not deleted and can be re-enabled later.
## Expiration (TTL) [#expiration-ttl]
You can give an API key a **time-to-live (TTL)** when you create it. Set how long
the key should live — in **minutes**, **hours**, or **days** — and it will be
disabled automatically once that time passes. This is ideal for short-lived
integrations, demos, CI jobs, and temporary access.
* A key works normally until its expiration time
* Once expired, the gateway rejects requests with that key with a `401 Unauthorized`
* A background job marks expired keys as **inactive**, so the dashboard reflects
the disabled state
* Keys created without a TTL never expire (the default)
### Reactivating an Expired Key [#reactivating-an-expired-key]
An expired key is paused, not deleted. To bring it back online you must reactivate
it **with a new future expiration** — an expired key cannot be re-enabled while its
TTL is still in the past. Keys that have no TTL, or whose TTL is still in the
future, can be enabled and disabled freely without setting a new expiration.
Expiration is independent of usage limits. A key can hit its TTL before, or
instead of, reaching a spend cap.
## Usage Limits [#usage-limits]
Usage is tracked per API key on the API Keys page. Usage includes both costs
from LLM Gateway credits and usage from your own provider keys when applicable,
giving you complete visibility into total spending per key.
You can set two independent limits for each key:
* **All-time usage limit**: A lifetime spend cap
* **Recurring usage limit**: A spend cap that resets every configured hour, day, week, or month
When a key reaches either limit, requests using that key return `401
Unauthorized` until the key is updated or, for recurring limits, the next
usage window starts. This is separate from IAM rule violations, which return
`403 Forbidden`.
Recurring windows support:
* Minimum duration: **1 hour**
* Maximum duration: **12 months**
* Units: **hour**, **day**, **week**, **month**
For the dashboard walkthrough and field-by-field details, see [API Keys in
Learn](https://docs.llmgateway.io/learn/api-keys).
## IAM Rules [#iam-rules]
IAM (Identity Access Management) rules provide fine-grained access control over what models, providers, and pricing tiers an API key can access.
### Rule Types [#rule-types]
#### Model Access Rules [#model-access-rules]
Control access to specific models:
* **Allow Models**: Only allow access to specific models
* **Deny Models**: Block access to specific models
#### Provider Access Rules [#provider-access-rules]
Control access to specific providers:
* **Allow Providers**: Only allow access to specific providers
* **Deny Providers**: Block access to specific providers
#### Pricing Rules [#pricing-rules]
Control access based on model pricing:
* **Allow Pricing**: Set constraints on what pricing tiers are allowed
* **Deny Pricing**: Block specific pricing tiers
* **Free vs Paid**: Allow or deny access to free vs paid models
#### IP Address Rules [#ip-address-rules]
IP address rules are available on the **Enterprise** plan only. Contact us at
[contact@llmgateway.io](mailto:contact@llmgateway.io) to enable them for your organization.
Restrict where the API key can be used from by source IP, using CIDR ranges:
* **Allow IP Ranges (CIDR)**: Only permit requests from the listed IPv4/IPv6 CIDRs
* **Deny IP Ranges (CIDR)**: Block requests from the listed IPv4/IPv6 CIDRs
Both IPv4 (e.g. `192.0.2.0/24`) and IPv6 (e.g. `2001:db8::/32`) ranges are supported, and you can mix both in a single rule. To restrict to a single address, use a `/32` (IPv4) or `/128` (IPv6) prefix.
The gateway reads the client IP from the first entry in the `X-Forwarded-For` header (set by the GCP load balancer). When an `allow_ip_cidrs` rule is configured and the gateway cannot determine the client IP, the request is denied. Invalid CIDR syntax is rejected at rule-creation time with a `400` error.
### Combining Multiple Rules [#combining-multiple-rules]
* **Allow rules of the same type are unioned**: a request passes if it matches *any* of them. For example, one `allow_models` rule with `["claude-opus-4-6"]` and another with `["claude-fable-5"]` allow both models — exactly as if you had a single rule listing both.
* **Allow rules of different types are combined with AND**: the request must satisfy every configured allow rule type (e.g. the model must be in the allowed models *and* served by an allowed provider).
* **Deny rules always apply**: a request matching any deny rule is rejected, regardless of allow rules.
* **Moderation is special-cased**: `/v1/moderations` runs a fixed moderation model that cannot appear in model allowlists, so only provider and IP rules apply to it — model and pricing rules are skipped.
## Member-Level IAM Rules [#member-level-iam-rules]
The same rule types can also be configured **per organization member** by owners and admins on the [Team page](https://docs.llmgateway.io/learn/team) (admins cannot modify an owner's rules). Member-level rules act as an organization-wide ceiling for that member:
* A request must pass **both** the member's rules and the API key's rules. Within each level, rules combine exactly as described above.
* Key rules can only **narrow** access further — they can never grant anything the member's rules deny. For example, if an admin restricts a member to a single approved [provider](https://llmgateway.io/providers) with an `allow_providers` rule, the member can create a key rule allowing only a specific model from that provider, but a key rule allowing any other provider has no effect.
* A key with **no rules of its own** is still fully constrained by its owner's member-level rules.
* Member-level rules apply to all regular API keys created by that member, across every project in the organization.
When a request is denied by a member-level rule, the `403` error message states that the restriction is an organization member IAM rule set by the org admin (rather than the key's own IAM configuration), so key holders know who to contact.
Member-level rules can also be managed programmatically via the [master key API](https://docs.llmgateway.io/features/master-keys#member-iam-rules), addressing members by membership id or email.
## Error Handling [#error-handling]
When API keys encounter IAM rule violations, the API returns a `403` with the standard OpenAI error envelope:
```json
{
"error": {
"message": "Access denied: Model gpt-4 is not in the allowed models list",
"type": "invalid_request_error",
"param": null,
"code": "permission_denied"
}
}
```
Common error scenarios:
* Model not allowed by IAM rules
* Provider blocked by IAM rules
* Pricing limits exceeded
* API key disabled or deleted
* API key expired (TTL passed)
* Usage limit reached
## Migration from Legacy Keys [#migration-from-legacy-keys]
If you have existing API keys without IAM rules:
1. **Backward Compatibility**: Existing keys continue to work without restrictions
2. **Gradual Migration**: Add IAM rules incrementally
3. **Testing**: Test IAM rules in development before applying to production
4. **Monitoring**: Monitor for access denied errors after implementing rules
API keys without IAM rules have unrestricted access to all models and
providers.
# Audit Logs
URL: https://docs.llmgateway.io/features/audit-logs
# Audit Logs [#audit-logs]
Audit logs provide complete visibility into all actions within your organization. Track who did what, when, and to which resource.
Audit logs are available on the [**Enterprise
plan**](https://llmgateway.io/enterprise) for organization owners and admins.
## What's Tracked [#whats-tracked]
Every significant action is logged with detailed metadata:
| Field | Description |
| ----------------- | -------------------------------------------------------- |
| **Timestamp** | When the action occurred |
| **User** | Who performed the action (name and email) |
| **Action** | What was done (e.g., `api_key.create`, `project.update`) |
| **Resource Type** | Category of the affected resource |
| **Resource ID** | Unique identifier of the affected resource |
| **Details** | Additional context like resource names or changed fields |
## Tracked Actions [#tracked-actions]
### Organization Management [#organization-management]
* `organization.update` — Organization settings changed
* `organization.delete` — Organization deleted
### Project Management [#project-management]
* `project.create` — New project created
* `project.update` — Project settings changed
* `project.delete` — Project deleted
### Team Management [#team-management]
* `team_member.add` — New member invited
* `team_member.update` — Member role changed
* `team_member.remove` — Member removed
### API Key Management [#api-key-management]
* `api_key.create` — New API key created
* `api_key.update_status` — API key enabled/disabled
* `api_key.update_limit` — Usage limit changed
* `api_key.delete` — API key deleted
* `api_key.iam_rule.create` — IAM rule added
* `api_key.iam_rule.update` — IAM rule modified
* `api_key.iam_rule.delete` — IAM rule removed
### Provider Key Management [#provider-key-management]
* `provider_key.create` — Provider key added
* `provider_key.update` — Provider key status changed
* `provider_key.delete` — Provider key removed
### Billing Events [#billing-events]
* `subscription.create` — Subscription started
* `subscription.cancel` — Subscription cancelled
* `subscription.resume` — Subscription resumed
* `payment.credit_topup` — Credits purchased
## Filtering and Search [#filtering-and-search]
Filter logs by:
* **Action** — Specific action type
* **Resource Type** — Category of resource
* **User** — Who performed the action
* **Date Range** — Time period
## Data Retention [#data-retention]
Audit logs are retained for **90 days** on the Enterprise plan.
## Access Control [#access-control]
Only organization **owners** and **admins** can view audit logs. This ensures sensitive activity data is only visible to authorized personnel.
## Get Started [#get-started]
Audit logs are an Enterprise feature. [Contact us](https://llmgateway.io/enterprise) to enable Enterprise for your organization.
# Coding Agents
URL: https://docs.llmgateway.io/features/coding-agents
# Coding Agents [#coding-agents]
The gateway detects which coding agent or tool a DevPass request comes from and records it as the `x-source` attribution in logs and the dashboard. Detection runs on every request.
Source enforcement is gated behind the `DEVPASS_ENFORCE_SOURCE_RESTRICTION` environment variable and is **disabled by default**. While disabled, all sources are allowed and detection is used only for attribution. When enabled (`DEVPASS_ENFORCE_SOURCE_RESTRICTION=true`), requests from unrecognized sources (browsers, curl, generic HTTP clients) are rejected with a `403` response.
## How Detection Works [#how-detection-works]
The gateway identifies coding agents using a multi-layer priority chain:
1. **`x-source` header** — Explicit source identifier sent by the client (also accepts full URLs like `https://hermes-agent.nousresearch.com`)
2. **`User-Agent` header** — Automatic detection via pattern matching
3. **`X-Title` / `X-OpenRouter-Title` header** — Title-based detection (e.g., "hermes agent")
4. **`HTTP-Referer` header** — Referer URL pattern matching (e.g., `hermes-agent.nousresearch.com`)
5. **User-Agent fallback** — If an unrecognized `x-source` is sent, falls back to UA detection
If your tool sends a recognized `x-source` header, no further detection is needed. Otherwise, the gateway checks each subsequent layer until a match is found. If no layer produces a match, the request is rejected on DevPass plans only when source enforcement is enabled (see above); otherwise it is allowed and logged as an unrecognized source.
## Supported Agents [#supported-agents]
The following agents are automatically detected and allowed on DevPass plans:
| Agent | Source ID | Detection |
| ------------------ | ------------------------ | --------------------------------------------------------------------------- |
| Claude Code | `claude.com/claude-code` | UA: `claude-cli/...` or contains `claude-code` |
| Codex CLI | `codex` | UA: `codex-cli/...`, `codex_cli_rs/...`, `codex-tui/...` |
| OpenCode | `opencode` | UA: `opencode/...` or contains `opencode-cli` |
| DevPass Code | `devpass-code` | Header: `x-source: devpass-code` |
| Roo Code | `roo-code` | UA: contains `roo-code` or `roo-cline` |
| Cline | `cline` | UA: contains `cline` |
| Cursor | `cursor` | UA: `Cursor/...` or contains `cursor-llm` |
| Autohand Code | `autohand` | UA: `autohand/...` or contains `autohand-code` |
| Empryo | `empryo` | UA: `empryo/...` or contains `empryo` |
| SoulForge | `soulforge` | UA: `soulforge/...` |
| n8n | `n8n` | UA: `n8n/...` or contains `n8n-workflow` |
| OpenClaw | `openclaw` | UA: `openclaw/...` |
| Aider | `aider` | UA: `aider/...` or contains `aider` |
| Continue | `continue` | UA: `continue/...` or contains `continue-dev` |
| Windsurf / Codeium | `windsurf` | UA: `windsurf/...` or `codeium/...` |
| Zed AI | `zed` | UA: `Zed/...` or contains `zed-editor` |
| GitHub Copilot | `github-copilot` | UA: `github-copilot/...` or contains `copilot` |
| Pi Agent | `pi-agent` | UA: `pi-agent/...` or contains `pi_agent` |
| Hermes Agent | `hermes-agent` | UA: `HermesAgent/...`, Title: `hermes agent`, Referer: `*.nousresearch.com` |
| OpenAI SDK | `openai-sdk` | UA: `OpenAI/Python ...` or `Is/JS ...` |
| Any \*claw fork | *(varies)* | UA or source containing `claw` |
## Configuring Your Tool [#configuring-your-tool]
### Option 1: Send the `x-source` Header (Recommended) [#option-1-send-the-x-source-header-recommended]
The most reliable way to identify your tool is to include the `x-source` header in every request:
```bash
curl -X POST https://api.llmgateway.io/v1/chat/completions \
-H "Content-Type: application/json" \
-H "Authorization: Bearer $LLM_GATEWAY_API_KEY" \
-H "x-source: your-tool-name" \
-d '{ "model": "claude-sonnet-4-5-20250514", "messages": [...] }'
```
The `x-source` value must match one of the recognized source IDs listed above. For \*claw forks, any value containing "claw" is accepted.
### Option 2: Send an Identifiable User-Agent [#option-2-send-an-identifiable-user-agent]
If you cannot set custom headers, ensure your tool sends a recognizable `User-Agent`:
```bash
curl -X POST https://api.llmgateway.io/v1/chat/completions \
-H "User-Agent: my-tool/1.0.0" \
-H "Authorization: Bearer $LLM_GATEWAY_API_KEY" \
-d '{ "model": "claude-sonnet-4-5-20250514", "messages": [...] }'
```
The User-Agent must match one of the patterns in the detection table above.
## Error Response [#error-response]
When a DevPass plan request comes from an unrecognized source, the gateway returns:
```json
{
"error": {
"message": "DevPass coding plans are restricted to recognized coding agents. Your request was not identified as coming from a supported tool. Please ensure your coding tool sends an identifiable User-Agent header or x-source header. Supported agents: Claude Code, Codex CLI, OpenCode, ..., and any *claw fork.",
"type": "gateway_error",
"param": null,
"code": "403"
}
}
```
## Adding a New Agent [#adding-a-new-agent]
To add support for a new coding agent, add an entry to the centralized registry at `packages/shared/src/coding-agents.ts`:
```typescript
{
id: "your-agent",
label: "Your Agent",
xSourceValues: ["your-agent"],
userAgentPatterns: [/^your-agent\//i, /\byour-agent\b/i],
titleValues: ["your agent"], // optional
refererPatterns: [/your-agent\.com/i], // optional
},
```
**Fields:**
| Field | Required | Description |
| ------------------- | -------- | -------------------------------------------------------------------------------------------------------------------------------------------- |
| `id` | Yes | Canonical identifier stored in `log.source`. Must be unique. |
| `label` | Yes | Human-friendly display name shown in the UI and error messages. |
| `xSourceValues` | Yes | Array of `x-source` header values that identify this agent. Include alternate spellings and domain forms (e.g., `"your-agent.example.com"`). |
| `userAgentPatterns` | Yes | Array of regex patterns to match the User-Agent string. Patterns are tested in order; first match wins. |
| `titleValues` | No | Array of lowercase title strings to match against `X-Title` or `X-OpenRouter-Title` headers. |
| `refererPatterns` | No | Array of regex patterns to match the `HTTP-Referer` header URL. |
After adding the entry:
1. The agent is automatically detected from User-Agent headers
2. The agent is automatically allowlisted for DevPass plans
3. The agent appears in the Agents activity view in the dashboard
4. The `x-source` values are normalized to the canonical `id` in logs
No other code changes are required.
## Removing an Agent [#removing-an-agent]
To remove an agent from the allowlist, delete its entry from `packages/shared/src/coding-agents.ts`. Once source enforcement is enabled, requests from that tool will be rejected on DevPass plans after deployment.
## Source Normalization [#source-normalization]
Alternate `x-source` values are normalized to canonical IDs for consistent analytics:
* `open-code` → `opencode`
* `codeium` → `windsurf`
* `roo-cline` → `roo-code`
* `copilot` → `github-copilot`
* `hermes` → `hermes-agent`
* `hermes-agent.nousresearch.com` → `hermes-agent`
Full URLs sent as `x-source` (e.g., `https://hermes-agent.nousresearch.com`) are automatically stripped of their protocol prefix before matching, so `https://hermes-agent.nousresearch.com` becomes `hermes-agent.nousresearch.com` which normalizes to `hermes-agent`.
This ensures the same agent always appears under one name in logs and dashboards regardless of which header value the client sends.
# Compliance
URL: https://docs.llmgateway.io/features/compliance
# Provider Compliance Policies [#provider-compliance-policies]
Provider compliance policies let you guarantee that requests are only ever routed to providers that meet your organization's regulatory requirements. When a request would be routed to a provider that doesn't meet the policy, the gateway blocks it **before any data leaves the gateway**.
Provider compliance policies are available on the [**Enterprise
plan**](https://llmgateway.io/enterprise) for organization owners and admins.
## Requirements [#requirements]
Enable a policy under **Settings → Compliance** in the dashboard and toggle the requirements you need:
| Requirement | A provider is allowed when… |
| ----------------------------- | -------------------------------------------------- |
| **SOC 2 (Type 1 or 2)** | it holds a SOC 2 report of any type |
| **SOC 2 Type 2** | it holds a SOC 2 Type 2 report specifically |
| **ISO 27001** | it holds an ISO 27001 certification |
| **SOC 2 Type 2 or ISO 27001** | it holds either a SOC 2 Type 2 report or ISO 27001 |
| **GDPR compliant** | it is GDPR compliant |
| **No training on prompts** | it does not train on API prompts |
| **No prompt logging** | it does not log prompts |
Every requirement is **fail-closed**: a provider passes only if its published data policy explicitly satisfies the requirement. If an attribute is unknown for a provider, that provider is treated as non-compliant.
The settings page shows a live preview of which providers are allowed and which are blocked under the current policy, so you can see the impact before saving.
## Provider headquarters [#provider-headquarters]
Beyond certifications, you can restrict routing by the country a provider is headquartered in. The **Provider Headquarters** card presents a country selector, and requests are only routed to providers based in a selected country.
The selector only offers countries that are referenced by a provider in the catalogue — browse the [providers directory](https://llmgateway.io/providers) to see the current set and each provider's headquarters. Selecting no country applies no location restriction. The country filter is also fail-closed: when at least one country is selected, a provider whose headquarters is unknown is treated as non-compliant.
The country filter composes with the certification and data-policy requirements above — a provider must satisfy all active requirements to be allowed.
## Enforcement [#enforcement]
When no available provider for a model meets the policy — or a pinned provider is non-compliant — the gateway returns a `403`:
```json
{
"error": {
"message": "This request was blocked by your organization's provider compliance policy. No available provider for deepseek-v3.2 meets the required certifications. Contact your LLMGateway admin to adjust the policy."
}
}
```
This applies to both routing modes:
* **Automatic routing** — non-compliant providers are removed from the candidate set, and the request is blocked if none remain.
* **Pinned providers** — a request such as `deepseek/deepseek-v3.2` is blocked when that specific provider does not meet the policy.
Each block is recorded as a **security event** so administrators can review what was rejected and why.
## Access Control [#access-control]
Only organization **owners** and **admins** can view and change the compliance policy.
## Related [#related]
* [Data Retention](https://docs.llmgateway.io/features/data-retention) — control whether request and response payloads are stored.
* [Guardrails](https://docs.llmgateway.io/features/guardrails) — detect and block harmful or sensitive content.
## Get Started [#get-started]
Provider compliance policies are an Enterprise feature. [Contact us](https://llmgateway.io/enterprise) to enable Enterprise for your organization.
# Cost Breakdown
URL: https://docs.llmgateway.io/features/cost-breakdown
# Cost Breakdown [#cost-breakdown]
LLM Gateway provides real-time cost information for each API request directly in the response's `usage` object. This allows you to track costs programmatically without needing to query the dashboard.
Cost breakdown is available for all users on both hosted and self-hosted
deployments.
## Response Format [#response-format]
When cost breakdown is enabled, your API responses will include additional cost fields in the `usage` object:
```json
{
"id": "chatcmpl-123",
"object": "chat.completion",
"created": 1234567890,
"model": "openai/gpt-4o",
"choices": [
{
"index": 0,
"message": {
"role": "assistant",
"content": "Hello! How can I help you today?"
},
"finish_reason": "stop"
}
],
"usage": {
"prompt_tokens": 10,
"completion_tokens": 15,
"total_tokens": 25,
"cost": 0.000125,
"cost_details": {
"upstream_inference_cost": 0.000125,
"upstream_inference_prompt_cost": 0.000025,
"upstream_inference_completions_cost": 0.0001,
"total_cost": 0.000125,
"input_cost": 0.000025,
"output_cost": 0.0001,
"cached_input_cost": 0,
"request_cost": 0,
"web_search_cost": 0,
"image_input_cost": null,
"image_output_cost": null,
"data_storage_cost": 0.00000025
},
"prompt_tokens_details": {
"cached_tokens": 0,
"cache_write_tokens": 0,
"audio_tokens": 0,
"video_tokens": 0
},
"completion_tokens_details": {
"reasoning_tokens": 0,
"image_tokens": 0,
"audio_tokens": 0
}
}
}
```
## Cost Fields [#cost-fields]
| Field | Description |
| -------------------------------------------------- | ------------------------------------------------------------------------------------------------------------------------------------------------------ |
| `cost` | Total inference cost for the request in USD |
| `cost_details.upstream_inference_cost` | Combined upstream inference cost in USD (prompt + completions) |
| `cost_details.upstream_inference_prompt_cost` | Upstream cost for prompt tokens in USD (includes cached prompt discount) |
| `cost_details.upstream_inference_completions_cost` | Upstream cost for completion tokens in USD |
| `cost_details.total_cost` | Total request cost in USD (LLM Gateway extended field) |
| `cost_details.input_cost` | Cost for non-cached prompt tokens in USD |
| `cost_details.output_cost` | Cost for completion tokens in USD |
| `cost_details.cached_input_cost` | Cost for cached prompt tokens in USD |
| `cost_details.cache_write_input_cost` | Cost for prompt tokens written to the provider cache in USD, billed at the provider's cache-write premium (e.g. 1.25x for 5m / 2x for 1h on Anthropic) |
| `cost_details.request_cost` | Per-request flat fee in USD (when the model applies one) |
| `cost_details.web_search_cost` | Cost for web search tool calls in USD |
| `cost_details.image_input_cost` | Cost for image inputs in USD |
| `cost_details.image_output_cost` | Cost for image outputs in USD |
| `cost_details.data_storage_cost` | Storage cost for retained request/response payloads in USD |
## Token Detail Fields [#token-detail-fields]
The `usage` object also includes detailed token counters that mirror OpenAI's extended format:
| Field | Description |
| --------------------------------------------- | ---------------------------------------------------------------------------------------------------------------------------------- |
| `prompt_tokens_details.cached_tokens` | Number of prompt tokens served from the provider's prompt cache |
| `prompt_tokens_details.cache_write_tokens` | Number of prompt tokens written into the provider's prompt cache |
| `prompt_tokens_details.cache_creation_tokens` | Alias of `cache_write_tokens`, matching Anthropic's naming |
| `prompt_tokens_details.cache_creation` | Per-TTL breakdown of cache writes (`ephemeral_5m_input_tokens` / `ephemeral_1h_input_tokens`), present when a cache write occurred |
| `prompt_tokens_details.audio_tokens` | Number of audio prompt tokens |
| `prompt_tokens_details.video_tokens` | Number of video prompt tokens |
| `completion_tokens_details.reasoning_tokens` | Number of reasoning tokens produced by reasoning models |
| `completion_tokens_details.image_tokens` | Number of image tokens produced |
| `completion_tokens_details.audio_tokens` | Number of audio tokens produced |
## Streaming Responses [#streaming-responses]
Cost information is also available in streaming responses. The cost fields are included in the final usage chunk sent before the `[DONE]` message:
```
data: {"id":"chatcmpl-123","object":"chat.completion.chunk","choices":[...],"usage":{"prompt_tokens":10,"completion_tokens":15,"total_tokens":25,"cost":0.000125,"cost_details":{"upstream_inference_cost":0.000125,"upstream_inference_prompt_cost":0.000025,"upstream_inference_completions_cost":0.0001,"total_cost":0.000125,"input_cost":0.000025,"output_cost":0.0001,"cached_input_cost":0,"request_cost":0,"web_search_cost":0,"image_input_cost":null,"image_output_cost":null,"data_storage_cost":0.00000025}}}
data: [DONE]
```
## Example: Tracking Costs in Code [#example-tracking-costs-in-code]
Here's an example of how to track costs programmatically using the cost breakdown feature:
```typescript
import OpenAI from "openai";
const client = new OpenAI({
apiKey: process.env.LLM_GATEWAY_API_KEY,
baseURL: "https://api.llmgateway.io/v1",
});
async function trackCosts() {
const response = await client.chat.completions.create({
model: "gpt-4o",
messages: [{ role: "user", content: "Hello!" }],
});
const usage = response.usage as any;
if (usage.cost !== undefined) {
console.log(`Request cost: $${usage.cost.toFixed(6)}`);
console.log(
` Prompt: $${usage.cost_details.upstream_inference_prompt_cost.toFixed(6)}`,
);
console.log(
` Completions: $${usage.cost_details.upstream_inference_completions_cost.toFixed(6)}`,
);
const cachedTokens = usage.prompt_tokens_details?.cached_tokens ?? 0;
if (cachedTokens > 0) {
console.log(` Cached prompt tokens: ${cachedTokens}`);
}
}
return response;
}
```
## Use Cases [#use-cases]
### Budget Monitoring [#budget-monitoring]
Track costs in real-time and implement budget limits in your application:
```typescript
let totalSpent = 0;
const BUDGET_LIMIT = 10.0; // $10 budget
async function makeRequest(messages: Message[]) {
const response = await client.chat.completions.create({
model: "gpt-4o",
messages,
});
const cost = (response.usage as any).cost || 0;
totalSpent += cost;
if (totalSpent > BUDGET_LIMIT) {
throw new Error(`Budget exceeded: $${totalSpent.toFixed(2)}`);
}
return response;
}
```
### Per-User Cost Allocation [#per-user-cost-allocation]
Track costs per user for billing or analytics:
```typescript
const userCosts: Map = new Map();
async function makeRequestForUser(userId: string, messages: Message[]) {
const response = await client.chat.completions.create({
model: "gpt-4o",
messages,
});
const cost = (response.usage as any).cost || 0;
const currentCost = userCosts.get(userId) || 0;
userCosts.set(userId, currentCost + cost);
return response;
}
```
### Cost Analytics [#cost-analytics]
Aggregate costs by model, time period, or any other dimension:
```typescript
interface CostEntry {
timestamp: Date;
model: string;
promptCost: number;
completionsCost: number;
totalCost: number;
}
const costLog: CostEntry[] = [];
async function loggedRequest(model: string, messages: Message[]) {
const response = await client.chat.completions.create({
model,
messages,
});
const usage = response.usage as any;
costLog.push({
timestamp: new Date(),
model: response.model,
promptCost: usage.cost_details?.upstream_inference_prompt_cost || 0,
completionsCost:
usage.cost_details?.upstream_inference_completions_cost || 0,
totalCost: usage.cost || 0,
});
return response;
}
```
## Self-Hosted Deployments [#self-hosted-deployments]
If you're running a self-hosted LLM Gateway deployment, cost breakdown is always included in API responses regardless of plan. This allows you to track internal costs and allocate them across teams or projects.
# Custom Providers
URL: https://docs.llmgateway.io/features/custom-providers
# Custom Providers [#custom-providers]
LLMGateway supports integrating custom OpenAI-compatible providers, allowing you to use any API that follows the OpenAI chat completions format. This feature is perfect for:
* Private or self-hosted LLM deployments
* Specialized AI providers not natively supported
* Internal AI services within your organization
* Testing against different model endpoints
Custom providers must be OpenAI-compatible, supporting the
`/v1/chat/completions` endpoint format.
## Quick Setup [#quick-setup]
### 1. Add a Custom Provider Key [#1-add-a-custom-provider-key]
Navigate to your organization's provider settings and add a custom provider via the UI.
Provide a lowercase name, OpenAI-compatible base URL, and API token for the custom provider.
### 2. Make Requests [#2-make-requests]
Once configured, make requests using the format `{customName}/{modelName}`:
```bash
curl -X POST "https://api.llmgateway.io/v1/chat/completions" \
-H "Authorization: Bearer $LLM_GATEWAY_API_KEY" \
-H "Content-Type: application/json" \
-d '{
"model": "mycompany/custom-gpt-4",
"messages": [
{
"role": "user",
"content": "Hello from my custom provider!"
}
]
}'
```
## Configuration Requirements [#configuration-requirements]
### Custom Provider Name [#custom-provider-name]
* **Format**: Lowercase letters (`a-z`) with optional single hyphens between them
* **Examples**: `mycompany`, `internal`, `my-company`, `eu-west`
* **Invalid**: `MyCompany`, `my_company`, `123test`, `-mycompany`, `my-`, `my--company`
The custom provider name must match the regex pattern `/^[a-z]+(-[a-z]+)*$/`
exactly.
### Base URL [#base-url]
* Must be a valid URL pointing to your provider's base endpoint
* Use an `https://` URL for hosted providers; an `http://` URL is allowed when
self-hosting (for example a service on your own network)
* LLMGateway will append `/v1/chat/completions` automatically
* **Example**: `https://api.example.com` → `https://api.example.com/v1/chat/completions`
### API Token [#api-token]
* Provider-specific authentication token
* Used in the `Authorization: Bearer {token}` header
Unlike built-in providers, custom provider models are not validated, giving
you complete flexibility.
## Supported Features [#supported-features]
Custom providers inherit full LLMGateway functionality.
## Custom Model Catalog [#custom-model-catalog]
The custom model catalog is an **Enterprise** feature. Managing entries
requires an enterprise plan, but the gateway always honors catalog entries
that already exist.
By default, requests through a custom provider are **not billed** and have **no
enforced limits** — LLMGateway has no catalog entry for the model, so it cannot
know its pricing, context window, or capabilities. The **custom model catalog**
lets you define that information per custom provider key, so LLMGateway can
attribute cost, enforce limits, and report usage just like a built-in model.
Custom catalog models are **text-output** models. Multi-modal *input* (images,
audio) is still supported and can be priced via the input fields below; output
generation (images, video, audio) is intentionally out of scope because it is
too provider-specific to bill generically.
### Defining a model [#defining-a-model]
Open **Organization → Custom Models**, pick the custom provider key, and add a
catalog entry. Every field except the model id is optional:
| Field | Purpose |
| ------------------------ | ------------------------------------------------------------------------------------------------------------------------------- |
| **Model id** | The id used after the provider prefix (e.g. `gpt-5.5` in `mycompany/gpt-5.5`). |
| **Display name** | Optional human-readable label. |
| **Context size** | Maximum input window in tokens. Enforced per request. |
| **Max output** | Maximum completion tokens. Enforced against `max_tokens`. |
| **Token prices** | Input, output, cached input, cache read, cache write (5m and 1h), per-request, web search, image input, and audio input prices. |
| **Capabilities** | `streaming`, `vision`, `tools`, `reasoning`, `jsonOutput`, `audio`. |
| **Supported parameters** | Advisory list of accepted request parameters. |
Prices are in **USD per token** and accept either decimal (`0.000003`) or
exponent (`3.0e-6`) notation.
### Cost attribution [#cost-attribution]
When a request matches a catalog entry, LLMGateway bills it using the entry's
token prices and records the cost on the activity log. Without a matching entry
the request stays unbilled (zero/null cost).
A known model id (for example `gpt-5.5`) routed through a custom provider is
**not** billed at that model's public pricing — only the prices you define in
the catalog apply. Define the model in the catalog to attribute cost.
### Limit and capability enforcement [#limit-and-capability-enforcement]
When an entry defines limits or capabilities, LLMGateway enforces them before
forwarding the request:
* **Context size / max output** — requests that would exceed the configured
window or output budget are rejected with `400`.
* **Capabilities** — when a flag is explicitly set to disabled, requests that use
that feature are rejected (e.g. images against a non-`vision` model, tools
against a non-`tools` model, streaming against a non-streaming model). Flags
left unset stay permissive and the upstream provider enforces them.
### Restricting to the catalog [#restricting-to-the-catalog]
Each custom provider key has an **Only allow catalog models** switch. When
enabled, requests through that provider must reference a defined catalog model —
undefined models are rejected with `400`. This guarantees that every request has
known cost attribution and enforced limits. When disabled, undefined models
still work but remain unbilled, as before.
# Data Retention
URL: https://docs.llmgateway.io/features/data-retention
# Data Retention [#data-retention]
LLM Gateway offers configurable data retention policies that allow you to store full request and response payloads. This enables powerful debugging capabilities, detailed analytics, and compliance with data governance requirements.
## Retention Levels [#retention-levels]
LLM Gateway supports two retention levels that can be configured per organization:
| Level | Description | Storage Cost |
| ------------------- | ---------------------------------------------------------------------------------------------- | --------------- |
| **Metadata Only** | Stores request metadata (timestamps, model, tokens, costs) without full payloads. Default. | Free |
| **Retain All Data** | Stores complete request and response payloads including messages, tool calls, and attachments. | $0.01/1M tokens |
Metadata-only retention is enabled by default and provides usage analytics
without additional storage costs.
## Storage Pricing [#storage-pricing]
When full data retention is enabled, storage is billed at **$0.01 per 1 million tokens**. This rate applies to:
* Input tokens (prompt)
* Cached input tokens
* Output tokens (completion)
* Reasoning tokens
Storage costs are calculated per request and billed separately from inference. When "Retain All Data" is enabled, each response's `usage.cost_details` object includes a `data_storage_cost` field with the per-request storage cost in USD. See [Cost Breakdown](https://docs.llmgateway.io/features/cost-breakdown) for the full list of cost fields.
### Example Cost Calculation [#example-cost-calculation]
For a request with:
* 1,000 input tokens
* 500 output tokens
* 1,500 total tokens
Storage cost = 1,500 / 1,000,000 × $0.01 = **$0.000015**
## Configuring Retention [#configuring-retention]
Data retention is configured at the organization level in your dashboard settings:
1. Navigate to **Organization Settings** → **Policies**
2. Select your preferred **Data Retention Level**
3. Save changes
Changing retention settings applies to new requests only. Existing stored data
follows the retention period active when it was created.
## Retention Periods [#retention-periods]
Data is retained for 30 days for all users. Enterprise plans can have custom retention periods. After the retention period expires, data is automatically deleted.
## Accessing Stored Data [#accessing-stored-data]
When data retention is enabled, you can access your stored requests through the dashboard:
* View request history with full payload inspection
* Filter by model and date range
* Inspect complete request and response payloads
## Use Cases [#use-cases]
### Debugging [#debugging]
Full data retention enables you to:
* Inspect exact prompts sent to models
* Review complete responses including tool calls
* Trace conversation histories
* Identify issues in production
### Analytics [#analytics]
With stored payloads, you can:
* Analyze prompt patterns and effectiveness
* Track response quality over time
* Build custom dashboards and reports
* Measure model performance across use cases
### Compliance [#compliance]
Data retention helps meet compliance requirements by:
* Maintaining audit trails of AI interactions
* Enabling data governance policies
* Supporting incident investigation
* Providing records for regulatory requirements
## Billing Considerations [#billing-considerations]
### Credit Usage [#credit-usage]
In **API keys mode** (using your own provider keys):
* Only storage costs are deducted from LLM Gateway credits
* Inference costs are billed directly to your provider
In **credits mode**:
* Both inference and storage costs are deducted from credits
### Monitoring Storage Costs [#monitoring-storage-costs]
Storage costs appear in:
* Usage dashboard under "Storage" category
* Billing invoices as a separate line item
Enable [auto top-up](https://llmgateway.io/dashboard) in billing settings to
ensure uninterrupted service when storage costs accumulate.
## Self-Hosted Deployments [#self-hosted-deployments]
Self-hosted deployments have full control over data retention:
* Configure retention periods in environment variables
* Data is stored in your own PostgreSQL database
* No additional storage costs (you manage your own infrastructure)
## Privacy and Security [#privacy-and-security]
* All stored data is encrypted at rest
* Access is restricted to organization members with appropriate permissions
* Data is automatically deleted after the retention period
* You can request immediate deletion of specific records through support
# Document Reading
URL: https://docs.llmgateway.io/features/documents
# Document Reading [#document-reading]
LLMGateway supports sending documents (PDFs and other file types) to document-capable models using OpenAI's `file` content block format. The gateway forwards the document to the underlying provider so the model can read and reason over its contents.
## Document-Capable Models [#document-capable-models]
Document input is currently supported on Google Gemini models via Google AI Studio. You can find document-capable models on the [models page with the document filter](https://llmgateway.io/models?filters=1\&document=true).
## Sending a Document [#sending-a-document]
Add a `file` content block to a user message. The `file_data` field must be a base64-encoded data URL that includes the document's MIME type.
```bash
curl -X POST "https://api.llmgateway.io/v1/chat/completions" \
-H "Authorization: Bearer $LLM_GATEWAY_API_KEY" \
-H "Content-Type: application/json" \
-d '{
"model": "gemini-2.5-flash",
"messages": [
{
"role": "user",
"content": [
{
"type": "text",
"text": "Summarize this document."
},
{
"type": "file",
"file": {
"filename": "report.pdf",
"file_data": "data:application/pdf;base64,JVBERi0xLjQKJ..."
}
}
]
}
]
}'
```
### Content Block Fields [#content-block-fields]
* **`type`**: must be `"file"`.
* **`file.filename`** *(optional)*: original filename, shown in Lounge and forwarded for context.
* **`file.file_data`**: base64-encoded data URL of the form `data:;base64,`.
The `file.file_id` field (for referencing files uploaded via a provider's
Files API) is accepted by the schema but not currently supported by the Google
transform. Use `file_data` with an inline base64 data URL.
## Supported File Types [#supported-file-types]
The accepted MIME types depend on the target model. Gemini models commonly support:
* `application/pdf`
* `text/plain`
* `text/html`
* `text/css`
* `text/javascript`
* `text/csv`
* `text/markdown`
* `text/xml`
If the upstream provider rejects the MIME type, the gateway surfaces a `400` error including the unsupported MIME type and the provider it was sent to. To use a different file type, encode the file with the matching MIME type in the data URL prefix.
## Encoding a File as a Data URL [#encoding-a-file-as-a-data-url]
Any tool that can produce base64 output works. For example, in a shell:
```bash
DATA=$(base64 -i report.pdf | tr -d '\n')
echo "data:application/pdf;base64,$DATA"
```
Or in JavaScript:
```javascript
import { readFileSync } from "node:fs";
const buffer = readFileSync("report.pdf");
const fileData = `data:application/pdf;base64,${buffer.toString("base64")}`;
```
Then pass `fileData` as the `file.file_data` value in your request.
## Multiple Documents [#multiple-documents]
You can include multiple `file` blocks in a single message, optionally mixed with text and image content:
```bash
curl -X POST "https://api.llmgateway.io/v1/chat/completions" \
-H "Authorization: Bearer $LLM_GATEWAY_API_KEY" \
-H "Content-Type: application/json" \
-d '{
"model": "gemini-2.5-pro",
"messages": [
{
"role": "user",
"content": [
{ "type": "text", "text": "Compare these two reports." },
{
"type": "file",
"file": {
"filename": "q1.pdf",
"file_data": "data:application/pdf;base64,JVBERi0x..."
}
},
{
"type": "file",
"file": {
"filename": "q2.pdf",
"file_data": "data:application/pdf;base64,JVBERi0x..."
}
}
]
}
]
}'
```
## Error Handling [#error-handling]
The gateway returns `400` for the following document-related errors:
* The selected model does not support document input.
* The `file` block is missing both `file_data` and `file_id`.
* `file_data` is not a valid base64 data URL.
* The upstream provider rejects the document's MIME type for the selected model.
# Embeddable Payments
URL: https://docs.llmgateway.io/features/embeddable-payments
# Embeddable Payments (Payments SDK) [#embeddable-payments-payments-sdk]
The **Payments SDK** lets you drop **end-user payments + in-app credit purchases** into your product the same way Stripe Elements lets you drop in payments. Your end-users get their **own wallet**, buy credits **inside your app**, and pay per request for any model the gateway supports. LLM Gateway is the merchant of record; you set a markup and keep the margin.
**Preview — opt-in only.** Embeddable Payments is in preview and enabled on an
opt-in basis per project. The **Settings → Payments SDK** dashboard page shows
a read-only preview until the feature is turned on for your project. [Contact
us](mailto:contact@llmgateway.io) to request access before integrating.
## When to use this [#when-to-use-this]
Reach for the Payments SDK when **you embed LLM Gateway's billing on your own site** and want **your end-users to pay for the AI they use**, each with their own wallet and credit balance. It handles end-user **payments and sessions**: per-user wallets, in-app credit top-ups (Stripe), short-lived browser sessions scoped to a single wallet, and developer-margin payouts.
**This is a payments product, not an AI client SDK.** Do not confuse it with a
normal AI SDK such as the OpenAI SDK or the Vercel AI SDK. If you just want to
call models from your own backend with a single API key, use the
[OpenAI-compatible API](https://docs.llmgateway.io/quick-start) instead — you do not need the Payments
SDK. Use the Payments SDK only when you need to **charge your own end-users**
and give each of them a wallet and checkout inside your app.
It ships as three packages:
| Package | Runs in | Use it for |
| ---------------------- | ------------------------- | ------------------------------------------------------------------------------------ |
| `@llmgateway/server` | Your backend (secret key) | Mint end-user sessions, manage wallets/customers, verify webhooks, trigger payouts |
| `@llmgateway/client` | Browser (headless) | Framework-agnostic chat/image/embeddings + balance/top-up, with auto session refresh |
| `@llmgateway/elements` | React | Drop-in ``, ``, `` + hooks |
A complete, runnable Next.js example lives in the templates repo:
[**Embeddable Payments
template**](https://github.com/theopenco/llmgateway-templates/tree/main/templates/embeddable-credits).
## How it works [#how-it-works]
```
Your backend ──(secret key sk_)──▶ POST /v1/sessions ──▶ ephemeral session token (es_, ~15 min)
│ │
└────────── returns es_ to your frontend ◀────────────────┘
│
Browser (es_ + pk_) ──▶ chat / images / embeddings ──▶ debits the end-user wallet
└──▶ buy credits (Stripe Elements) ─▶ credits land in the wallet
```
* Your **secret key** (`sk_…`) never leaves your backend. It mints short-lived **ephemeral session tokens** (`es_…`) scoped to one end-user wallet.
* The **browser** only ever holds the `es_…` token (and a publishable Stripe key). It calls the gateway directly; usage is billed to that user's wallet.
* **Markup is applied at top-up time**: if you set a 20% markup and a user buys $10, their wallet is credited the net spend power and your **margin accrues to your organization** for later payout.
* **Top-up bonus (optional)**: set a bonus percent to credit end-users *more* than they pay — e.g. a 50% bonus turns a $10 top-up into $15 of spend power. The extra credits are funded from **your organization's credit balance** at top-up time (capped at your available credits), so it's a promotional lever you can switch on or off anytime. Markup and bonus are independent: the bonus is applied on top of the net credited amount.
## Set up in the dashboard [#set-up-in-the-dashboard]
Before you write any code, configure the project you want to embed:
1. Open the LLM Gateway dashboard and select your project.
2. Go to **Settings → Payments SDK** and turn on **End-user sessions** (this requires the preview to be enabled for your project).
3. *(Optional)* Set a **markup percent** — the margin you earn on every top-up — and/or a **top-up bonus percent** to gift end-users extra credit (funded from your organization's credit balance).
4. Add the browser origins allowed to call the gateway, one per line (e.g. `https://app.example.com`), then click **Save Settings**.
5. Under **Platform Secret Keys**, click **Create Live Key** (or **Create Test Key**) and copy the `sk_…` value immediately.
6. Store it as a server-side environment variable, for example `LLMGATEWAY_SECRET_KEY`.
The platform secret key (`sk_…`) is different from a regular gateway API key (`llmgtwy_…`): it mints end-user sessions and must only ever be used from your backend.
**Test mode.** A `sk_test_…` key is a sandbox key: end-user wallet top-ups go
through Stripe's sandbox (use Stripe [test cards](https://docs.stripe.com/testing),
no real charges), and its wallets are fully segregated from live ones — the same
end-user gets independent test and live wallets. To keep sandbox money from
buying real inference, **test-mode wallets can only call free models**: use the
`auto` route (it picks a free model automatically) or a free model id; paid
models return a `403`. Pair a test secret key on your backend with
`mode="test"` on `` (see below) — the two must match.
The platform secret key is shown only once. Do not put it in frontend code,
browser bundles, mobile apps, or public repos.
## 1. Install [#1-install]
```bash
# backend
npm install @llmgateway/server
# frontend (pick one)
npm install @llmgateway/elements # React drop-in components
npm install @llmgateway/client # headless / non-React
```
## 2. Mint a session on your backend [#2-mint-a-session-on-your-backend]
Identify your signed-in user and mint a session bound to their wallet. Scope which models they may call.
```ts
// app/api/llmgateway/session/route.ts (Next.js Route Handler)
import { LLMGateway } from "@llmgateway/server";
const lg = new LLMGateway({ secretKey: process.env.LLMGATEWAY_SECRET_KEY! });
export async function POST() {
const session = await lg.sessions.create({
customer: { externalId: "user_123" }, // your stable user id
scope: { models: ["openai/gpt-4o-mini"] }, // lock down what they can call
ttlSeconds: 900, // optional, default 15 min
});
return Response.json(session); // { sessionToken, walletId, endCustomerId, expiresAt, publishableKey }
}
```
Always mint sessions server-side. Never ship your `sk_…` secret key to the
browser.
## 3a. Drop in the React components [#3a-drop-in-the-react-components]
Wrap your UI in `` and use the components. `fetchSession` is how the client refreshes the short-lived token before it expires.
```tsx
"use client";
import {
LLMGatewayProvider,
Chat,
CreditBalance,
BuyCredits,
} from "@llmgateway/elements";
const fetchSession = () =>
fetch("/api/llmgateway/session", { method: "POST" }).then((r) => r.json());
export default function Assistant({ session }) {
return (
);
}
```
Need full control over rendering? Use the hooks instead of the components:
* `useBalance()` → `{ balance, currency, recentLedger, loading, error, refetch, refetchUntilChange }`
* `useChat({ model })` → `{ turns, send, streaming, ... }`
`useBalance().refetchUntilChange()` polls until the balance actually changes —
use it after a purchase, since the wallet is credited asynchronously once the
Stripe webhook lands.
## 3b. Or go headless (any framework) [#3b-or-go-headless-any-framework]
```ts
import { LLMGatewayClient } from "@llmgateway/client";
const client = new LLMGatewayClient({
session: { token: session.sessionToken, expiresAt: session.expiresAt },
refresh: fetchSession, // auto-refreshes ~60s before expiry
});
// stream a completion (billed to the user's wallet)
for await (const delta of client.stream({
model: "openai/gpt-4o-mini",
messages: [{ role: "user", content: "Hello!" }],
})) {
process.stdout.write(delta);
}
const { balance } = await client.getBalance();
```
The headless client also exposes `chat()`, `image()`, `embeddings()`, `getBalance()`, `createTopUp(amount)`, and `getConfig()`.
### Spend limits [#spend-limits]
`getBalance()` (and `useBalance()`) also returns a `limits` object describing the spend limits enforced on the session, the amount consumed so far, and — when a windowed limit is configured — when it resets. This lets you show the user how much of their allowance is left before a request is rejected.
```ts
const { balance, limits } = await client.getBalance();
// limits: {
// usageLimit, // lifetime spend cap (null = uncapped)
// usage, // consumed over the session's lifetime
// periodUsageLimit, // per-window cap (null = no windowed limit)
// periodUsageDurationValue, // e.g. 1
// periodUsageDurationUnit, // "hour" | "day" | "week" | "month"
// currentPeriodUsage, // consumed in the current window
// currentPeriodStartedAt, // ISO timestamp, or null
// currentPeriodResetAt, // ISO timestamp the window resets, or null
// }
```
`null` limit fields mean that cap is not configured. `currentPeriodUsage` is `"0"` and `currentPeriodResetAt` is `null` until the first spend in a fresh window.
## Buying credits [#buying-credits]
`` creates a Stripe PaymentIntent scoped to the user's wallet, renders Stripe's `PaymentElement`, and confirms the payment. Once LLM Gateway's webhook processes it, the wallet is credited the **net** amount (after your markup) and your margin accrues to your organization. If you've configured a **top-up bonus**, the additional developer-funded credit is applied on top of the net amount at the same time (debited from your organization's credit balance). The top-up API response and the `wallet.credited` webhook include `bonusCredited` and `totalCredited` so you can show the boosted total.
`@llmgateway/elements` bundles LLM Gateway's browser-safe Stripe publishable keys. Pass `mode="test"` to `` while developing to use Stripe test mode; omit it or pass `mode="prod"` for live payments (`"prod"` is the default). You never need to provide LLM Gateway's Stripe publishable key yourself, and the end-user never sees your `sk_…` secret key.
The frontend `mode` prop and the backend secret key must match. A `sk_test_…`
key creates the top-up PaymentIntent in the Stripe sandbox, which only the
`mode="test"` publishable key can confirm — mixing a test key with `mode="prod"`
(or vice versa) makes `` fail to confirm.
## Managing wallets & customers (server-side) [#managing-wallets--customers-server-side]
```ts
// grant credits directly (e.g. free trial)
await lg.wallets.credit({ walletId, amount: 5, reason: "Signup bonus" });
const wallet = await lg.wallets.retrieve(walletId);
// analytics: customers with balances + lifetime spend
const { customers } = await lg.customers.list();
const detail = await lg.customers.retrieve(endCustomerId);
```
## Webhooks [#webhooks]
Register an endpoint to react to wallet events. Events are signed (`X-LLMGateway-Signature`); verify them like Stripe.
```ts
await lg.webhookEndpoints.create({
url: "https://yourapp.com/webhooks/llmgateway",
enabledEvents: ["wallet.credited", "wallet.low_balance"],
});
// in your handler
const event = lg.webhooks.constructEvent(
rawBody,
signatureHeader,
endpointSecret,
);
```
Webhook URLs must be **https** and public — requests to private/internal
addresses are rejected (SSRF protection), both at registration and at delivery
time.
## Margin payouts (Stripe Connect) [#margin-payouts-stripe-connect]
Your accrued markup is held as a margin balance. Onboard a connected account and pay it out:
```ts
const { url } = await lg.connect.createOnboardingLink({
refreshUrl: "https://yourapp.com/settings/payouts",
returnUrl: "https://yourapp.com/settings/payouts?done=1",
});
// redirect the developer to `url`, then later:
const status = await lg.connect.status(); // { onboarded, payoutsEnabled, marginBalance }
const payout = await lg.connect.payout(); // transfer the accrued margin out
```
## Security model [#security-model]
* **Ephemeral tokens** (`es_…`) are short-lived and revocable; mint them per-user from your backend.
* **Model scopes** restrict each session to an allow-list of models.
* **Origin allowlist** (configured on the project) blocks browser calls from unexpected origins.
* **Per-session spend caps** (`scope.maxSpend`) bound how much a single session can spend.
## Full example [#full-example]
The end-to-end Next.js app — backend session route, provider, chat, and buy-credits — is in the templates repo:
➡️ [**Embeddable Payments template**](https://github.com/theopenco/llmgateway-templates/tree/main/templates/embeddable-credits)
# Embeddings
URL: https://docs.llmgateway.io/features/embeddings
# Embeddings [#embeddings]
LLMGateway exposes an OpenAI-compatible `/v1/embeddings` endpoint for generating vector representations of text — useful for semantic search, clustering, recommendations, and RAG.
Browse available embedding models on the [models page](https://llmgateway.io/models?filters=1\&embedding=true).
## Supported providers [#supported-providers]
* **OpenAI** — `text-embedding-3-small`, `text-embedding-3-large`, `text-embedding-ada-002`
* **Google AI Studio** — `gemini-embedding-2` (recommended), `gemini-embedding-001` (legacy)
* **Google Vertex AI** — `gemini-embedding-001`, `text-embedding-005`
The gateway translates between provider-native request/response shapes (e.g. Google's `:embedContent` / `:batchEmbedContents`) and the OpenAI-compatible payload, so you can swap models without changing your client code.
## cURL [#curl]
```bash
curl -X POST "https://api.llmgateway.io/v1/embeddings" \
-H "Authorization: Bearer $LLM_GATEWAY_API_KEY" \
-H "Content-Type: application/json" \
-d '{
"model": "text-embedding-3-small",
"input": "The quick brown fox jumps over the lazy dog."
}'
```
## OpenAI JS SDK [#openai-js-sdk]
```ts
import OpenAI from "openai";
const client = new OpenAI({
apiKey: process.env.LLM_GATEWAY_API_KEY,
baseURL: "https://api.llmgateway.io/v1",
});
const response = await client.embeddings.create({
model: "text-embedding-3-small",
input: "The quick brown fox jumps over the lazy dog.",
});
console.log(response.data[0].embedding);
```
Embedding models are billed only for input tokens. There are no output tokens
since embeddings are fixed-size vectors.
## Improving retrieval quality [#improving-retrieval-quality]
Vector similarity is fast but approximate. For RAG, pair embeddings with
[rerank](https://docs.llmgateway.io/features/rerank): use embeddings to pull a broad candidate set, then
rerank those candidates to pick the few documents that actually go in the
prompt.
# Guardrails
URL: https://docs.llmgateway.io/features/guardrails
# Guardrails [#guardrails]
Guardrails protect your organization by automatically detecting and blocking harmful content in LLM requests before they reach the model.
Guardrails are available on the [**Enterprise
plan**](https://llmgateway.io/enterprise).
## Overview [#overview]
Guardrails run on every API request, scanning message content for:
* Security threats (prompt injection, jailbreak attempts)
* Sensitive data (PII, secrets, credentials)
* Policy violations (blocked terms, restricted topics)
When a violation is detected, you control what happens: block the request, redact the content, or log a warning.
## System Rules [#system-rules]
Built-in rules protect against common threats:
### Prompt Injection Detection [#prompt-injection-detection]
Detects attempts to override or manipulate system instructions. Common patterns include:
* "Ignore all previous instructions"
* "You are now a different AI"
* Hidden instructions in encoded text
### Jailbreak Detection [#jailbreak-detection]
Identifies attempts to bypass safety measures:
* DAN (Do Anything Now) prompts
* Roleplay-based bypasses
* Instruction override attempts
### PII Detection [#pii-detection]
Identifies personal information:
* Email addresses
* Phone numbers
* Social Security Numbers
* Credit card numbers
* IP addresses
When the action is set to **redact**, PII is replaced with placeholders like `[EMAIL_REDACTED]`.
### Secrets Detection [#secrets-detection]
Detects credentials and API keys:
* AWS access keys and secrets
* Generic API keys
* Passwords in common formats
* Private keys
### File Type Restrictions [#file-type-restrictions]
Control which file types can be uploaded:
* Configure allowed MIME types
* Set maximum file size limits
* Block potentially dangerous file types
### Document Leakage Prevention [#document-leakage-prevention]
Detects attempts to extract confidential documents or internal data.
## Configurable Actions [#configurable-actions]
For each rule, choose how to respond:
| Action | Behavior |
| ---------- | --------------------------------------------------- |
| **Block** | Reject the request with a content policy error |
| **Redact** | Remove or mask the sensitive content, then continue |
| **Warn** | Log the violation but allow the request to proceed |
## Custom Rules [#custom-rules]
Create organization-specific rules for your use case:
### Blocked Terms [#blocked-terms]
Prevent specific words or phrases from being used:
* Match type: exact, contains, or regex
* Case-sensitive matching option
* Multiple terms per rule
### Custom Regex [#custom-regex]
Match patterns unique to your organization:
* Internal project codenames
* Customer identifiers
* Domain-specific sensitive data
### Topic Restrictions [#topic-restrictions]
Block content related to specific topics:
* Define restricted topics
* Keyword-based detection
## Security Events Dashboard [#security-events-dashboard]
Monitor all guardrail violations with a dedicated dashboard:
* **Total violations** — Overall count and trends
* **By action** — Breakdown of blocked, redacted, and warned
* **By category** — Which rules are being triggered
* **Detailed logs** — Individual violations with timestamps and matched patterns
## How It Works [#how-it-works]
```
Request → Guardrails Check → Action Based on Rules → Forward to Model (if allowed)
↓
Log Violation
```
1. **Request received** — API request comes in with messages
2. **Content scanned** — All text content is checked against enabled rules
3. **Violations detected** — Matches are identified and logged
4. **Action taken** — Based on rule configuration (block/redact/warn)
5. **Request proceeds** — If not blocked, the (potentially redacted) request continues
## Best Practices [#best-practices]
1. **Start with warnings** — Enable rules in warn mode first to understand your traffic patterns
2. **Review violations** — Check the Security Events dashboard regularly
3. **Tune custom rules** — Adjust blocked terms and regex patterns based on false positives
4. **Layer defenses** — Use multiple rule types together for comprehensive protection
## Get Started [#get-started]
Guardrails are an Enterprise feature. [Contact us](https://llmgateway.io/enterprise) to enable Enterprise for your organization.
# Image Generation
URL: https://docs.llmgateway.io/features/image-generation
# Image Generation [#image-generation]
LLMGateway supports image generation through two APIs:
1. **`/v1/images/generations`** — OpenAI-compatible images endpoint (recommended for simple image generation)
2. **`/v1/images/edits`** — OpenAI-compatible image editing endpoint
3. **`/v1/chat/completions`** — Chat completions with image generation models (for conversational image generation and editing)
For asynchronous video generation, see [Video Generation](https://docs.llmgateway.io/features/video-generation).
## Available Models [#available-models]
You can find all available image generation models on our [models page](https://llmgateway.io/models?filters=1\&imageGeneration=true).
## OpenAI Images API [#openai-images-api]
The `/v1/images/generations` endpoint provides a drop-in replacement for OpenAI's image generation API. It works with any OpenAI-compatible client library.
### Parameters [#parameters]
| Parameter | Type | Default | Description |
| ----------------- | ------- | ------------ | ---------------------------------------------------------------------------------------------------------------- |
| `prompt` | string | required | A text description of the desired image(s) |
| `model` | string | `"auto"` | The model to use. `auto` resolves to `gemini-3-pro-image-preview` |
| `n` | integer | `1` | Number of images to generate (1-10) |
| `size` | string | — | Image dimensions. Supported sizes depend on the model/provider — see [Image Configuration](#image-configuration) |
| `quality` | string | — | Image quality. Supported values depend on the model/provider — see [Image Configuration](#image-configuration) |
| `response_format` | string | `"b64_json"` | Only `b64_json` is supported |
| `style` | string | — | Image style: `vivid` or `natural` |
### curl [#curl]
```bash
curl -X POST "https://api.llmgateway.io/v1/images/generations" \
-H "Authorization: Bearer $LLM_GATEWAY_API_KEY" \
-H "Content-Type: application/json" \
-d '{
"model": "gemini-3-pro-image-preview",
"prompt": "A cute cat wearing a tiny top hat",
"n": 1,
"size": "1024x1024"
}'
```
### OpenAI SDK [#openai-sdk]
Works with the standard OpenAI client library — just point the base URL to LLMGateway.
```ts
import OpenAI from "openai";
import { writeFileSync } from "fs";
const client = new OpenAI({
baseURL: "https://api.llmgateway.io/v1",
apiKey: process.env.LLM_GATEWAY_API_KEY,
});
const response = await client.images.generate({
model: "gemini-3-pro-image-preview",
prompt: "A futuristic city skyline at sunset with flying cars",
n: 1,
size: "1024x1024",
});
response.data.forEach((image, i) => {
if (image.b64_json) {
const buf = Buffer.from(image.b64_json, "base64");
writeFileSync(`image-${i}.png`, buf);
}
});
```
### Vercel AI SDK [#vercel-ai-sdk]
Use the `@llmgateway/ai-sdk-provider` with `generateImage`.
```ts
import { createLLMGateway } from "@llmgateway/ai-sdk-provider";
import { generateImage } from "ai";
import { writeFileSync } from "fs";
const llmgateway = createLLMGateway({
apiKey: process.env.LLM_GATEWAY_API_KEY,
});
const result = await generateImage({
model: llmgateway.image("gemini-3-pro-image-preview"),
prompt:
"A cozy cabin in a snowy mountain landscape at night with aurora borealis",
size: "1024x1024",
n: 1,
// aspectRatio and quality are model-specific — only some providers honor them.
// aspectRatio works on Gemini image models; OpenAI gpt-image-2 ignores it
// (use a literal WxH `size` instead).
aspectRatio: "16:9",
// quality works on OpenAI gpt-image-2 ("low" | "medium" | "high" | "auto").
// The AI SDK only forwards it through providerOptions.
providerOptions: {
llmgateway: { quality: "high" },
},
});
result.images.forEach((image, i) => {
const buf = Buffer.from(image.base64, "base64");
writeFileSync(`image-${i}.png`, buf);
});
```
## OpenAI Images Edit API [#openai-images-edit-api]
The `/v1/images/edits` endpoint is OpenAI-compatible and supports a focused subset of `images.edit` parameters.
### Parameters [#parameters-1]
| Parameter | Type | Required | Description |
| -------------------- | ------------------------ | -------- | ------------------------------------------------------------------ |
| `images` | array of `{ image_url }` | yes | Input images. `image_url` supports HTTPS URLs and base64 data URLs |
| `prompt` | string | yes | A text description of the desired image edit |
| `model` | string | no | Image editing model |
| `background` | enum | no | `transparent`, `opaque`, or `auto` |
| `input_fidelity` | enum | no | `high` or `low` |
| `n` | integer | no | Number of edited images to generate |
| `output_format` | enum | no | `png`, `jpeg`, or `webp` |
| `output_compression` | integer | no | Compression level for `jpeg`/`webp` |
| `quality` | enum | no | `low`, `medium`, `high`, or `auto` |
| `size` | string | no | Output size. Examples: `1024x1024`, `1536x1024`, `1K`, `2K`, `4K` |
| `aspect_ratio` | string | no | Aspect ratio override. Examples: `1:1`, `16:9`, `4:3`, `5:4` |
`mask` is not supported yet on `/v1/images/edits`.
### curl (HTTPS image URL) [#curl-https-image-url]
```bash
curl -X POST "https://api.llmgateway.io/v1/images/edits" \
-H "Authorization: Bearer $LLM_GATEWAY_API_KEY" \
-H "Content-Type: application/json" \
-d '{
"images": [
{
"image_url": "https://example.com/source-image.png"
}
],
"prompt": "Add a watercolor effect to this image",
"model": "gemini-3-pro-image-preview",
"aspect_ratio": "16:9",
"quality": "high",
"size": "4K"
}'
```
### curl (base64 data URL) [#curl-base64-data-url]
```bash
curl -X POST "https://api.llmgateway.io/v1/images/edits" \
-H "Authorization: Bearer $LLM_GATEWAY_API_KEY" \
-H "Content-Type: application/json" \
-d '{
"images": [
{
"image_url": "data:image/png;base64,iVBORw0KGgoAAAANSUhEUgAA..."
}
],
"prompt": "Turn this into a pixel-art style image"
}'
```
## Chat Completions API [#chat-completions-api]
Image generation also works through the `/v1/chat/completions` endpoint, which is useful for conversational image generation, image editing with vision, and multi-turn interactions.
### Making Requests [#making-requests]
Simply use an image generation model and provide a text prompt describing the image you want to create.
```bash
curl -X POST "https://api.llmgateway.io/v1/chat/completions" \
-H "Authorization: Bearer $LLM_GATEWAY_API_KEY" \
-H "Content-Type: application/json" \
-d '{
"model": "gemini-3-pro-image-preview",
"messages": [
{
"role": "user",
"content": "Generate an image of a cute golden retriever puppy playing in a sunny meadow"
}
]
}'
```
### Response Format [#response-format]
Image generation models return responses in the standard chat completions format, with generated images included in the `images` array within the assistant message:
```json
{
"id": "chatcmpl-1756234109285",
"object": "chat.completion",
"created": 1756234109,
"model": "gemini-3-pro-image-preview",
"choices": [
{
"index": 0,
"message": {
"role": "assistant",
"content": "Here's an image of a cute dog for you: ",
"images": [
{
"type": "image_url",
"image_url": {
"url": "data:image/png;base64,"
}
}
]
},
"finish_reason": "stop"
}
],
"usage": {
"prompt_tokens": 8,
"completion_tokens": 1303,
"total_tokens": 1311
}
}
```
### Vision support [#vision-support]
You can edit or modify images by combining image generation with [vision models](https://docs.llmgateway.io/features/vision) by including the image in the `messages` array.
### Response Structure [#response-structure]
#### Images Array [#images-array]
The `images` array contains one or more generated images with the following structure:
* `type`: Always `"image_url"` for generated images
* `image_url.url`: A data URL containing the base64-encoded image data (format: `data:image/png;base64,`)
#### Content Field [#content-field]
The `content` field may contain descriptive text about the generated image, depending on the model's behavior.
### AI SDK (Chat Completions) [#ai-sdk-chat-completions]
You can use the AI SDK to generate images with your existing generateText or streamText calls using the LLMGateway provider.
#### Example [#example]
```ts title="/api/chat/route.ts"
import { streamText, type UIMessage, convertToModelMessages } from "ai";
import { createLLMGateway } from "@llmgateway/ai-sdk-provider";
interface ChatRequestBody {
messages: UIMessage[];
}
export async function POST(req: Request) {
const body = await req.json();
const { messages }: ChatRequestBody = body;
const llmgateway = createLLMGateway({
apiKey: "llmgateway_api_key",
baseUrl: "https://api.llmgateway.io/v1",
});
try {
const result = streamText({
model: llmgateway.chat("gemini-3-pro-image-preview"),
messages: convertToModelMessages(messages),
});
return result.toUIMessageStreamResponse();
} catch {
return new Response(
JSON.stringify({ error: "LLM Gateway request failed" }),
{
status: 500,
},
);
}
}
```
Then you can render the image in your frontend using the `Image` component from the [ai-elements](https://ai-sdk.dev/elements/components/image).
Here is a full example of how to use the AI SDK to generate images in your frontend:
```tsx title="/app/page.tsx"
"use client";
import { useState, useRef } from "react";
import { useChat } from "@ai-sdk/react";
import { parseImagePartToDataUrl } from "@/lib/image-utils";
import {
PromptInput,
PromptInputBody,
PromptInputButton,
PromptInputSubmit,
PromptInputTextarea,
PromptInputToolbar,
} from "@/components/ai-elements/prompt-input";
import {
Conversation,
ConversationContent,
} from "@/components/ai-elements/conversation";
import { Image } from "@/components/ai-elements/image";
import { Loader } from "@/components/ai-elements/loader";
import { Message, MessageContent } from "@/components/ai-elements/message";
import { Response } from "@/components/ai-elements/response";
export const ChatUI = () => {
const textareaRef = useRef(null);
const [text, setText] = useState("");
const { messages, status, stop, regenerate, sendMessage } = useChat();
return (
<>
>
);
};
```
```ts title="/lib/image-utils.ts"
/**
* Parses a file object containing image data and returns a properly formatted data URL
* and normalized media type.
*
* Handles:
* - Normalizing mediaType from various property names (mediaType, mime_type)
* - Detecting existing data: URLs
* - Detecting base64-looking content
* - Stripping whitespace from base64 content
* - Building proper data:...;base64,... URLs
*/
export function parseImageFile(file: {
url?: string;
mediaType?: string;
mime_type?: string;
}): { dataUrl: string; mediaType: string } {
const mediaType = file.mediaType || file.mime_type || "image/png";
let url = String(file.url || "");
const isDataUrl = url.startsWith("data:");
const looksLikeBase64 =
!isDataUrl && /^[A-Za-z0-9+/=\s]+$/.test(url.slice(0, 200));
if (looksLikeBase64) {
url = url.replace(/\s+/g, "");
}
const dataUrl = isDataUrl
? url
: looksLikeBase64
? `data:${mediaType};base64,${url}`
: url;
return { dataUrl, mediaType };
}
/**
* Extracts base64-only content from a data URL.
* Returns empty string if the input is not a valid data URL.
*/
export function extractBase64FromDataUrl(dataUrl: string): string {
if (!dataUrl.startsWith("data:")) {
return "";
}
const comma = dataUrl.indexOf(",");
return comma >= 0 ? dataUrl.slice(comma + 1) : "";
}
/**
* Parses an image part (either image_url or file type) and returns
* dataUrl, base64Only, and mediaType ready for rendering.
*
* Handles error cases gracefully by returning empty base64Only string
* when parsing fails, allowing the renderer to skip invalid images.
*/
export function parseImagePartToDataUrl(part: any): {
dataUrl: string;
base64Only: string;
mediaType: string;
} {
try {
// Handle image_url parts
if (part.type === "image_url" && part.image_url?.url) {
const url = part.image_url.url;
const mediaType = "image/png"; // Default for image_url parts
if (url.startsWith("data:")) {
// Extract media type from data URL if present
const match = url.match(/data:([^;]+)/);
const extractedMediaType = match?.[1] || mediaType;
return {
dataUrl: url,
base64Only: extractBase64FromDataUrl(url),
mediaType: extractedMediaType,
};
}
return {
dataUrl: url,
base64Only: "",
mediaType,
};
}
// Handle file parts (AI SDK format)
if (part.type === "file") {
const { dataUrl, mediaType } = parseImageFile(part);
return {
dataUrl,
base64Only: extractBase64FromDataUrl(dataUrl),
mediaType,
};
}
return {
dataUrl: "",
base64Only: "",
mediaType: "image/png",
};
} catch {
return {
dataUrl: "",
base64Only: "",
mediaType: "image/png",
};
}
}
```
## Image Configuration [#image-configuration]
You can customize the generated image using the optional `image_config` parameter (for chat completions) or `size`/`quality`/`style` parameters (for the images API). The supported parameters vary by provider.
### Google Models [#google-models]
Available Google models:
| Model | Description |
| -------------------------------- | ----------------------------------------------------------------------------------- |
| `gemini-3-pro-image-preview` | Gemini 3 Pro with native image generation. Supports aspect ratios and 1K–4K sizes. |
| `gemini-3.1-flash-image-preview` | Gemini 3.1 Flash with native image generation. Supports 0.5K–4K sizes (default 1K). |
#### gemini-3-pro-image-preview [#gemini-3-pro-image-preview]
```bash
curl -X POST "https://api.llmgateway.io/v1/chat/completions" \
-H "Authorization: Bearer $LLM_GATEWAY_API_KEY" \
-H "Content-Type: application/json" \
-d '{
"model": "gemini-3-pro-image-preview",
"messages": [
{
"role": "user",
"content": "Generate an image of a mountain landscape at sunset"
}
],
"image_config": {
"aspect_ratio": "16:9",
"image_size": "4K"
}
}'
```
| Parameter | Type | Description |
| -------------- | ------ | --------------------------------------------------------------------------------------------------------------------------------------------- |
| `aspect_ratio` | string | The aspect ratio of the generated image. Options: `"1:1"`, `"2:3"`, `"3:2"`, `"3:4"`, `"4:3"`, `"4:5"`, `"5:4"`, `"9:16"`, `"16:9"`, `"21:9"` |
| `image_size` | string | The resolution of the generated image. Options: `"1K"` (1024x1024), `"2K"` (2048x2048), `"4K"` (4096x4096) |
#### gemini-3.1-flash-image-preview [#gemini-31-flash-image-preview]
```bash
curl -X POST "https://api.llmgateway.io/v1/chat/completions" \
-H "Authorization: Bearer $LLM_GATEWAY_API_KEY" \
-H "Content-Type: application/json" \
-d '{
"model": "gemini-3.1-flash-image-preview",
"messages": [
{
"role": "user",
"content": "Generate an image of a mountain landscape at sunset"
}
],
"image_config": {
"image_size": "1K"
}
}'
```
| Parameter | Type | Description |
| -------------- | ------ | --------------------------------------------------------------------------------------------------------------------------------------------------------------------------------- |
| `aspect_ratio` | string | The aspect ratio of the generated image. Options: `"1:1"`, `"1:4"`, `"1:8"`, `"2:3"`, `"3:2"`, `"3:4"`, `"4:1"`, `"4:3"`, `"4:5"`, `"5:4"`, `"8:1"`, `"9:16"`, `"16:9"`, `"21:9"` |
| `image_size` | string | The resolution of the generated image. Options: `"0.5K"` (512x512), `"1K"` (1024x1024, default), `"2K"` (2048x2048), `"4K"` (4096x4096) |
`gemini-3.1-flash-image-preview` uniquely supports `"0.5K"` resolution, which
is not available on other Google image models.
### Alibaba Models [#alibaba-models]
```bash
curl -X POST "https://api.llmgateway.io/v1/chat/completions" \
-H "Authorization: Bearer $LLM_GATEWAY_API_KEY" \
-H "Content-Type: application/json" \
-d '{
"model": "alibaba/qwen-image-plus",
"messages": [
{
"role": "user",
"content": "Generate an image of a mountain landscape at sunset"
}
],
"image_config": {
"image_size": "1024x1536",
"n": 1,
"seed": 42
}
}'
```
| Parameter | Type | Description |
| ------------ | ------- | ------------------------------------------------------------------------------------------------ |
| `image_size` | string | Image dimensions in `WIDTHxHEIGHT` format. Examples: `"1024x1024"`, `"1024x1536"`, `"1536x1024"` |
| `n` | integer | Number of images to generate (1-4) |
| `seed` | integer | Random seed for reproducible generation |
Available Alibaba models:
| Model | Price | Description |
| ------------------------- | ------------ | --------------------------------- |
| `alibaba/qwen-image` | $0.035/image | Standard quality image generation |
| `alibaba/qwen-image-plus` | $0.03/image | Good balance of quality and cost |
| `alibaba/qwen-image-max` | $0.075/image | Highest quality image generation |
Alibaba models use explicit pixel dimensions (e.g., `"1024x1536"`) instead of
aspect ratios. For portrait orientation use `"1024x1536"`, for landscape use
`"1536x1024"`.
### Z.AI Models [#zai-models]
```bash
curl -X POST "https://api.llmgateway.io/v1/chat/completions" \
-H "Authorization: Bearer $LLM_GATEWAY_API_KEY" \
-H "Content-Type: application/json" \
-d '{
"model": "zai/cogview-4",
"messages": [
{
"role": "user",
"content": "Generate an image of a futuristic city skyline"
}
],
"image_config": {
"image_size": "1024x1024"
}
}'
```
| Parameter | Type | Description |
| ------------ | ------- | ------------------------------------------------------------------------------------------------ |
| `image_size` | string | Image dimensions in `WIDTHxHEIGHT` format. Examples: `"1024x1024"`, `"2048x1024"`, `"1024x2048"` |
| `n` | integer | Number of images to generate |
Available Z.AI models:
| Model | Price | Description |
| --------------- | ------------ | ------------------------------------------------------------------------------------------------------------------- |
| `zai/cogview-4` | $0.01/image | CogView-4 with bilingual support and excellent text rendering |
| `zai/glm-image` | $0.015/image | GLM-Image with hybrid auto-regressive architecture, excellent for text-rendering and knowledge-intensive generation |
CogView-4 supports both Chinese and English prompts and excels at generating
images with embedded text.
### OpenAI Models [#openai-models]
```bash
curl -X POST "https://api.llmgateway.io/v1/chat/completions" \
-H "Authorization: Bearer $LLM_GATEWAY_API_KEY" \
-H "Content-Type: application/json" \
-d '{
"model": "openai/gpt-image-2",
"messages": [
{
"role": "user",
"content": "Generate a photo-real cinematic landscape at golden hour"
}
],
"image_config": {
"image_size": "3072x2160",
"image_quality": "low"
}
}'
```
| Parameter | Type | Description |
| --------------- | ------ | ------------------------------------------------------------------------------------- |
| `image_size` | string | Image dimensions in `WIDTHxHEIGHT` format, or `"auto"` to let the model choose. |
| `image_quality` | string | One of `"low"`, `"medium"`, `"high"`, or `"auto"`. Defaults to `"auto"` when omitted. |
OpenAI image models do **not** accept `aspect_ratio`. Always specify
`image_size` as `WIDTHxHEIGHT` (e.g. `"1024x1024"`, `"3072x2160"`). OpenAI
requires both width and height to be divisible by 16, the longest edge to be ≤
3840, and the total pixel count to fit within the model's pixel budget;
requests outside these bounds are rejected with HTTP 400.
Available OpenAI image models:
| Model | Description |
| -------------------- | ------------------------------------------------------------------------------------------------------------ |
| `openai/gpt-image-2` | OpenAI's next-generation image model with improved quality and prompt adherence, supporting text and vision. |
### ByteDance Models [#bytedance-models]
```bash
curl -X POST "https://api.llmgateway.io/v1/chat/completions" \
-H "Authorization: Bearer $LLM_GATEWAY_API_KEY" \
-H "Content-Type: application/json" \
-d '{
"model": "bytedance/seedream-4-5",
"messages": [
{
"role": "user",
"content": "Generate an image of a futuristic cyberpunk city at night"
}
],
"image_config": {
"image_size": "2048x2048"
}
}'
```
| Parameter | Type | Description |
| ------------ | ------ | ------------------------------------------------------------------------------------------------ |
| `image_size` | string | Image dimensions in `WIDTHxHEIGHT` format. Examples: `"1024x1024"`, `"2048x2048"`, `"4096x4096"` |
Available ByteDance models:
| Model | Price | Description |
| ------------------------ | ------------ | --------------------------------------------------------------- |
| `bytedance/seedream-4-0` | $0.035/image | High-quality text-to-image generation with 2K default output |
| `bytedance/seedream-4-5` | $0.045/image | Enhanced quality and consistency with improved prompt adherence |
Seedream models support up to 2-10 reference images for multi-image fusion and
generation. The default output resolution is 2048×2048 (2K), with support up
to 4096×4096 (4K).
## Usage Notes [#usage-notes]
Image generation models typically have higher token costs compared to
text-only models due to the computational requirements of image synthesis.
Generated images are returned as base64-encoded data URLs, which can be large.
Consider the payload size when integrating image generation into your
applications.
# Master Keys
URL: https://docs.llmgateway.io/features/master-keys
# Master Keys [#master-keys]
Master keys are org-scoped bearer tokens that let you create projects, gateway API keys, and IAM rules (both per key and per organization member) programmatically — without going through the dashboard. They are intended for server-to-server provisioning (e.g. multi-tenant onboarding from your own backend).
Master keys are available on the **Enterprise** plan only. Contact us at
[contact@llmgateway.io](mailto:contact@llmgateway.io) to enable them for your organization.
## Security [#security]
* Master keys are stored as **HMAC-SHA256 hashes** in the database (using the `GATEWAY_API_KEY_HASH_SECRET` secret). The plain token is shown to you **only once** at creation time.
* Each master key is scoped to a single organization and cannot access resources in other organizations.
* Deleting or deactivating a master key revokes all programmatic access immediately.
* All creates/deletes/status changes are recorded in your organization audit log.
## Limits [#limits]
* Maximum **10 active master keys per organization**.
* Programmatic project and API-key creation enforces the same per-org and per-project limits as the dashboard flow.
## Managing master keys [#managing-master-keys]
In the dashboard, go to **Organization → Master Keys**. From there you can:
* Create a new master key (the plain token is shown once — copy it immediately).
* View the masked token, status, creator, and last-used timestamp for each existing key.
* Activate / deactivate or delete keys.
## Authentication [#authentication]
All programmatic endpoints live under `/v1/master/*` and require a master key in the `Authorization` header:
```
Authorization: Bearer llmgmk_...
```
A request with a missing, invalid, inactive, or non-enterprise master key receives a 401 / 403 response.
## Endpoints [#endpoints]
### List projects [#list-projects]
`GET /v1/master/projects`
Returns all non-deleted projects in the master key's organization.
```bash
curl https://internal.llmgateway.io/v1/master/projects \
-H "Authorization: Bearer $MASTER_KEY"
```
Response (200):
```json
{
"projects": [
{
"id": "proj_...",
"name": "Customer ACME",
"organizationId": "org_...",
"cachingEnabled": false,
"cacheDurationSeconds": 60,
"mode": "hybrid",
"status": "active",
"createdAt": "...",
"updatedAt": "..."
}
]
}
```
### Create a project [#create-a-project]
`POST /v1/master/projects`
```bash
curl -X POST https://internal.llmgateway.io/v1/master/projects \
-H "Authorization: Bearer $MASTER_KEY" \
-H "Content-Type: application/json" \
-d '{
"name": "Customer ACME",
"cachingEnabled": false,
"mode": "hybrid"
}'
```
Body parameters:
| Field | Type | Description |
| ---------------------- | ------------------------------------------------ | -------------------------- |
| `name` | string | Project name (1–255 chars) |
| `cachingEnabled` | boolean (optional) | Default `false` |
| `cacheDurationSeconds` | number (optional) | 10–31536000, default 60 |
| `mode` | `"api-keys" \| "credits" \| "hybrid"` (optional) | Default `"hybrid"` |
Response (201): the created project.
### Update a project [#update-a-project]
`PATCH /v1/master/projects/{id}`
Updates a project owned by the master key's organization. All body fields are optional; provide only the ones you want to change.
```bash
curl -X PATCH https://internal.llmgateway.io/v1/master/projects/proj_... \
-H "Authorization: Bearer $MASTER_KEY" \
-H "Content-Type: application/json" \
-d '{
"name": "Customer ACME (renamed)",
"cachingEnabled": true,
"status": "inactive"
}'
```
Body parameters (all optional, at least one required):
| Field | Type | Description |
| ---------------------- | ------------------------------------- | ----------------------------------- |
| `name` | string | 1–255 chars |
| `cachingEnabled` | boolean | |
| `cacheDurationSeconds` | number | 10–31536000 |
| `mode` | `"api-keys" \| "credits" \| "hybrid"` | |
| `status` | `"active" \| "inactive"` | Toggle the project without deleting |
Response (200): the updated project.
### Delete a project [#delete-a-project]
`DELETE /v1/master/projects/{id}`
Soft-deletes a project (sets `status` to `"deleted"`). Cascades to its API keys.
```bash
curl -X DELETE https://internal.llmgateway.io/v1/master/projects/proj_... \
-H "Authorization: Bearer $MASTER_KEY"
```
Response (200):
```json
{ "message": "Project deleted successfully" }
```
### List gateway API keys [#list-gateway-api-keys]
`GET /v1/master/keys`
Returns the developer-created gateway API keys in the master key's organization, each with its configured limits, the usage consumed so far, and — when a windowed limit is set — the time the current period resets. Pass an optional `projectId` query parameter to scope the list to a single project.
```bash
curl "https://internal.llmgateway.io/v1/master/keys?projectId=proj_..." \
-H "Authorization: Bearer $MASTER_KEY"
```
Response (200):
```json
{
"apiKeys": [
{
"id": "ak_...",
"description": "Customer ACME — production key",
"status": "active",
"projectId": "proj_...",
"createdBy": "usr_...",
"maskedToken": "llmgtwy_...abcd",
"usageLimit": "100.00",
"usage": "42.13",
"periodUsageLimit": "10.00",
"periodUsageDurationValue": 1,
"periodUsageDurationUnit": "day",
"currentPeriodUsage": "3.50",
"currentPeriodStartedAt": "2025-01-15T00:00:00.000Z",
"currentPeriodResetAt": "2025-01-16T00:00:00.000Z",
"createdAt": "...",
"updatedAt": "..."
}
]
}
```
Limit and usage fields:
| Field | Description |
| -------------------------- | ---------------------------------------------------------------------------------- |
| `usageLimit` | Lifetime spend cap (`null` when uncapped) |
| `usage` | Total spend accrued against `usageLimit` over the key's lifetime |
| `periodUsageLimit` | Recurring per-window spend cap (`null` when no windowed limit is configured) |
| `periodUsageDurationValue` | Length of the window, paired with `periodUsageDurationUnit` |
| `periodUsageDurationUnit` | `"hour" \| "day" \| "week" \| "month"` |
| `currentPeriodUsage` | Spend accrued in the current window (`"0"` when unconfigured or the window lapsed) |
| `currentPeriodStartedAt` | When the current window began (`null` when unconfigured or lapsed) |
| `currentPeriodResetAt` | When the windowed limit resets (`null` when unconfigured or lapsed) |
The plain token is never returned by this endpoint — only a masked form for identification.
### Get a gateway API key [#get-a-gateway-api-key]
`GET /v1/master/keys/{id}`
Returns a single gateway API key in the master key's organization, with the same limit, usage, and reset-time fields as the list endpoint.
```bash
curl https://internal.llmgateway.io/v1/master/keys/ak_... \
-H "Authorization: Bearer $MASTER_KEY"
```
Response (200):
```json
{
"apiKey": {
"id": "ak_...",
"description": "Customer ACME — production key",
"status": "active",
"projectId": "proj_...",
"createdBy": "usr_...",
"maskedToken": "llmgtwy_...abcd",
"usageLimit": "100.00",
"usage": "42.13",
"periodUsageLimit": "10.00",
"periodUsageDurationValue": 1,
"periodUsageDurationUnit": "day",
"currentPeriodUsage": "3.50",
"currentPeriodStartedAt": "2025-01-15T00:00:00.000Z",
"currentPeriodResetAt": "2025-01-16T00:00:00.000Z",
"createdAt": "...",
"updatedAt": "..."
}
}
```
### Create a gateway API key [#create-a-gateway-api-key]
`POST /v1/master/keys`
```bash
curl -X POST https://internal.llmgateway.io/v1/master/keys \
-H "Authorization: Bearer $MASTER_KEY" \
-H "Content-Type: application/json" \
-d '{
"projectId": "proj_...",
"description": "Customer ACME — production key"
}'
```
Body parameters:
| Field | Type | Description |
| -------------------------- | ------------------------------------------------- | -------------------------------------------- |
| `projectId` | string | Must belong to the master key's organization |
| `description` | string | API key description (1–255 chars) |
| `usageLimit` | string (optional) | Lifetime usage limit |
| `periodUsageLimit` | string (optional) | Recurring period usage limit |
| `periodUsageDurationValue` | number (optional) | Required if `periodUsageLimit` is set |
| `periodUsageDurationUnit` | `"hour" \| "day" \| "week" \| "month"` (optional) | Required if `periodUsageLimit` is set |
The created gateway API key's plain token is returned in the response **only
once**. Persist it immediately on your side.
Response (201):
```json
{
"apiKey": {
"id": "ak_...",
"token": "llmgtwy_...",
"description": "Customer ACME — production key",
"status": "active",
"projectId": "proj_...",
"createdBy": "usr_...",
"createdAt": "...",
"updatedAt": "..."
}
}
```
### Update a gateway API key [#update-a-gateway-api-key]
`PATCH /v1/master/keys/{id}`
Updates an API key in a project owned by the master key's organization. All body fields are optional; provide only the ones you want to change.
```bash
curl -X PATCH https://internal.llmgateway.io/v1/master/keys/ak_... \
-H "Authorization: Bearer $MASTER_KEY" \
-H "Content-Type: application/json" \
-d '{
"status": "inactive",
"usageLimit": "100.00"
}'
```
Body parameters (all optional, at least one required):
| Field | Type | Description |
| -------------------------- | -------------------------------------- | -------------------------------------- |
| `description` | string | 1–255 chars |
| `status` | `"active" \| "inactive"` | |
| `usageLimit` | string \| null | Lifetime usage limit (null to clear) |
| `periodUsageLimit` | string \| null | Recurring period limit (null to clear) |
| `periodUsageDurationValue` | number \| null | Required if `periodUsageLimit` is set |
| `periodUsageDurationUnit` | `"hour" \| "day" \| "week" \| "month"` | Required if `periodUsageLimit` is set |
Response (200): the updated API key, including its configured limits, consumed `usage` / `currentPeriodUsage`, and the `currentPeriodResetAt` window-reset time (same fields as the [list endpoint](#list-gateway-api-keys)). The plain token is **not** included — it is only returned at creation.
### Delete a gateway API key [#delete-a-gateway-api-key]
`DELETE /v1/master/keys/{id}`
Soft-deletes the API key (sets `status` to `"deleted"`). Any in-flight requests using the key will be rejected immediately on next auth check.
```bash
curl -X DELETE https://internal.llmgateway.io/v1/master/keys/ak_... \
-H "Authorization: Bearer $MASTER_KEY"
```
Response (200):
```json
{ "message": "API key deleted successfully" }
```
The auto-generated Lounge (playground) API key cannot be deleted via the
master API.
## IAM rules [#iam-rules]
Each gateway API key can have one or more IAM rules that restrict which models, providers, or pricing tiers it is allowed to use. Rules are evaluated at request time by the gateway. A key with no active rules has no IAM restrictions.
Rule types:
| `ruleType` | Description |
| ----------------- | ----------------------------------------------------------- |
| `allow_models` | Only the listed models are permitted |
| `deny_models` | The listed models are blocked |
| `allow_providers` | Only the listed providers are permitted |
| `deny_providers` | The listed providers are blocked |
| `allow_pricing` | Only models matching the pricing constraint are permitted |
| `deny_pricing` | Models matching the pricing constraint are blocked |
| `allow_ip_cidrs` | Only requests from the listed IPv4/IPv6 CIDRs are permitted |
| `deny_ip_cidrs` | Requests from the listed IPv4/IPv6 CIDRs are blocked |
The `ruleValue` JSON object holds the rule's parameters. The fields it accepts depend on the `ruleType`:
| Field | Type | Used by |
| ---------------- | ------------------ | ----------------------------------- |
| `models` | string\[] | `allow_models`, `deny_models` |
| `providers` | string\[] | `allow_providers`, `deny_providers` |
| `pricingType` | `"free" \| "paid"` | `allow_pricing`, `deny_pricing` |
| `maxInputPrice` | number | `allow_pricing`, `deny_pricing` |
| `maxOutputPrice` | number | `allow_pricing`, `deny_pricing` |
| `ipCidrs` | string\[] | `allow_ip_cidrs`, `deny_ip_cidrs` |
### IP CIDR rules [#ip-cidr-rules]
IP CIDR rules restrict gateway requests by source IP. Both IPv4 (e.g. `192.0.2.0/24`) and IPv6 (e.g. `2001:db8::/32`) ranges are supported, and you can mix both in a single rule. To restrict to a single address, use a `/32` (IPv4) or `/128` (IPv6) prefix.
The gateway reads the client IP from the first entry in the `X-Forwarded-For` header, which is set by the GCP load balancer.
IPv4-mapped IPv6 addresses (`::ffff:1.2.3.4`) are normalized to IPv4 so a single `1.2.3.0/24` rule still matches when the upstream connection happens to be IPv6.
When an `allow_ip_cidrs` rule is configured and the gateway cannot determine the client IP, the request is denied. Invalid CIDR syntax is rejected at rule-creation time with a `400` error.
All endpoints scope by the master key's organization: a `404` is returned if the API key (or rule) is not part of the authenticated master key's organization.
### List IAM rules [#list-iam-rules]
`GET /v1/master/keys/{id}/iam`
```bash
curl https://internal.llmgateway.io/v1/master/keys/ak_.../iam \
-H "Authorization: Bearer $MASTER_KEY"
```
Response (200):
```json
{
"rules": [
{
"id": "iam_...",
"apiKeyId": "ak_...",
"ruleType": "allow_models",
"ruleValue": {
"models": ["openai/gpt-4o", "anthropic/claude-3-5-sonnet"]
},
"status": "active",
"createdAt": "...",
"updatedAt": "..."
}
]
}
```
### Create an IAM rule [#create-an-iam-rule]
`POST /v1/master/keys/{id}/iam`
```bash
curl -X POST https://internal.llmgateway.io/v1/master/keys/ak_.../iam \
-H "Authorization: Bearer $MASTER_KEY" \
-H "Content-Type: application/json" \
-d '{
"ruleType": "allow_models",
"ruleValue": {
"models": ["openai/gpt-4o", "anthropic/claude-3-5-sonnet"]
}
}'
```
Body parameters:
| Field | Type | Description |
| ----------- | ------------------------ | ------------------------------------------------------- |
| `ruleType` | rule type enum (above) | Required |
| `ruleValue` | object (see table above) | Must include the fields appropriate for the chosen type |
| `status` | `"active" \| "inactive"` | Optional, defaults to `"active"` |
Restricting by source IP:
```bash
curl -X POST https://internal.llmgateway.io/v1/master/keys/ak_.../iam \
-H "Authorization: Bearer $MASTER_KEY" \
-H "Content-Type: application/json" \
-d '{
"ruleType": "allow_ip_cidrs",
"ruleValue": {
"ipCidrs": ["192.0.2.0/24", "2001:db8::/32"]
}
}'
```
Response (201): the created IAM rule.
### Update an IAM rule [#update-an-iam-rule]
`PATCH /v1/master/keys/{id}/iam/{ruleId}`
All body fields are optional; provide only the ones you want to change.
```bash
curl -X PATCH https://internal.llmgateway.io/v1/master/keys/ak_.../iam/iam_... \
-H "Authorization: Bearer $MASTER_KEY" \
-H "Content-Type: application/json" \
-d '{
"status": "inactive"
}'
```
Body parameters (all optional, at least one required):
| Field | Type | Description |
| ----------- | ------------------------ | --------------------------------------- |
| `ruleType` | rule type enum (above) | Change the rule type |
| `ruleValue` | object (see table above) | Replace the rule value |
| `status` | `"active" \| "inactive"` | Activate or deactivate without deleting |
Response (200): the updated IAM rule.
### Delete an IAM rule [#delete-an-iam-rule]
`DELETE /v1/master/keys/{id}/iam/{ruleId}`
Permanently removes an IAM rule from the API key.
```bash
curl -X DELETE https://internal.llmgateway.io/v1/master/keys/ak_.../iam/iam_... \
-H "Authorization: Bearer $MASTER_KEY"
```
Response (200):
```json
{ "message": "IAM rule deleted successfully" }
```
## Member IAM rules [#member-iam-rules]
The same rule types can be applied to an **organization member** instead of a single API key. Member-level rules are an organization-wide ceiling: a request must pass both the member's rules and the key's rules, so key rules can only narrow access further, never expand it. They apply to all regular API keys created by that member. See [Member-Level IAM Rules](https://docs.llmgateway.io/features/api-keys#member-level-iam-rules) for the full semantics.
The `{member}` path parameter accepts either the **membership id** or the member's **email address** (matched case-insensitively). Email references must resolve to a user who is a member of the master key's organization — an email belonging to a user outside the organization, or an unknown reference, returns a `404`.
The `ruleType`, `ruleValue`, and `status` fields are identical to the per-key IAM endpoints above.
### List member IAM rules [#list-member-iam-rules]
`GET /v1/master/members/{member}/iam`
```bash
curl https://internal.llmgateway.io/v1/master/members/jane@example.com/iam \
-H "Authorization: Bearer $MASTER_KEY"
```
Response (200):
```json
{
"rules": [
{
"id": "iam_...",
"userOrganizationId": "uo_...",
"ruleType": "allow_providers",
"ruleValue": {
"providers": ["openai"]
},
"status": "active",
"createdAt": "...",
"updatedAt": "..."
}
]
}
```
### Create a member IAM rule [#create-a-member-iam-rule]
`POST /v1/master/members/{member}/iam`
```bash
curl -X POST https://internal.llmgateway.io/v1/master/members/jane@example.com/iam \
-H "Authorization: Bearer $MASTER_KEY" \
-H "Content-Type: application/json" \
-d '{
"ruleType": "allow_providers",
"ruleValue": {
"providers": ["openai"]
}
}'
```
Response (201): the created member IAM rule.
### Update a member IAM rule [#update-a-member-iam-rule]
`PATCH /v1/master/members/{member}/iam/{ruleId}`
All body fields are optional; provide only the ones you want to change.
```bash
curl -X PATCH https://internal.llmgateway.io/v1/master/members/uo_.../iam/iam_... \
-H "Authorization: Bearer $MASTER_KEY" \
-H "Content-Type: application/json" \
-d '{
"status": "inactive"
}'
```
Response (200): the updated member IAM rule.
### Delete a member IAM rule [#delete-a-member-iam-rule]
`DELETE /v1/master/members/{member}/iam/{ruleId}`
```bash
curl -X DELETE https://internal.llmgateway.io/v1/master/members/uo_.../iam/iam_... \
-H "Authorization: Bearer $MASTER_KEY"
```
Response (200):
```json
{ "message": "Member IAM rule deleted successfully" }
```
# Metadata
URL: https://docs.llmgateway.io/features/metadata
# Metadata [#metadata]
LLM Gateway supports sending additional metadata with your requests using custom headers. This allows you to include information like user sessions, application versions, tenant IDs, or other contextual data that can be useful for analytics and monitoring.
Later, you can filter by specific values to return, such as for a specific user or session. Additionally, in the future, you will be able to segment your analytics and monitoring based on this metadata. For example, you could show cost and latency breakdowns per user, application, country, feature, or any other dimension you want to track.
## Custom Headers [#custom-headers]
You can include custom headers with the `X-LLMGateway-` prefix to send metadata alongside your LLM requests:
```bash
curl -X POST https://api.llmgateway.io/v1/chat/completions \
-H "Content-Type: application/json" \
-H "Authorization: Bearer $LLM_GATEWAY_API_KEY" \
-H "X-LLMGateway-Country: US" \
-H "X-LLMGateway-User-ID: 9403f741-a524-4b18-b1b2-dbb71cdff2a4" \
-d '{
"model": "gpt-4o",
"messages": [
{
"role": "user",
"content": "Hello, how are you?"
}
]
}'
```
## Best Practices [#best-practices]
### Header Naming [#header-naming]
* Use the `X-LLMGateway-` prefix for all custom metadata
* Use descriptive, consistent naming conventions
* Avoid special characters; use hyphens to separate words
### Data Privacy [#data-privacy]
* Be mindful of sensitive data in headers
* Consider hashing or anonymizing user identifiers
* Follow your organization's data privacy policies
### Performance [#performance]
* Keep header values reasonably short
* Avoid sending unnecessary metadata that won't be used for analytics
* Consider the impact on request size, especially for high-volume applications
## Example: Multi-tenant Application [#example-multi-tenant-application]
For a multi-tenant application, you might use metadata headers like this:
```bash
curl -X POST https://api.llmgateway.io/v1/chat/completions \
-H "Content-Type: application/json" \
-H "Authorization: Bearer $LLM_GATEWAY_API_KEY" \
-H "X-LLMGateway-Tenant-ID: acme-corp" \
-H "X-LLMGateway-User-ID: user-12345" \
-H "X-LLMGateway-App-Version: 2.1.4" \
-H "X-LLMGateway-Feature: chat-assistant" \
-d '{
"model": "gpt-4o",
"messages": [
{
"role": "user",
"content": "Summarize this document..."
}
]
}'
```
This allows you to track usage and costs per tenant, user, application version, and feature, providing detailed insights into how your LLM integration is being used across your platform.
# Moderations
URL: https://docs.llmgateway.io/features/moderations
# Moderations [#moderations]
LLMGateway supports the OpenAI-compatible `/v1/moderations` endpoint for text
and multimodal safety classification.
Use it when you want to:
* Screen user prompts before they reach a model
* Review generated output before displaying it
* Apply the same moderation API shape you already use with OpenAI clients
For the full request and response schema, see the
[API reference](https://docs.llmgateway.io/v1_moderations).
## Endpoint [#endpoint]
`POST https://api.llmgateway.io/v1/moderations`
Authenticate with your LLMGateway API key:
```bash
-H "Authorization: Bearer $LLM_GATEWAY_API_KEY"
```
## Supported Inputs [#supported-inputs]
The `input` field accepts:
* A single string
* An array of strings
* An array of multimodal content items with `text` and `image_url`
The default model is `omni-moderation-latest`.
## curl [#curl]
### Single text input [#single-text-input]
```bash
curl -X POST "https://api.llmgateway.io/v1/moderations" \
-H "Authorization: Bearer $LLM_GATEWAY_API_KEY" \
-H "Content-Type: application/json" \
-d '{
"input": "I want to harm someone."
}'
```
### Multiple text inputs [#multiple-text-inputs]
```bash
curl -X POST "https://api.llmgateway.io/v1/moderations" \
-H "Authorization: Bearer $LLM_GATEWAY_API_KEY" \
-H "Content-Type: application/json" \
-d '{
"model": "omni-moderation-latest",
"input": [
"This is a harmless sentence.",
"I want to attack somebody."
]
}'
```
### Multimodal input [#multimodal-input]
```bash
curl -X POST "https://api.llmgateway.io/v1/moderations" \
-H "Authorization: Bearer $LLM_GATEWAY_API_KEY" \
-H "Content-Type: application/json" \
-d '{
"input": [
{
"type": "text",
"text": "Check this image for violent content."
},
{
"type": "image_url",
"image_url": {
"url": "https://example.com/image.png"
}
}
]
}'
```
## OpenAI SDK [#openai-sdk]
```ts
import OpenAI from "openai";
const client = new OpenAI({
baseURL: "https://api.llmgateway.io/v1",
apiKey: process.env.LLM_GATEWAY_API_KEY,
});
const response = await client.moderations.create({
model: "omni-moderation-latest",
input: "I want to harm someone.",
});
console.log(response.results[0]?.flagged);
```
## Response Shape [#response-shape]
The response follows the standard OpenAI moderation format:
```json
{
"id": "modr-123",
"model": "omni-moderation-latest",
"results": [
{
"flagged": true,
"categories": {
"violence": true,
"self_harm": false
},
"category_scores": {
"violence": 0.98,
"self_harm": 0.01
}
}
]
}
```
## When To Use This Instead Of Chat Content Filtering [#when-to-use-this-instead-of-chat-content-filtering]
Use `/v1/moderations` when you want an explicit moderation decision in your own
application flow.
If you want moderation to happen automatically as part of model requests, use
LLMGateway content filtering on `/v1/chat/completions` instead.
# OCR
URL: https://docs.llmgateway.io/features/ocr
# OCR [#ocr]
LLMGateway exposes a dedicated `/v1/ocr` endpoint for optical character
recognition. It extracts text, tables, and layout from PDFs and images and
returns them as clean markdown, one entry per page.
Use it when you want to:
* Turn scanned PDFs or photos into machine-readable markdown
* Pull structured text out of receipts, invoices, forms, or screenshots
* Feed document contents into a downstream model or RAG pipeline
For the full request and response schema, see the
[API reference](https://docs.llmgateway.io/v1_ocr).
## Endpoint [#endpoint]
`POST https://api.llmgateway.io/v1/ocr`
Authenticate with your LLMGateway API key:
```bash
-H "Authorization: Bearer $LLM_GATEWAY_API_KEY"
```
The current model is `mistral-ocr-latest`, billed at **$4 per 1,000 pages**
processed.
## Document Input [#document-input]
The `document` field accepts either a document URL (PDF) or an image:
* `{ "type": "document_url", "document_url": "https://…/file.pdf" }`
* `{ "type": "image_url", "image_url": "https://…/image.png" }`
Both `document_url` and `image_url` accept a public URL or a base64 data URL
(`data:application/pdf;base64,…` / `data:image/png;base64,…`). The `image_url`
field may also be passed as an object: `{ "url": "…" }`.
### Scoping pages [#scoping-pages]
By default the entire document is processed and every page is billed. Use the
optional `pages` field to restrict (and cap the cost of) a request:
* A list of zero-based indices: `"pages": [0, 1, 2]`
* A range string: `"pages": "0-4"`
## curl [#curl]
### Document URL [#document-url]
```bash
curl -X POST "https://api.llmgateway.io/v1/ocr" \
-H "Authorization: Bearer $LLM_GATEWAY_API_KEY" \
-H "Content-Type: application/json" \
-d '{
"model": "mistral-ocr-latest",
"document": {
"type": "document_url",
"document_url": "https://arxiv.org/pdf/2201.04234"
}
}'
```
### Only specific pages [#only-specific-pages]
```bash
curl -X POST "https://api.llmgateway.io/v1/ocr" \
-H "Authorization: Bearer $LLM_GATEWAY_API_KEY" \
-H "Content-Type: application/json" \
-d '{
"model": "mistral-ocr-latest",
"document": {
"type": "document_url",
"document_url": "https://arxiv.org/pdf/2201.04234"
},
"pages": "0-4"
}'
```
### Image input [#image-input]
```bash
curl -X POST "https://api.llmgateway.io/v1/ocr" \
-H "Authorization: Bearer $LLM_GATEWAY_API_KEY" \
-H "Content-Type: application/json" \
-d '{
"model": "mistral-ocr-latest",
"document": {
"type": "image_url",
"image_url": "https://example.com/receipt.png"
}
}'
```
### Inline (base64) document [#inline-base64-document]
```bash
BASE64_PDF=$(base64 -i invoice.pdf)
curl -X POST "https://api.llmgateway.io/v1/ocr" \
-H "Authorization: Bearer $LLM_GATEWAY_API_KEY" \
-H "Content-Type: application/json" \
-d "{
\"model\": \"mistral-ocr-latest\",
\"document\": {
\"type\": \"document_url\",
\"document_url\": \"data:application/pdf;base64,${BASE64_PDF}\"
}
}"
```
## Response Shape [#response-shape]
```json
{
"pages": [
{
"index": 0,
"markdown": "# Document title\n\nExtracted body text…",
"images": [],
"dimensions": { "dpi": 200, "height": 2200, "width": 1700 }
}
],
"model": "mistral-ocr-latest",
"document_annotation": null,
"usage_info": {
"pages_processed": 1,
"doc_size_bytes": 125344
}
}
```
Each entry in `pages` carries the markdown for one page. `usage_info.pages_processed`
reflects exactly how many pages were billed for the request.
## Billing [#billing]
OCR is billed per page processed, not per token. A request that processes 12
pages bills `12 × $0.004 = $0.048`. Scoping a request with `pages` reduces both
the work and the cost.
## OCR Models Use This Endpoint, Not Chat [#ocr-models-use-this-endpoint-not-chat]
OCR models are not chat models and cannot be called through
`/v1/chat/completions` — doing so returns a `400` pointing you here. Send OCR
requests to `/v1/ocr`.
# Realtime API
URL: https://docs.llmgateway.io/features/realtime
# Realtime API [#realtime-api]
LLMGateway supports low-latency, speech-to-speech conversations through the
OpenAI-compatible **`/v1/realtime`** WebSocket endpoint. Sessions support text
and audio input/output, server-side voice activity detection (VAD), input
audio transcription, and function calling — using the same event protocol as
the OpenAI Realtime API.
The API is a drop-in replacement: point any OpenAI realtime client at
`wss://api.llmgateway.io/v1/realtime`, authenticate with your LLMGateway API
key, and keep your existing event handling.
Want to talk to a model right now? The [Realtime
page](https://chat.llmgateway.io/realtime) in Lounge runs a full voice call in
the browser using this API.
## Available Models [#available-models]
Browse the available realtime models, with up-to-date pricing, on the
[models page](https://llmgateway.io/models). Realtime sessions are billed per
token — text and audio input, cached input, and output are metered separately
at the model's listed rates, matching the provider's own pricing.
Model names work like everywhere else on LLMGateway: use the plain model id
(e.g. `gpt-realtime`), a dated alias, or the `provider/model` pinned form
(e.g. `openai/gpt-realtime`).
## Connecting [#connecting]
Connect a WebSocket to:
```
wss://api.llmgateway.io/v1/realtime?model=gpt-realtime
```
Authenticate with your LLMGateway API key in the `Authorization` header (an
`x-api-key` header also works):
```javascript
import WebSocket from "ws";
const url = "wss://api.llmgateway.io/v1/realtime?model=gpt-realtime";
const ws = new WebSocket(url, {
headers: {
Authorization: "Bearer " + process.env.LLM_GATEWAY_API_KEY,
},
});
ws.on("open", () => {
console.log("Connected to server.");
});
ws.on("message", (message) => {
const event = JSON.parse(message.toString());
console.log(event.type);
});
```
Once connected, the session speaks the standard realtime event protocol:
send client events like `session.update`, `conversation.item.create`,
`input_audio_buffer.append`, and `response.create`; receive server events
like `session.created`, `response.output_audio.delta`, and `response.done`.
```javascript
ws.on("open", () => {
// Configure the session.
ws.send(
JSON.stringify({
type: "session.update",
session: {
type: "realtime",
instructions: "You are a friendly assistant.",
audio: {
output: { voice: "marin" },
},
},
}),
);
// Ask for a response.
ws.send(
JSON.stringify({
type: "conversation.item.create",
item: {
type: "message",
role: "user",
content: [{ type: "input_text", text: "Say hello!" }],
},
}),
);
ws.send(JSON.stringify({ type: "response.create" }));
});
```
All events are JSON text frames; audio travels base64-encoded inside events
(binary WebSocket frames are rejected). The model is locked at connection
time — a `session.update` that tries to change `session.model` is rejected
with a `model_locked` error event.
Credentials are never accepted as query parameters. A connection URL
containing `token`, `api_key`, or `client_secret` query parameters is rejected
with HTTP 400. Use the `Authorization` header on servers, or an ephemeral
client secret (below) in browsers.
## Browser Clients and Client Secrets [#browser-clients-and-client-secrets]
Never ship a long-lived API key to a browser. Instead, mint a short-lived
**ephemeral client secret** from your backend with the OpenAI-compatible
`POST /v1/realtime/client_secrets` endpoint:
```bash
curl -X POST "https://api.llmgateway.io/v1/realtime/client_secrets" \
-H "Authorization: Bearer $LLM_GATEWAY_API_KEY" \
-H "Content-Type: application/json" \
-d '{
"expires_after": { "anchor": "created_at", "seconds": 120 },
"session": {
"type": "realtime",
"model": "gpt-realtime"
}
}'
```
The response contains the secret (`ek_...`) and its expiry:
```json
{
"value": "ek_...",
"expires_at": 1753500000,
"session": {
"type": "realtime",
"model": "gpt-realtime"
}
}
```
The browser then connects using the standard `openai-insecure-api-key`
WebSocket subprotocol — no `Authorization` header needed:
```javascript
const ws = new WebSocket("wss://api.llmgateway.io/v1/realtime", [
"realtime",
"openai-insecure-api-key." + clientSecret,
]);
```
Client secret behavior:
* **TTL**: 10–300 seconds (default 60), set via `expires_after.seconds`.
Secrets are reusable until they expire; expiry only gates opening the
connection, not the session's duration.
* **Model pinning**: the secret is minted for one model. The `model` query
parameter is optional when connecting with a secret; if provided, it must
match the minted model.
* **Transcription pinning**: optionally pin an input transcription model at
mint time via `session.audio.input.transcription.model`. The session can
then only enable that transcription model.
* All authentication, credit, model access, and compliance checks run at
mint time and again at connection time.
## Input Audio Transcription [#input-audio-transcription]
Enable transcription of the user's audio with `session.update`. An explicit,
supported transcription model is required — check the
[models page](https://llmgateway.io/models) for available realtime
transcription models and their pricing:
```json
{
"type": "session.update",
"session": {
"type": "realtime",
"audio": {
"input": {
"transcription": { "model": "gpt-4o-transcribe" }
}
}
}
}
```
Transcripts arrive as standard
`conversation.item.input_audio_transcription.delta` and `.completed` events.
* The provider's implicit default (e.g. `whisper-1`) is not available;
omitting `transcription.model` is rejected with
`transcription_model_required`. Duration-billed transcription models cannot
be metered per token, so only token-metered models are supported.
* The transcription model is pinned for the session on first use and cannot
be switched afterwards; disabling transcription (`"transcription": null`)
is always allowed.
* Transcription is billed separately from the realtime model, at the
transcription model's listed per-token rates.
* Both the current nested form (`session.audio.input.transcription`) and the
legacy top-level form (`session.input_audio_transcription`) are accepted.
## Function Calling [#function-calling]
Plain function tools work exactly as in the OpenAI Realtime API — declare
them in `session.update` (or per response in `response.create`), receive
`response.function_call_arguments` events, and return results with
`conversation.item.create`:
```json
{
"type": "session.update",
"session": {
"type": "realtime",
"tools": [
{
"type": "function",
"name": "get_weather",
"description": "Get the current weather for a location.",
"parameters": {
"type": "object",
"properties": {
"location": { "type": "string" }
},
"required": ["location"]
}
}
],
"tool_choice": "auto"
}
}
```
Hosted tools (MCP servers, web search, code interpreter, etc.) are not yet
available and are rejected with `tool_type_not_supported`.
## Billing and Session Gating [#billing-and-session-gating]
Realtime sessions bill your organization's pay-as-you-go credits, or your own
provider key when the project uses [provider keys](https://docs.llmgateway.io/learn/provider-keys). Every
model generation — whether triggered by your `response.create` or by
server-side VAD — passes the gateway's authorization gates first (credits,
API key status, usage limits, IAM rules), so a session cannot run past an
exhausted balance. A blocked generation surfaces as a standard `error` event
on the session instead of a response.
Default per-session safety limits:
| Limit | Default |
| ------------------------------- | ------- |
| Maximum session duration | 1 hour |
| Maximum spend per session | $10 |
| Concurrent sessions per org | 20 |
| Concurrent sessions per API key | 10 |
Sessions that hit a limit are closed gracefully after in-flight responses are
billed. Usage appears in your [activity feed](https://llmgateway.io/dashboard)
like any other request, including separate line items for input transcription.
## Current Limitations [#current-limitations]
* **WebSocket transport only** — WebRTC and SIP are not yet supported.
* **Image input** is not yet supported in realtime sessions.
* **Hosted tools** (MCP, web search, etc.) and **stored prompt references**
(`session.prompt`) are not supported; inline your instructions and function
tools instead.
* Realtime requires a regular developer API key on a pay-as-you-go
organization. End-user session tokens, platform keys, and DevPass/chat plan
organizations are not supported yet.
## Self-Hosting [#self-hosting]
Realtime is disabled by default on self-hosted deployments. Set
`REALTIME_INLINE=true` to attach the `/v1/realtime` WebSocket listener (and
the client-secret mint endpoint) to the gateway process — `pnpm dev` sets
this automatically. Client secrets require Redis. See `.env.example` for the
tunables (session caps, concurrency limits, shutdown grace period).
# Reasoning
URL: https://docs.llmgateway.io/features/reasoning
# Reasoning [#reasoning]
LLMGateway supports reasoning-capable models that can show their step-by-step thought process before providing a final answer. This feature is particularly useful for complex problem-solving tasks, mathematical calculations, and logical reasoning.
## Reasoning-Enabled Models [#reasoning-enabled-models]
You can find all reasoning-enabled models on our [models page with reasoning filter](https://llmgateway.io/models?filters=1\&reasoning=true). These models include:
* OpenAI's GPT-5 series (e.g., `gpt-5`, `gpt-5-mini`)
* Note: GPT-5 models use reasoning but currently do not return the reasoning content in the response.
* Anthropic's Claude 3.7 Sonnet
* Google's Gemini 2.0 Flash Thinking and Gemini 2.5 Pro
* GPT OSS models such as `gpt-oss-120b` and `gpt-oss-20b`
* Z.AI's reasoning models
Some models may reason internally even if the `reasoning_effort` parameter is
not specified.
## Using the Reasoning Parameter [#using-the-reasoning-parameter]
There are two ways to control reasoning effort:
### Option 1: Top-level `reasoning_effort` [#option-1-top-level-reasoning_effort]
Add the `reasoning_effort` parameter directly to your request:
* `none` - Disable reasoning. Supported by OpenAI's newer reasoning models (e.g. `gpt-5.4-mini` and later, which accept `none` instead of `minimal`). For other providers this turns reasoning off.
* `minimal` - Fastest reasoning with minimal thought process (only for GPT-5 models)
* `low` - Light reasoning for simpler tasks
* `medium` - Balanced reasoning for most tasks
* `high` - Deep reasoning for complex problems
* `xhigh` - Very deep reasoning for the most complex problems
* `max` - Highest reasoning tier, above `xhigh`. Supported by Anthropic thinking models and OpenAI GPT-5.6 models. Effort tiers are never downgraded by the gateway: providers that accept an effort parameter receive the value unchanged (unsupported values result in a provider error), while providers that take a thinking budget instead (Anthropic, Google, Alibaba) have each tier translated to a native budget
OpenAI's reasoning models do not all accept the same effort values. The
original GPT-5 models support `minimal`, while newer models (e.g.
`gpt-5.4-mini` and later) replace it with `none`. If you send an effort value
the target model doesn't support, OpenAI returns an `unsupported_value` error.
The exact values each provider mapping accepts are exposed as
`reasoning_efforts` on the [`/v1/models`](https://api.llmgateway.io/v1/models)
endpoint.
```bash
curl -X POST "https://api.llmgateway.io/v1/chat/completions" \
-H "Authorization: Bearer $LLM_GATEWAY_API_KEY" \
-H "Content-Type: application/json" \
-d '{
"model": "gpt-oss-120b",
"messages": [
{
"role": "user",
"content": "What is 2/3 + 1/4 + 5/6?"
}
],
"reasoning_effort": "medium"
}'
```
### Option 2: Using the `reasoning` object [#option-2-using-the-reasoning-object]
Use the unified `reasoning` configuration object with an `effort` field:
* `none` - Disable reasoning
* `minimal` - Fastest reasoning with minimal thought process
* `low` - Light reasoning for simpler tasks
* `medium` - Balanced reasoning for most tasks
* `high` - Deep reasoning for complex problems
* `xhigh` - Very deep reasoning for the most complex problems
* `max` - Highest reasoning tier, above `xhigh`. Supported by Anthropic thinking models and OpenAI GPT-5.6 models. Effort tiers are never downgraded by the gateway: providers that accept an effort parameter receive the value unchanged (unsupported values result in a provider error), while providers that take a thinking budget instead (Anthropic, Google, Alibaba) have each tier translated to a native budget
```bash
curl -X POST "https://api.llmgateway.io/v1/chat/completions" \
-H "Authorization: Bearer $LLM_GATEWAY_API_KEY" \
-H "Content-Type: application/json" \
-d '{
"model": "gpt-5",
"messages": [
{
"role": "user",
"content": "What is 2/3 + 1/4 + 5/6?"
}
],
"reasoning": {
"effort": "medium"
}
}'
```
You cannot use both `reasoning_effort` and `reasoning.effort` in the same
request. Choose one approach. However, you can combine `reasoning_effort` or
`reasoning.effort` with `reasoning.max_tokens` — when `max_tokens` is
specified, it takes priority over the effort level.
### Example Response [#example-response]
The response will include a `reasoning` field in the message object containing the model's step-by-step thought process:
```json
{
"id": "chatcmpl-abc123",
"object": "chat.completion",
"created": 1234567890,
"model": "gpt-oss-120b",
"choices": [
{
"index": 0,
"message": {
"role": "assistant",
"content": "The answer is 1.75 or 7/4.",
"reasoning": "First, I need to find a common denominator for 2/3, 1/4, and 5/6. The LCD is 12. Converting: 2/3 = 8/12, 1/4 = 3/12, 5/6 = 10/12. Adding: 8/12 + 3/12 + 10/12 = 21/12 = 1.75 or 7/4."
},
"finish_reason": "completed"
}
],
"usage": {
"prompt_tokens": 20,
"completion_tokens": 45,
"reasoning_tokens": 35,
"total_tokens": 65
}
}
```
## Specifying Reasoning Token Budget [#specifying-reasoning-token-budget]
For models that support it, you can specify an exact token budget for reasoning using the `reasoning` object with `max_tokens`. This gives you precise control over how many tokens the model allocates to its thinking process.
When `reasoning.max_tokens` is specified, it overrides `reasoning.effort` and
`reasoning_effort`. Supported by Anthropic Claude and Google Gemini thinking
models, plus Alibaba-hosted thinking models (forwarded as DashScope's
`thinking_budget`).
### Example Request [#example-request]
```bash
curl -X POST "https://api.llmgateway.io/v1/chat/completions" \
-H "Authorization: Bearer $LLM_GATEWAY_API_KEY" \
-H "Content-Type: application/json" \
-d '{
"model": "anthropic/claude-sonnet-4-20250514",
"messages": [
{
"role": "user",
"content": "Explain the P vs NP problem and why it matters."
}
],
"reasoning": {
"max_tokens": 8000
}
}'
```
### Supported Models [#supported-models]
The `reasoning.max_tokens` parameter is supported by:
* **Anthropic Claude**: Claude 3.7 Sonnet, Claude Sonnet 4, Claude Opus 4, Claude Opus 4.5
* **Google Gemini**: Gemini 2.5 Pro, Gemini 2.5 Flash, Gemini 3 Pro Preview
When using auto-routing or root models with `reasoning.max_tokens`, only providers that support this feature will be considered.
### Provider-Specific Constraints [#provider-specific-constraints]
* **Anthropic**: Reasoning budget must be between 1,024 and 128,000 tokens. Values outside this range are automatically clamped.
* **Google**: No specific constraints on the reasoning budget.
### Error Handling [#error-handling]
If you specify `reasoning.max_tokens` for a model that doesn't support it, you'll receive an error:
```json
{
"error": {
"message": "Model gpt-4o does not support reasoning.max_tokens. Remove the reasoning parameter or use a model that supports explicit reasoning token budgets.",
"type": "invalid_request_error",
"code": "model_not_supported"
}
}
```
## Controlling Response Verbosity [#controlling-response-verbosity]
For OpenAI GPT-5 and later models, you can control how detailed the model's final answer is with the top-level `verbosity` parameter. This is independent of `reasoning_effort`: `reasoning_effort` controls how much the model thinks, while `verbosity` controls how much it writes in its response.
Accepted values:
* `low` - Concise responses with minimal elaboration
* `medium` - Balanced level of detail
* `high` - Detailed, thorough responses
```bash
curl -X POST "https://api.llmgateway.io/v1/chat/completions" \
-H "Authorization: Bearer $LLM_GATEWAY_API_KEY" \
-H "Content-Type: application/json" \
-d '{
"model": "gpt-5",
"messages": [
{
"role": "user",
"content": "Explain how a hash map works."
}
],
"verbosity": "low"
}'
```
`verbosity` is only supported by OpenAI GPT-5 and later models. You can check
which model mappings accept it via the
[`/v1/models`](https://api.llmgateway.io/v1/models) endpoint. It can be
combined freely with `reasoning_effort` or the `reasoning` object.
### Error Handling [#error-handling-1]
If you specify `verbosity` for a model that doesn't support it, you'll receive a `400` error:
```json
{
"error": {
"message": "Model gpt-4o does not support the verbosity parameter. Remove the verbosity parameter or use a model that supports it (OpenAI GPT-5 and later).",
"type": "invalid_request_error",
"code": "model_not_supported"
}
}
```
## Streaming Reasoning Content [#streaming-reasoning-content]
When streaming is enabled, reasoning content will be streamed as part of the response chunks:
```bash
curl -X POST "https://api.llmgateway.io/v1/chat/completions" \
-H "Authorization: Bearer $LLM_GATEWAY_API_KEY" \
-H "Content-Type: application/json" \
-d '{
"model": "gpt-oss-120b",
"messages": [
{
"role": "user",
"content": "Solve this logic puzzle: If all roses are flowers and some flowers fade quickly, can we conclude that some roses fade quickly?"
}
],
"reasoning_effort": "high",
"stream": true
}'
```
The reasoning content will appear in the stream chunks before the final answer, allowing you to display the model's thought process in real-time.
Example:
```
data: {
"id": "chatcmpl-fb266880-1016-4797-9a70-f21a538edaf6",
"object": "chat.completion.chunk",
"created": 1761048126,
"model": "openai/gpt-oss-20b",
"choices": [
{
"index": 0,
"delta": {
"reasoning": "It's ",
"role": "assistant"
},
"finish_reason": null
}
]
}
```
## Usage Tracking [#usage-tracking]
### Response Payload [#response-payload]
The `usage` object in the response includes reasoning-specific token counts:
* `reasoning_tokens` - Number of tokens used for the reasoning process
* `completion_tokens` - Number of tokens in the final answer
* `prompt_tokens` - Number of tokens in the input
* `total_tokens` - Sum of all token counts
### Logs and Analytics [#logs-and-analytics]
All requests using the `reasoning_effort` parameter are tracked in your dashboard logs with:
* The `reasoningContent` field containing the full reasoning text
* Separate token counts for reasoning vs. completion
* Performance metrics for reasoning-enabled requests
You can view detailed logs for each request in the [dashboard](https://llmgateway.io/dashboard) to analyze how models are reasoning through problems.
## Auto-Routing with Reasoning [#auto-routing-with-reasoning]
When using auto-routing (specifying a model like `gpt-5` without a specific version), LLMGateway will:
1. Automatically set `reasoning_effort` to `minimal` for GPT-5 models
2. Set `reasoning_effort` to `low` for other auto-routed reasoning models
3. Only route to providers that support reasoning when `reasoning_effort` is specified
This ensures optimal performance and cost when using auto-routing with reasoning-capable models.
## Model-Specific Behavior [#model-specific-behavior]
Not all reasoning models return reasoning content in the same way. Some models (like OpenAI models) may reason internally but not expose the reasoning content in the response. LLMGateway makes sure the response is unified across different providers, but the depth and format of reasoning may vary.
## Best Practices [#best-practices]
1. **Choose appropriate reasoning effort**: Use `low` or `minimal` for simple tasks, `medium` for most tasks, and `high` only for complex problems that require deep reasoning
2. **Monitor token usage**: Reasoning can significantly increase token consumption - monitor your `reasoning_tokens` in the usage object
3. **Stream for better UX**: When building user-facing applications, enable streaming to show the reasoning process in real-time
4. **Check logs**: Review the `reasoningContent` in your dashboard logs to understand how models are solving problems
## Error Handling [#error-handling-2]
If you specify `reasoning_effort` for a model that doesn't support reasoning, you'll receive an error:
```json
{
"error": {
"message": "Model gpt-4o does not support reasoning. Remove the reasoning_effort parameter or use a reasoning-capable model.",
"type": "invalid_request_error",
"code": "model_not_supported"
}
}
```
To avoid this error, only use the `reasoning_effort` parameter with [reasoning-enabled models](https://llmgateway.io/models?filters=1\&reasoning=true).
# Rerank
URL: https://docs.llmgateway.io/features/rerank
# Rerank [#rerank]
LLMGateway exposes a Cohere-compatible `/v1/rerank` endpoint that scores a list
of candidate documents against a query and returns them ordered by relevance.
Rerankers are cross-encoders: they read the query and a document *together*
rather than embedding each in isolation. That makes them far more accurate than
vector similarity, but too slow to run over a whole corpus. The usual pattern is
two-stage retrieval — use [embeddings](https://docs.llmgateway.io/features/embeddings) to cheaply fetch
the top \~100 candidates, then rerank those down to the handful you actually put
in the prompt.
Browse available rerank models on the
[models page](https://llmgateway.io/models?filters=1\&rerank=true).
For the full request and response schema, see the
[API reference](https://docs.llmgateway.io/v1_rerank).
## Endpoint [#endpoint]
`POST https://api.llmgateway.io/v1/rerank`
## cURL [#curl]
```bash
curl -X POST "https://api.llmgateway.io/v1/rerank" \
-H "Authorization: Bearer $LLM_GATEWAY_API_KEY" \
-H "Content-Type: application/json" \
-d '{
"model": "qwen3-reranker-8b",
"query": "What is the capital of France?",
"documents": [
"Paris is the capital of France.",
"Berlin is the capital of Germany.",
"Madrid is the capital of Spain."
],
"top_n": 2
}'
```
```json
{
"id": "kK1sT9pQ2mR7vX4nB6cL8dF3gH5jW0yZaA2eS4uI",
"results": [
{ "index": 0, "relevance_score": 0.9781517386436462 },
{ "index": 1, "relevance_score": 0.00010548105638008565 }
],
"meta": {
"api_version": { "version": "1" },
"billed_units": { "input_tokens": 255, "total_tokens": 255 }
}
}
```
Results are sorted by `relevance_score` descending. Each `index` refers back to
the position of that document in the request's `documents` array, so you can map
scores onto your own records without relying on the returned text.
The response `id` echoes the `x-request-id` header when you send one, which is
handy for correlating a rerank call with its entry in the activity log.
## Request fields [#request-fields]
| Field | Type | Description |
| -------------------- | ---------- | ------------------------------------------------------------------------- |
| `model` | `string` | Rerank model to use. Optionally prefixed with a provider (`deepinfra/…`). |
| `query` | `string` | The search query to rank documents against. |
| `documents` | `string[]` | Candidate documents to score. At least one. |
| `top_n` | `number` | Return only the top N results. Defaults to all documents. |
| `return_documents` | `boolean` | Include the document text on each result. Defaults to `false`. |
| `max_chunks_per_doc` | `number` | Maximum chunks per document. Accepted, but not every provider honors it. |
## Two-stage retrieval [#two-stage-retrieval]
```ts
// 1. Cheap recall: embed the query and pull the top 100 candidates
// from your vector store.
const candidates = await vectorStore.search(queryEmbedding, { limit: 100 });
// 2. Precise ordering: rerank those candidates and keep the best 5.
const res = await fetch("https://api.llmgateway.io/v1/rerank", {
method: "POST",
headers: {
Authorization: `Bearer ${process.env.LLM_GATEWAY_API_KEY}`,
"Content-Type": "application/json",
},
body: JSON.stringify({
model: "qwen3-reranker-8b",
query,
documents: candidates.map((c) => c.text),
top_n: 5,
}),
});
const { results } = await res.json();
const topDocuments = results.map((r) => candidates[r.index]);
```
Rerank models are billed on input tokens only — the query and every document
you send are scored as input. There are no output tokens, since the response
is a list of scores rather than generated text. Sending 100 long documents
costs real money, so keep the first-stage candidate set tight.
Rerank models only work on `/v1/rerank`. Requesting one on
`/v1/chat/completions` returns a 400 pointing you at the right endpoint, and
they are not available in the playground.
# Response Healing
URL: https://docs.llmgateway.io/features/response-healing
# Response Healing [#response-healing]
Response Healing is a plugin that automatically validates and repairs malformed JSON responses from AI models. When enabled, LLM Gateway ensures that API responses conform to your specified schemas even when the model's formatting is imperfect.
## Why Response Healing? [#why-response-healing]
Large language models occasionally produce invalid JSON, especially in complex scenarios:
* **Markdown wrapping**: Models often wrap JSON in code blocks like \`\`\`json...\`\`\`
* **Mixed content**: JSON may be preceded or followed by explanatory text
* **Syntax errors**: Trailing commas, unquoted keys, or single quotes instead of double quotes
* **Truncated output**: Token limits may cut off responses mid-JSON
Response Healing automatically detects and fixes these issues, saving you from implementing error handling for every possible malformed response.
## Enabling Response Healing [#enabling-response-healing]
To enable Response Healing, add `response-healing` to the `plugins` array in your request:
```bash
curl -X POST "https://api.llmgateway.io/v1/chat/completions" \
-H "Authorization: Bearer $LLM_GATEWAY_API_KEY" \
-H "Content-Type: application/json" \
-d '{
"model": "gpt-4o",
"messages": [{"role": "user", "content": "Return a JSON object with name and age"}],
"response_format": {"type": "json_object"},
"plugins": [{"id": "response-healing"}]
}'
```
Response Healing only activates when `response_format` is set to `json_object`
or `json_schema`. For regular text responses, the plugin has no effect.
## How It Works [#how-it-works]
When Response Healing is enabled, LLM Gateway applies a series of repair strategies to malformed JSON responses:
### 1. Markdown Extraction [#1-markdown-extraction]
Extracts JSON from markdown code blocks:
```text
Here's the data:
\`\`\`json
{"name": "Alice", "age": 30}
\`\`\`
```
Becomes:
```json
{ "name": "Alice", "age": 30 }
```
### 2. Mixed Content Extraction [#2-mixed-content-extraction]
Separates JSON from surrounding text:
```text
Sure! Here is the JSON you requested: {"name": "Alice", "age": 30} Let me know if you need anything else.
```
Becomes:
```json
{ "name": "Alice", "age": 30 }
```
### 3. Syntax Fixes [#3-syntax-fixes]
Repairs common JSON syntax violations:
| Issue | Before | After |
| --------------- | ------------------- | ------------------- |
| Trailing commas | `{"a": 1,}` | `{"a": 1}` |
| Unquoted keys | `{name: "Alice"}` | `{"name": "Alice"}` |
| Single quotes | `{'name': 'Alice'}` | `{"name": "Alice"}` |
### 4. Truncation Completion [#4-truncation-completion]
Adds missing closing brackets for truncated responses:
```text
{"name": "Alice", "data": {"nested": true
```
Becomes:
```json
{ "name": "Alice", "data": { "nested": true } }
```
## Usage Examples [#usage-examples]
### With JSON Object Format [#with-json-object-format]
Request a structured response with automatic healing:
```typescript
const response = await fetch("https://api.llmgateway.io/v1/chat/completions", {
method: "POST",
headers: {
Authorization: `Bearer ${process.env.LLM_GATEWAY_API_KEY}`,
"Content-Type": "application/json",
},
body: JSON.stringify({
model: "gpt-4o",
messages: [
{
role: "user",
content:
"Return a JSON object with fields: name (string) and age (number)",
},
],
response_format: { type: "json_object" },
plugins: [{ id: "response-healing" }],
}),
});
const result = await response.json();
// Response is guaranteed to be valid JSON
const data = JSON.parse(result.choices[0].message.content);
```
### With JSON Schema [#with-json-schema]
For stricter validation, combine with `json_schema`:
```typescript
const response = await fetch("https://api.llmgateway.io/v1/chat/completions", {
method: "POST",
headers: {
Authorization: `Bearer ${process.env.LLM_GATEWAY_API_KEY}`,
"Content-Type": "application/json",
},
body: JSON.stringify({
model: "gpt-4o",
messages: [
{
role: "user",
content: "Generate a user profile",
},
],
response_format: {
type: "json_schema",
json_schema: {
name: "user_profile",
schema: {
type: "object",
required: ["name", "email"],
properties: {
name: { type: "string" },
email: { type: "string" },
age: { type: "number" },
},
},
},
},
plugins: [{ id: "response-healing" }],
}),
});
const result = await response.json();
```
## Healing Metadata [#healing-metadata]
When a response is healed, the healing method is logged for debugging. The following healing methods may be applied:
| Method | Description |
| -------------------------- | ------------------------------------------- |
| `markdown_extraction` | JSON extracted from markdown code blocks |
| `mixed_content_extraction` | JSON extracted from surrounding text |
| `syntax_fix` | Trailing commas, quotes, or keys were fixed |
| `truncation_completion` | Missing closing brackets were added |
| `combined_strategies` | Multiple strategies were applied |
## Limitations [#limitations]
Response Healing is only available for non-streaming requests. Streaming
responses are returned as-is without healing.
Response Healing works best for:
* Simple to moderately complex JSON structures
* Common formatting issues from LLMs
It may not be able to repair:
* Severely corrupted or nonsensical output
* Complex nested structures with multiple issues
* Responses that don't contain any recognizable JSON
## Best Practices [#best-practices]
### Use with Structured Prompts [#use-with-structured-prompts]
Combine Response Healing with clear instructions for best results:
```typescript
const response = await fetch("https://api.llmgateway.io/v1/chat/completions", {
method: "POST",
headers: {
Authorization: `Bearer ${process.env.LLM_GATEWAY_API_KEY}`,
"Content-Type": "application/json",
},
body: JSON.stringify({
model: "gpt-4o",
messages: [
{
role: "system",
content: "Always respond with valid JSON. No explanations.",
},
{
role: "user",
content: "List three colors as a JSON array",
},
],
response_format: { type: "json_object" },
plugins: [{ id: "response-healing" }],
}),
});
const result = await response.json();
```
### Validate Critical Data [#validate-critical-data]
For critical applications, validate the healed JSON in your code:
```typescript
const result = await response.json();
const content = result.choices[0].message.content;
const data = JSON.parse(content);
// Add your own validation
if (!data.name || typeof data.name !== "string") {
throw new Error("Invalid response: missing name");
}
```
### Monitor Healing Rates [#monitor-healing-rates]
If you notice frequent healing in your logs, consider:
* Improving your prompts to request cleaner JSON
* Using models with better JSON output (e.g., GPT-4o, Claude 3.5)
* Adding explicit JSON examples in your prompts
# Routing
URL: https://docs.llmgateway.io/features/routing
# Routing [#routing]
LLMGateway provides flexible and intelligent routing options to help you get the best performance and cost efficiency from your AI applications. Whether you want to use specific models, providers, or let our system automatically optimize your requests, we've got you covered.
LLMGateway also includes **automatic retry and fallback** — if a provider fails, your request is seamlessly retried on the next best provider, all within the same API call.
## Model Selection [#model-selection]
### Any Model Name [#any-model-name]
You can use any model name from our [models page](https://llmgateway.io/models) or discover available models programmatically through the [/v1/models endpoint](https://docs.llmgateway.io/v1_models).
```bash
curl -X POST "https://api.llmgateway.io/v1/chat/completions" \
-H "Authorization: Bearer $LLM_GATEWAY_API_KEY" \
-H "Content-Type: application/json" \
-d '{
"model": "gpt-4o",
"messages": [{"role": "user", "content": "Hello!"}]
}'
```
### Model ID Routing [#model-id-routing]
Choose a specific model ID to route to the **best available provider** for that model. LLMGateway's smart routing algorithm considers multiple factors to find the optimal provider across all configured options.
#### Smart Routing Algorithm [#smart-routing-algorithm]
When you use a model ID without a provider prefix, LLMGateway's intelligent routing system analyzes multiple factors to select the best provider.
**Weighted Scoring System**:
Each factor has a **relative weight**. The factors are scored as ratios against the best provider in the candidate set (e.g. a provider that is twice as expensive as the cheapest scores `1.0` on price), and each ratio is multiplied by its weight divided by the sum of all active weights. The provider with the lowest (best) total score wins.
The default weights are:
| Factor | Default weight | Notes |
| --------------- | -------------- | -------------------------------------------------------------------------- |
| **Price** | `0.6` | Cost efficiency (average of input and output price) |
| **Uptime** | `0.5` | Provider reliability / low error rate |
| **Throughput** | `0.05` | Tokens per second generation speed |
| **Latency** | `0.025` | Time to first token — **only applied for streaming requests** |
| **Cache** | `0.2` | Prompt-cache support — **only applied for large prompts** (≥ 5,000 tokens) |
| **Image price** | `1.0` | Replaces the price weight for image-generation models |
Because the weights are relative and normalized by the sum of the active weights, price and uptime dominate routing decisions in practice, while throughput and latency act as tie-breakers between otherwise comparable providers.
**Latency Weight for Non-Streaming Requests**:
The latency weight only applies to streaming requests (time-to-first-token is only measured there). For non-streaming requests the latency weight is dropped and its share is redistributed proportionally across the remaining factors.
**Time-Decayed Metrics Window**:
Provider metrics (uptime, throughput, latency) are not a flat "last N minutes" snapshot. They are aggregated over a rolling **60-minute window** with a time-decay weighting so very recent behavior dominates while older data still contributes:
* The most recent **1 minute** is weighted **10×**
* The most recent **5 minutes** are weighted **3×**
* The remainder of the 60-minute window is weighted **1×**
This makes routing react quickly to a provider that just started failing or slowing down, without overreacting to a single noisy data point.
**Cache Support for Large Prompts**:
When the estimated prompt is at least 5,000 tokens, the **cache weight** (default `0.2`) is factored into the score based on whether each provider supports prompt caching (advertised via a cached input price). Providers that support caching score better than ones that do not, since caching can substantially reduce the cost of large or repeated prompts. Below the 5,000-token threshold, this weight is dropped entirely — caching has little impact on small prompts, so cache support is ignored. The selected provider's cache support is exposed as `cacheSupported` on the routing metadata.
**Exponential Uptime Penalty**:
Providers with uptime below 95% receive an additional exponential penalty that increases rapidly as uptime drops:
* 95-100% uptime: No penalty
* 90% uptime: \~0.07 penalty
* 80% uptime: \~0.62 penalty
* 70% uptime: \~1.73 penalty
* 50% uptime: \~5.61 penalty
This ensures providers experiencing significant issues are strongly deprioritized while minor fluctuations have minimal impact. The penalty threshold (default `95%`) is configurable.
**Provider Priority**:
Each provider has a **priority** value (default `1`) that nudges routing toward or away from it independently of live metrics:
* A provider's priority is applied as a `(1 - priority)` adjustment to its score — higher priority lowers the score (more preferred), lower priority raises it (less preferred).
* A priority of **0** disables the provider entirely, removing it from routing for that model.
Provider priorities are surfaced in the routing metadata so you can see how they influenced a decision.
**Epsilon-Greedy Exploration** (1% of requests by default):
To solve the "cold start problem" where new or unused providers never get traffic to build up metrics, the system randomly explores different providers a small fraction of the time (default 1%, configurable). This ensures:
* All providers periodically receive traffic
* New providers can prove their reliability
* The system adapts to changing provider performance
* You benefit from improved routing decisions over time
The exploration rate is configurable per project through the routing configuration (`thresholds.explorationRate`), and self-hosted deployments can override it globally with the `EXPLORATION_RATE` environment variable (a number between `0` and `1`).
**Stable Provider Preference**:
To avoid unnecessary churn between providers that score similarly, LLMGateway remembers the best provider chosen for each model and sticks with it across requests — even if another provider edges ahead slightly on the next score calculation.
On every routing decision, the system checks whether the previously selected provider is still acceptable:
* **Uptime hard switch**: if the preferred provider's uptime drops below **85%**, routing switches to the current best-scoring provider immediately.
* **Score margin soft switch**: the preferred provider is replaced only when a better option's score is more than **0.15** ahead. Small fluctuations caused by metric noise or minor price differences do not trigger a switch.
* **Periodic re-evaluation**: the preference expires after **1 hour**, at which point the next request picks the best-scoring provider fresh and stores it as the new preferred.
Requests that are part of the epsilon-greedy exploration bypass this preference entirely so that all providers continue to receive periodic traffic and build up metrics.
The selection reason in routing metadata will show `stable-preferred` when a request was served by the stored preference rather than the top-scored provider at that moment.
Self-hosted deployments can tune this behavior with three environment
variables: `PREFERRED_PROVIDER_TTL` (preference lifetime in seconds, default
`3600`), `PREFERRED_PROVIDER_UPTIME_THRESHOLD` (hard-switch uptime floor,
default `85`), and `PREFERRED_PROVIDER_SCORE_MARGIN` (soft-switch score gap,
default `0.15`). On the **Enterprise plan**, these same values can be
customized per project from the dashboard — see [Per-Project Routing
Configuration](#per-project-routing-configuration-enterprise).
**Routing Metadata**:
Every request includes detailed routing metadata in the logs, showing:
* Available providers that were considered
* Selected provider and selection reason
* Scores for each provider (including uptime, throughput, latency, price, priority, and cache support)
This transparency allows you to understand and debug routing decisions.
Using model IDs without a provider prefix automatically routes to the optimal
provider based on reliability, speed, and cost. The system continuously learns
and adapts based on real-time performance metrics.
Smart routing prioritizes reliability over cost, ensuring your requests are
routed to providers with proven uptime and performance, while still
considering cost efficiency.
### Routing Strategy [#routing-strategy]
By default, model-ID routing uses the full weighted score described above (`routing: "auto"`). When you care about a single dimension, set the `routing` field — named after the factor it optimizes — to bias provider selection toward it:
| Strategy | Behavior |
| ---------------------------- | ------------------------------------------------------------------------------------ |
| `auto` *(default)* | Full weighted smart-routing score (price, uptime, throughput, latency, cache). |
| `price` | Gives price a **90% relative weight**, so the cheapest provider almost always wins. |
| `throughput` | Gives throughput a **90% relative weight**, so the fastest-generating provider wins. |
| `latency` | Gives latency a **90% relative weight**, so the lowest time-to-first-token wins. |
Each non-`auto` strategy keeps a small (10%) uptime weight, and the [exponential uptime penalty](#smart-routing-algorithm) still applies on top. This means the dominant pick is still skipped in favor of another provider when it has extremely bad uptime — you get the cheapest (or fastest) provider that is actually healthy, not one that is effectively down.
Because time-to-first-token is only measured for streaming requests, `routing: "latency"` only biases streaming requests; for non-streaming requests it falls back to selecting on uptime.
```bash
# Always pick the cheapest healthy provider for this model
curl -X POST "https://api.llmgateway.io/v1/chat/completions" \
-H "Authorization: Bearer $LLM_GATEWAY_API_KEY" \
-H "Content-Type: application/json" \
-d '{
"model": "deepseek-v3.2",
"messages": [{"role": "user", "content": "Hello!"}],
"routing": "price"
}'
```
```bash
# Always pick the highest-throughput healthy provider for this model
curl -X POST "https://api.llmgateway.io/v1/chat/completions" \
-H "Authorization: Bearer $LLM_GATEWAY_API_KEY" \
-H "Content-Type: application/json" \
-d '{
"model": "deepseek-v3.2",
"messages": [{"role": "user", "content": "Hello!"}],
"routing": "throughput"
}'
```
The `routing` field only applies to model-id routing. Combining it with a
specific provider (e.g. `openai/gpt-4o`) returns a `400` error, since the
strategy can't influence a pinned provider — remove the provider prefix to use
a strategy. On **coding (dev) plans**, only `auto` and `price` are allowed;
the other strategies return a `400` error because they would bypass the
prompt-cache–aware routing those plans depend on.
### Sticky Session Routing [#sticky-session-routing]
When a model is served by multiple providers, every request is normally scored independently — so a multi-turn conversation can bounce between providers. That defeats provider-side **prompt caching**, which only pays off when consecutive requests with a shared prefix hit the **same** provider.
Sticky session routing solves this: attach a session identifier and LLMGateway pins all requests for that session to a single provider (and region), keeping the upstream prompt cache warm across the whole conversation.
#### Setting the session id [#setting-the-session-id]
For chat completions, the session key is resolved in priority order:
1. The `x-session-id` header
2. The `prompt_cache_key` body field (OpenAI-compatible)
3. The `user` body field (OpenAI-compatible)
```bash
curl -X POST "https://api.llmgateway.io/v1/chat/completions" \
-H "Authorization: Bearer $LLM_GATEWAY_API_KEY" \
-H "Content-Type: application/json" \
-H "x-session-id: conversation-9f8e7d6c" \
-d '{
"model": "claude-sonnet-4-6",
"messages": [{"role": "user", "content": "Hello!"}]
}'
```
For the Anthropic Messages endpoint (`/v1/messages`), the session key is derived automatically from `metadata.user_id` — coding agents such as Claude Code embed the session id there — and forwarded internally. An explicit `x-session-id` header still takes precedence.
#### How pinning works [#how-pinning-works]
On a session's **first** request the provider is chosen by the normal weighted smart-routing score — the same price-, priority-, uptime-, and throughput-aware algorithm used for non-sticky requests. That choice is then **persisted for the session** and reused on every subsequent request, so the upstream prompt cache stays warm without bouncing the conversation between providers.
Because the pinned provider is replayed directly, sticky requests **skip the epsilon-greedy exploration** — a session is never randomly bounced to a different provider mid-conversation.
#### Falling back when a provider is down [#falling-back-when-a-provider-is-down]
An established pin yields only when its provider can no longer serve the session well. A session is re-scored and re-pinned to the current weighted-best provider when its provider:
* Drops below the session uptime threshold (default 85%),
* Is filtered out by health checks (e.g. excluded for low uptime), or
* Fails the request and is dropped by the [automatic retry & fallback](#automatic-retry--fallback) loop.
Re-pinning runs the same weighted algorithm again, so the replacement is the best currently available provider — not an arbitrary one.
The selection reason in routing metadata shows `session-sticky` when a request was pinned via a session id.
Sticky routing optimizes for cache locality over per-request churn. Once a
session is pinned it stays on its provider even if a cheaper or faster
alternative becomes momentarily available, since the prompt-cache savings
typically outweigh the difference — but the initial pick still respects price
and priority. Requests without a session id are unaffected and continue to use
the weighted smart-routing algorithm.
### Provider-Specific Routing [#provider-specific-routing]
To use a specific provider without any fallbacks, prefix the model name with the provider name followed by a slash:
```bash
# Use OpenAI specifically
curl -X POST "https://api.llmgateway.io/v1/chat/completions" \
-H "Authorization: Bearer $LLM_GATEWAY_API_KEY" \
-H "Content-Type: application/json" \
-d '{
"model": "openai/gpt-4o",
"messages": [{"role": "user", "content": "Hello!"}]
}'
# Use DeepSeek provider specifically
curl -X POST "https://api.llmgateway.io/v1/chat/completions" \
-H "Authorization: Bearer $LLM_GATEWAY_API_KEY" \
-H "Content-Type: application/json" \
-d '{
"model": "deepseek/deepseek-v3.2",
"messages": [{"role": "user", "content": "Hello!"}]
}'
```
#### Regions [#regions]
Some providers expose the same model in multiple regions. In that case, LLMGateway supports two routing modes:
* `provider/model` selects the best eligible region for that provider using the same routing inputs used elsewhere: recent uptime, throughput, latency, and price
* `provider/model:region` pins the request to one exact region
```bash
# Let LLMGateway choose the best Alibaba region for DeepSeek V3.2
curl -X POST "https://api.llmgateway.io/v1/chat/completions" \
-H "Authorization: Bearer $LLM_GATEWAY_API_KEY" \
-H "Content-Type: application/json" \
-d '{
"model": "alibaba/deepseek-v3.2",
"messages": [{"role": "user", "content": "Hello!"}]
}'
# Force a specific Alibaba region
curl -X POST "https://api.llmgateway.io/v1/chat/completions" \
-H "Authorization: Bearer $LLM_GATEWAY_API_KEY" \
-H "Content-Type: application/json" \
-d '{
"model": "alibaba/deepseek-v3.2:cn-beijing",
"messages": [{"role": "user", "content": "Hello!"}]
}'
```
If your provider key stores an explicit region, that region acts like a lock and LLMGateway will only use that region for provider-specific requests. If no explicit region is configured on the provider key, provider-specific requests can still score all eligible regions for that provider.
Routing metadata reflects this:
* Dynamic provider-region selection shows all eligible regional scores that were considered
* Explicitly pinned regions show only the pinned region in the score list
Region-aware routing only compares regions that are actually available for the
current project mode and provider setup. In credits mode, that means only
regions backed by configured environment keys. In API keys and hybrid mode, an
explicit provider-key region restricts the request to that region.
#### Low-Uptime Protection [#low-uptime-protection]
When you specify a provider explicitly, LLMGateway checks the provider's recent uptime (from the time-decayed metrics window described above). If the uptime falls below 90%, the system automatically routes your request to the best available alternative provider to ensure reliability. This protects your application from providers experiencing temporary issues. The fallback threshold (default `90%`) is configurable.
If the requested provider has low uptime but no alternative providers are
available for that model, the request will still be sent to the originally
requested provider.
#### Disabling Fallback with X-No-Fallback Header [#disabling-fallback-with-x-no-fallback-header]
If you need to bypass this protection and always use the exact provider you specified regardless of its current uptime, you can use the `X-No-Fallback` header:
```bash
# Force use of a specific provider even if it has low uptime
curl -X POST "https://api.llmgateway.io/v1/chat/completions" \
-H "Authorization: Bearer $LLM_GATEWAY_API_KEY" \
-H "Content-Type: application/json" \
-H "X-No-Fallback: true" \
-d '{
"model": "openai/gpt-4o",
"messages": [{"role": "user", "content": "Hello!"}]
}'
```
Using `X-No-Fallback: true` disables automatic provider failover. Your
requests will be sent to the specified provider even if it is experiencing
issues, which may result in higher error rates. Retries may still occur
against another key for the same provider when multiple keys are configured.
When the `X-No-Fallback` header is used, the routing metadata in logs will include `noFallback: true` to indicate that fallback was disabled for that request.
## Automatic Retry & Fallback [#automatic-retry--fallback]
When using model ID routing (without a provider prefix), LLMGateway automatically retries failed requests on alternate providers. This happens transparently within the same API call — your application receives the successful response as if nothing went wrong.
### How Retry Works [#how-retry-works]
1. Your request is routed to the best available provider using the smart routing algorithm
2. If that provider returns a server error (5xx), times out, or has a connection failure, the gateway marks the provider as failed
3. The next best available provider is selected and the request is retried
4. Up to **2 retries** are attempted before returning an error to the client
```
Request → Provider A (500 error) → Provider B (200 OK) → Response
```
Both streaming and non-streaming requests support automatic retry.
### What Triggers a Retry [#what-triggers-a-retry]
Retries are triggered by **server-side failures** only:
* **5xx errors** (500 Internal Server Error, 502 Bad Gateway, 503 Service Unavailable, etc.)
* **Timeouts** (upstream provider took too long to respond)
* **Connection failures** (network errors, DNS failures, etc.)
Retries are **not** triggered by:
* **4xx client errors** (400 Bad Request, 401 Unauthorized, 403 Forbidden, 422 Unprocessable Entity)
* **Content filter responses** (Azure ResponsibleAI, etc.)
### When Retry Is Disabled [#when-retry-is-disabled]
Automatic retry to a different provider is disabled when:
* The `X-No-Fallback: true` header is set
* A specific provider is requested (e.g., `openai/gpt-4o`)
* No alternative providers are available for the requested model
* The maximum retry count (2) has been exhausted
Retries can still happen within the same provider when multiple keys are
configured and the current key fails with a retryable error.
### Routing Transparency [#routing-transparency]
Every provider attempt — both failed and successful — is recorded in the `routing` array in the response metadata and activity logs:
```json
{
"metadata": {
"routing": [
{
"provider": "openai",
"model": "gpt-4o",
"status_code": 500,
"error_type": "server_error",
"succeeded": false
},
{
"provider": "azure",
"model": "gpt-4o",
"status_code": 200,
"error_type": "none",
"succeeded": true
}
]
}
}
```
### Retried Log Tracking [#retried-log-tracking]
Each provider attempt creates its own log entry. Failed attempts that were retried are marked with:
* **`retried: true`** — indicates this failed request was retried on another provider
* **`retriedByLogId`** — the ID of the final successful log entry
This allows you to distinguish between unrecovered failures and failures that were transparently recovered via retry. In the dashboard, retried logs display a "Retried" badge with a link to the successful log.
### Impact on Provider Health [#impact-on-provider-health]
Failed attempts still count against the provider's uptime score, even when the request was successfully retried on another provider. This means:
* A provider that keeps failing will see its uptime score drop
* The exponential uptime penalty kicks in below 95% (see [Smart Routing Algorithm](#smart-routing-algorithm))
* Future requests are automatically routed away from unreliable providers
* Your application stays reliable without any code changes on your side
Automatic retry and fallback works together with smart routing to provide
self-healing behavior. Failing providers are automatically avoided, and your
requests are transparently recovered on reliable alternatives.
## Per-Project Routing Configuration (Enterprise) [#per-project-routing-configuration-enterprise]
The values described above — scoring weights, thresholds, retry behavior, the metrics window, sticky-routing, and per-provider priorities — are the **defaults** that apply to every project. On the **Enterprise plan**, you can override any of them **per project** from the dashboard under **Project Settings → Routing**. Projects on other plans always use the defaults.
Overrides are merged on top of the defaults, so you only set the values you want to change. When a custom configuration is disabled, the project falls back to the defaults.
The following groups can be customized per project:
| Group | What it controls | Defaults |
| ----------------------- | ------------------------------------------------------------------------------------------------------------------------------------------------------------------------------------ | ---------------------------------------------------------------------------------------------------------------------------------------- |
| **Weights** | Relative importance of each scoring factor | `price 0.6`, `imagePrice 1.0`, `uptime 0.5`, `throughput 0.05`, `latency 0.025`, `cache 0.2` |
| **Thresholds** | Cache prompt-size threshold, uptime-penalty threshold, exploration rate, and the assumed defaults used when no metrics exist | `cachePromptTokens 5000`, `uptimePenalty 95`, `defaultUptime 100`, `defaultLatency 1000`, `defaultThroughput 50`, `explorationRate 0.01` |
| **Retry** | Max cross-provider fallback attempts and the low-uptime reroute threshold | `maxRetries 2`, `lowUptimeFallbackThreshold 90` |
| **Timeouts** | Per-request time limits (end-to-end, streaming, non-streaming) — see [Request Timeouts](https://docs.llmgateway.io/features/timeouts). Capped at the infrastructure defaults — an override can only lower them | `gatewayMs 1,500,000`, `streamingMs 1,200,000`, `plainMs 600,000` |
| **History** | The metrics window and the time-decay tier boundaries and weights | `windowMinutes 60` (max 120), `tier1Minutes 1`, `tier2Minutes 5`, `tier1Weight 10`, `tier2Weight 3`, `tier3Weight 1` |
| **Sticky** | Stable-provider preference: on/off, TTL, hard-switch uptime floor, soft-switch score margin | `enabled true`, `ttlSeconds 3600`, `uptimeThreshold 85`, `scoreMargin 0.15` |
| **Provider priorities** | Per-provider priority multipliers; set a provider to `0` to disable it for that project | `1` for every provider |
Per-project routing configuration requires the Enterprise plan. If you'd like
to tune routing for your workloads, contact us at [contact@llmgateway.io](mailto:contact@llmgateway.io).
## Optimized Auto Routing [#optimized-auto-routing]
Auto routing automatically selects the best model for your specific use case without you having to specify a model at all.
### Current Implementation [#current-implementation]
The auto routing system currently:
* **Chooses cost-effective models** by default for optimal price-to-performance ratio
* **Automatically scales to more powerful models** based on your request's context size
* **Handles large contexts intelligently** by selecting models with appropriate context windows
```bash
# Let LLMGateway choose the optimal model
curl -X POST "https://api.llmgateway.io/v1/chat/completions" \
-H "Authorization: Bearer $LLM_GATEWAY_API_KEY" \
-H "Content-Type: application/json" \
-d '{
"model": "auto",
"messages": [{"role": "user", "content": "Your request here..."}]
}'
```
### Free Models Only [#free-models-only]
When using auto routing, you can restrict the selection to only free models (models with zero input and output pricing) by setting the `free_models_only` parameter to `true`:
```bash
# Auto route to free models only
curl -X POST "https://api.llmgateway.io/v1/chat/completions" \
-H "Authorization: Bearer $LLM_GATEWAY_API_KEY" \
-H "Content-Type: application/json" \
-d '{
"model": "auto",
"messages": [{"role": "user", "content": "Hello!"}],
"free_models_only": true
}'
```
Adding even a small amount of credits to your account (e.g., $10) will
immediately upgrade your free model rate limits from 5 requests per 10 minutes
to 20 requests per minute.
The `free_models_only` parameter only works with auto routing (`"model":
"auto"`). If no free models are available that meet your request requirements,
the API will return an error.
### Reasoning models only [#reasoning-models-only]
Just specify the `reasoning_effort` value and only a model which supports reasoning will be chosen. This parameter is not specific to the auto model.
```bash
# Auto route only to reasoning models
curl -X POST "https://api.llmgateway.io/v1/chat/completions" \
-H "Authorization: Bearer $LLM_GATEWAY_API_KEY" \
-H "Content-Type: application/json" \
-d '{
"model": "auto",
"messages": [{"role": "user", "content": "Hello!"}],
"reasoning_effort": "medium"
}'
```
### Exclude Reasoning Models [#exclude-reasoning-models]
When using auto routing, you can exclude reasoning models from selection by setting the `no_reasoning` parameter to `true`. This is useful when you want faster responses or need to avoid the additional cost and latency of reasoning models:
```bash
# Auto route excluding reasoning models
curl -X POST "https://api.llmgateway.io/v1/chat/completions" \
-H "Authorization: Bearer $LLM_GATEWAY_API_KEY" \
-H "Content-Type: application/json" \
-d '{
"model": "auto",
"messages": [{"role": "user", "content": "Hello!"}],
"no_reasoning": true
}'
```
The `no_reasoning` parameter only works with auto routing (`"model": "auto"`).
If no non-reasoning models are available that meet your request requirements,
the API will return an error.
Auto routing analyzes your payload and automatically chooses between
cost-effective models for simple requests and more powerful models for complex
or large-context requests.
### Coming Soon: Advanced Optimization [#coming-soon-advanced-optimization]
We're continuously improving our auto routing capabilities. Soon you'll benefit from:
* **Tool call optimization**: Automatically select models that excel at function calling and structured outputs
* **Content-aware routing**: Analyze message content to determine the best model for specific types of requests (coding, creative writing, analysis, etc.)
* **Performance-based routing**: Route based on historical performance data for similar requests
* **Multi-model orchestration**: Intelligently combine multiple models for complex workflows
### How It Works [#how-it-works]
1. **Request Analysis**: The system analyzes your request including message content, context size, and any special parameters
2. **Model Selection**: Based on the analysis, it selects the most appropriate model considering cost, performance, and capabilities
3. **Transparent Routing**: Your request is seamlessly routed to the chosen model and provider
4. **Optimized Response**: You receive the best possible response while maintaining cost efficiency
Auto routing decisions are transparent in your usage logs, so you can always
see which model was selected for each request.
## Best Practices [#best-practices]
### For Development [#for-development]
* Use specific model names during development and testing
* Leverage auto routing for production workloads to optimize costs
### For Production [#for-production]
* Use auto routing (`"model": "auto"`) for the best balance of cost and performance
* Monitor your usage patterns through the dashboard to understand routing decisions
* Set up provider keys for multiple providers to maximize routing options
### For Cost Optimization [#for-cost-optimization]
* Let auto routing handle model selection to automatically use the most cost-effective options
* Use model IDs without provider prefixes to always get the cheapest available provider
* Monitor your usage analytics to track cost savings from intelligent routing
# Service Tiers
URL: https://docs.llmgateway.io/features/service-tiers
# Service Tiers [#service-tiers]
Some OpenAI and Google models support selectable **processing tiers** that trade
latency and availability against price. You pick one per request with the
OpenAI-compatible `service_tier` parameter, and LLM Gateway forwards it only
when the selected provider/model mapping supports that tier.
| Tier | `service_tier` | Cost vs. standard | Latency / availability |
| ------------ | ------------------------- | ----------------- | ------------------------------------------- |
| Standard | `default` / `auto` / omit | baseline | Normal on-demand latency |
| **Flex** | `flex` | **−50%** | Best-effort; may be preempted under load |
| **Priority** | `priority` | varies by model | Prioritized above standard and flex traffic |
## Using the `service_tier` parameter [#using-the-service_tier-parameter]
```bash
curl -X POST "https://api.llmgateway.io/v1/chat/completions" \
-H "Authorization: Bearer $LLM_GATEWAY_API_KEY" \
-H "Content-Type: application/json" \
-d '{
"model": "google-vertex/gemini-2.5-pro",
"service_tier": "priority",
"messages": [
{ "role": "user", "content": "Summarize this incident report." }
]
}'
```
Accepted values are `flex`, `priority`, and `default`/`auto` (standard). If you
request `flex` or `priority` for a provider/model mapping that does not support
that tier, the gateway returns a 400 `unsupported_service_tier` error and logs
the request as a client error.
The parameter works the same on the OpenAI-compatible **Responses API**
(`/v1/responses`): the tier is forwarded to the provider and the response's
`service_tier` field echoes the tier that was actually served.
## Supported providers [#supported-providers]
Service tiers are explicit per provider/model mapping. Check the model page for
the exact tiers exposed by each provider card.
* **OpenAI** (`openai`) — sent as the OpenAI `service_tier` request field for
supported OpenAI models. Flex is billed at 0.5x standard token prices and
Priority uses the model-specific multiplier shown on the model page.
* **Google Vertex AI** (`google-vertex`) — sent as the
`X-Vertex-AI-LLM-Shared-Request-Type` request header, together with
`X-Vertex-AI-LLM-Request-Type: shared` so the request bypasses any Provisioned
Throughput on the project and actually reaches the shared Flex/Priority tier.
Flex and Priority are served only on the **global** endpoint, which is the
gateway default. Google Flex PayGo applies a 0.5x multiplier; Google Priority
PayGo applies a 1.8x multiplier.
* **Google AI Studio / Gemini API** (`google-ai-studio`) — sent as a
`service_tier` field in the request body for configured models that opt in.
Tiers are supported on a **subset** of models, and the Flex and Priority
subsets differ by provider. For example, Google Flex PayGo lists Gemini 3
image / Nano Banana models, but Google Priority PayGo does not; those
configured image mappings are Flex-only.
Flex and Priority are only honored when the request reaches Google directly,
so a `google-vertex` / `google-ai-studio` provider key with a **custom base
URL** (a proxy) is excluded from service-tier routing — a proxy may silently
drop the tier and serve standard. With multiple providers/keys, the gateway
routes around the ineligible key automatically; if a request pins a provider
whose only key uses a custom base URL, it returns a 400 instead of silently
downgrading. Keys with no custom base URL (the managed default) are always
eligible.
## Pricing uses multipliers [#pricing-uses-multipliers]
Service tiers do not define separate model prices in LLM Gateway. They multiply
the provider mapping's standard token prices:
* Standard / `default` / `auto`: 1x
* Flex: 0.5x
* Priority: model/provider-specific, shown on the model page
The multiplier scales per-token costs, including input, output, cached, and
image tokens. Flat per-request and web-search fees are not tier-scaled.
## Billing follows the served tier [#billing-follows-the-served-tier]
When a provider reports the tier that was actually served, LLM Gateway bills
that returned tier instead of blindly billing the requested value:
* A `priority` request that runs as priority is billed at 2.5x.
* A `flex` request that runs as flex is billed at 0.5x.
* A request that is served as standard is billed at the standard 1x rate.
The served tier is read back from the provider response — Vertex reports it in
`usageMetadata.trafficType` (`ON_DEMAND_PRIORITY` / `ON_DEMAND_FLEX` /
`ON_DEMAND`), Google AI Studio reports it in the `x-gemini-service-tier`
response header, and OpenAI can return `service_tier` in response payloads or
stream events.
LLM Gateway rejects unsupported tier requests before provider routing. For
example, `gemini-3-pro-image-preview` currently exposes Flex for Google AI
Studio and Vertex, but not Priority.
You can see per-tier pricing for each model on its
[model page](https://llmgateway.io/models). Supported provider cards include a
Service Tier selector in the card header and show the active multiplier next to
each tier.
## Sources [#sources]
* [OpenAI API pricing](https://openai.com/api/pricing/)
* [Google Flex PayGo](https://docs.cloud.google.com/vertex-ai/generative-ai/docs/flex-paygo)
* [Google Priority PayGo](https://docs.cloud.google.com/gemini-enterprise-agent-platform/models/priority-paygo)
# Sessions
URL: https://docs.llmgateway.io/features/sessions
# Sessions [#sessions]
A **session** ties together the requests that belong to the same conversation or workflow. By attaching a stable session identifier to your requests, LLMGateway can treat them as a unit — keeping provider routing consistent across turns and letting you trace and filter the whole conversation in the dashboard.
Sessions are the foundation for several features. Today they power **sticky provider routing** and **session-level observability**; more session-scoped capabilities will build on the same identifier over time.
## Setting the session id [#setting-the-session-id]
For chat completions, the session key is resolved in priority order — the first present value wins:
1. The `x-session-id` header
2. The `x-session-affinity` header (sent automatically by coding agents such as opencode)
3. The `prompt_cache_key` body field (OpenAI-compatible)
4. The `user` body field (OpenAI-compatible)
```bash
curl -X POST "https://api.llmgateway.io/v1/chat/completions" \
-H "Authorization: Bearer $LLM_GATEWAY_API_KEY" \
-H "Content-Type: application/json" \
-H "x-session-id: conversation-9f8e7d6c" \
-d '{
"model": "claude-sonnet-4-6",
"messages": [{"role": "user", "content": "Hello!"}]
}'
```
Reuse the same session id for every request in a conversation. If you don't set any of the values above, the request simply has no session and behaves exactly as before.
### Anthropic Messages endpoint [#anthropic-messages-endpoint]
For the [Anthropic Messages endpoint](https://docs.llmgateway.io/features/anthropic-endpoint) (`/v1/messages`), the session key is derived automatically from `metadata.user_id`. Coding agents such as Claude Code send a JSON object there (e.g. `{"session_id":"",…}`); the gateway uses its `session_id` field. An explicit `x-session-id` header still takes precedence.
## Sticky provider routing [#sticky-provider-routing]
When a model is served by multiple providers, requests are normally scored independently, so a multi-turn conversation can bounce between providers. That defeats provider-side **prompt caching**, which only pays off when consecutive requests with a shared prefix reach the **same** provider.
With a session id set, LLMGateway scores the session's first request with the normal weighted smart-routing algorithm (price, priority, uptime, throughput) and then **pins that provider for the session**, reusing it on every subsequent request to keep the prompt cache warm. The session stays on that provider — skipping the epsilon-greedy exploration — and only moves when its provider drops below the session uptime threshold or leaves the available pool (health filtering or a failed request dropped by retry/fallback), at which point the session is re-scored and re-pinned to the current best provider.
See [Routing → Sticky Session Routing](https://docs.llmgateway.io/features/routing) for the full algorithm, fallback behavior, and the `session-sticky` routing-metadata reason.
Session stickiness is **on by default**. Enterprise projects can turn it off per project under **Settings → Routing → Session Stickiness**; when disabled, every request is scored independently regardless of session id (the id is still recorded for observability).
Sticky routing optimizes for cache locality over per-request price. A session
stays on its provider even if a cheaper or faster alternative is momentarily
available, since the prompt-cache savings typically outweigh the difference.
## Upstream prompt-cache routing [#upstream-prompt-cache-routing]
Some providers use an OpenAI-style `prompt_cache_key` to route requests to the cache shard that already holds your prompt prefix — without it, repeat requests can land on different backends and miss the cache entirely (Meta requires it for cache hits in practice; OpenAI and Azure use it to improve hit rates under load).
When a request has a session id and you didn't send a `prompt_cache_key` yourself, LLMGateway forwards a **keyed hash** (HMAC-SHA256 with a gateway-side secret) of the session id as the `prompt_cache_key` to providers that support it (currently OpenAI, Azure, and Meta). Hashing means your raw session ids are never exposed to providers; the hash is stable per session, which is all cache routing needs. A `prompt_cache_key` you set explicitly takes precedence and is forwarded as-is on those same surfaces.
On provider surfaces that don't support the field, no key is sent at all — whether derived or explicit. This currently applies to Sakana (the field is not part of its API) and to Azure chat-completions requests, which can be served by legacy deployment-based API versions that reject unknown body fields; Azure requests on the Responses API always carry the key. Providers not listed above use different caching mechanisms (for example Anthropic `cache_control` breakpoints or Google implicit caching), so the `prompt_cache_key` doesn't apply to them either.
For Meta, requests without any session id still get a cache key derived from the conversation's first messages, so multi-turn conversations hit Meta's prompt cache even when no session signal is present.
## Observing sessions in the activity log [#observing-sessions-in-the-activity-log]
Every request is logged with its resolved session id. In the dashboard **Activity** view you can:
* See the **Session ID** on each request's metadata, alongside the request and trace IDs.
* **Filter by session id** using the search field next to the custom-metadata search, to pull up every request that belongs to a conversation in one place.
This makes it easy to follow a full conversation end-to-end — inspecting how each turn was routed, what it cost, and which provider served it.
The session id is distinct from freeform [metadata](https://docs.llmgateway.io/features/metadata). Use
metadata custom headers for arbitrary tags (user, tenant, app version); use
the session id for the one value that should keep a conversation pinned and
traceable.
# Source Attribution
URL: https://docs.llmgateway.io/features/source
# Source Attribution [#source-attribution]
The `X-Source` header allows you to identify your domain when making requests to LLM Gateway. This information is used to generate public usage statistics showing how LLM Gateway is being used across different websites and applications.
## X-Source Header [#x-source-header]
Include the `X-Source` header with your domain name in your requests:
```bash
curl -X POST https://api.llmgateway.io/v1/chat/completions \
-H "Content-Type: application/json" \
-H "Authorization: Bearer $LLM_GATEWAY_API_KEY" \
-H "X-Source: example.com" \
-d '{
"model": "gpt-4o",
"messages": [
{
"role": "user",
"content": "Hello, how are you?"
}
]
}'
```
## Domain Format [#domain-format]
The `X-Source` header accepts domain names in various formats. All of the following are valid and will be normalized to the same domain:
* `example.com`
* `https://example.com`
* `https://www.example.com`
* `www.example.com`
All variations will be stripped down to the base domain (`example.com`) for aggregation purposes.
## Public Statistics [#public-statistics]
Data from the `X-Source` header is used to generate public statistics about LLM Gateway usage, including:
* **Popular Domains**: Which websites and applications are using LLM Gateway most frequently
* **Model Usage**: What models are being used by different domains
* **Geographic Distribution**: Where requests are coming from across different sources
* **Growth Trends**: How usage is growing over time for different domains
These statistics help demonstrate the adoption and impact of LLM Gateway across the ecosystem.
## Privacy Considerations [#privacy-considerations]
### What's Public [#whats-public]
* Domain names (stripped of protocol and www prefixes)
* Aggregated request counts and model usage
* General geographic regions (country-level data)
### What's Private [#whats-private]
* Individual request content or responses
* User identifiers or personal information
* Detailed usage patterns beyond aggregated counts
* API keys or authentication details
## Benefits [#benefits]
Including the `X-Source` header provides several benefits:
### For Your Project [#for-your-project]
* **Recognition**: Your domain will appear in public usage statistics
* **Credibility**: Demonstrates real-world usage of your application
* **Community**: Contributes to the broader LLM Gateway ecosystem
### For the Community [#for-the-community]
* **Transparency**: Shows real adoption and usage patterns
* **Inspiration**: Other developers can see successful implementations
* **Growth**: Helps demonstrate the value of open-source LLM infrastructure
## Optional but Recommended [#optional-but-recommended]
While the `X-Source` header is optional, we strongly encourage its use to:
* Support transparency in the LLM Gateway ecosystem
* Help showcase successful integrations
* Contribute to understanding of LLM usage patterns
* Demonstrate the real-world impact of your application
Your participation helps build a more transparent and collaborative LLM ecosystem.
# Speech Generation
URL: https://docs.llmgateway.io/features/speech-generation
# Speech Generation [#speech-generation]
LLMGateway supports text-to-speech (TTS) through the OpenAI-compatible
**`/v1/audio/speech`** endpoint, powered by ElevenLabs, Google Gemini, OpenAI,
and Alibaba Qwen speech models.
Want to hear the voices before writing code? The [Audio
Studio](https://chat.llmgateway.io/audio) in Lounge generates speech from up
to three models side by side, with per-model voice, format, and speed
controls.
## Available Models [#available-models]
Browse all speech generation models, with up-to-date pricing, on the
[models page](https://llmgateway.io/models?filters=1\&audioGeneration=true).
Billing varies by model family. Some models are billed on token usage reported
by the provider (input text tokens and output audio tokens), while others are
billed on input character count (those return audio bytes without usage data).
See the [models
page](https://llmgateway.io/models?filters=1\&audioGeneration=true) for each
model's exact pricing.
## Parameters [#parameters]
| Parameter | Type | Default | Description |
| ----------------- | ------ | -------- | ------------------------------------------------------------------------------------------------------------------------------------------------------------------------------- |
| `model` | string | required | The speech model to use |
| `input` | string | required | The text to synthesize into speech |
| `voice` | string | model | A prebuilt voice. Defaults to `Kore` (Gemini), `alloy` (OpenAI), `Sarah` (ElevenLabs), or the model's first voice on Qwen (`longanlingxin` on Plus, `longanhuan_v3.6` on Flash) |
| `response_format` | string | model | Audio format. OpenAI: `mp3` (default), `opus`, `aac`, `flac`, `wav`, `pcm`. ElevenLabs: `mp3` (default), `wav`, `pcm`, `opus`. Gemini: `wav` (default), `pcm`. Qwen: `wav` |
| `instructions` | string | — | Optional style/delivery directive prepended to the input (e.g. `"Say cheerfully"`) |
| `speed` | number | — | Accepted for OpenAI compatibility, but not applied by Gemini speech models |
Gemini speech models return raw PCM audio. LLMGateway wraps it in a WAV
container by default (`response_format: "wav"`), or returns the raw 16-bit
little-endian PCM at 24 kHz when `response_format: "pcm"` is requested.
Other formats such as `mp3` are only available on the OpenAI models, which
return the audio already encoded in the requested format.
## curl [#curl]
```bash
curl -X POST "https://api.llmgateway.io/v1/audio/speech" \
-H "Authorization: Bearer $LLM_GATEWAY_API_KEY" \
-H "Content-Type: application/json" \
-d '{
"model": "gemini-2.5-flash-preview-tts",
"input": "Hello, welcome to LLM Gateway!",
"voice": "Kore"
}' \
--output speech.wav
```
## OpenAI SDK [#openai-sdk]
Works with the standard OpenAI client library — just point the base URL to
LLMGateway.
```ts
import OpenAI from "openai";
import { writeFileSync } from "fs";
const openai = new OpenAI({
apiKey: process.env.LLM_GATEWAY_API_KEY,
baseURL: "https://api.llmgateway.io/v1",
});
const response = await openai.audio.speech.create({
model: "gemini-2.5-flash-preview-tts",
voice: "Kore",
input: "Hello, welcome to LLM Gateway!",
});
const buffer = Buffer.from(await response.arrayBuffer());
writeFileSync("speech.wav", buffer);
```
## Streaming [#streaming]
Streaming speech responses (chunked audio or `stream_format: "sse"`) are not
supported yet. The endpoint always returns the complete audio file in a single
response, so there is no low-latency, play-as-you-go output for now.
## Voices [#voices]
Gemini exposes 30 prebuilt voices. A few common ones:
`Kore`, `Puck`, `Zephyr`, `Charon`, `Fenrir`, `Leda`, `Orus`, `Aoede`. When
`voice` is omitted on a Gemini model, `Kore` is used.
OpenAI voices include `alloy`, `ash`, `ballad`, `coral`, `echo`, `fable`,
`nova`, `onyx`, `sage`, `shimmer`, and `verse`. When `voice` is omitted on an
OpenAI model, `alloy` is used.
ElevenLabs models accept 20 named voices, including `Sarah`, `Aria`, `Roger`,
`Laura`, `Charlie`, `George`, `Charlotte`, `Jessica`, `Brian`, and `Lily`. When
`voice` is omitted on an ElevenLabs model, `Sarah` is used. A raw ElevenLabs
voice id is also accepted directly.
Qwen-Audio-3.0-TTS voices are model-specific and cannot be mixed between
models: `longanlingxin` and `longanlufeng` on Plus (default `longanlingxin`),
and `longanhuan_v3.6`, `longjielidou_v3.6`, `loongeva_v3.6`, and `loongjohn` on
Flash (default `longanhuan_v3.6`).
## ElevenLabs [#elevenlabs]
The four ElevenLabs models are billed per **input character** (see the [models
page](https://llmgateway.io/models?filters=1\&audioGeneration=true) for rates):
* `eleven-multilingual-v2` — most lifelike, rich emotional expression, 29 languages
* `eleven-v3` — most expressive and human-like, 70+ languages
* `eleven-flash-v2-5` — ultra-low latency, 32 languages
* `eleven-turbo-v2-5` — fast and balanced, 32 languages
```bash
curl -X POST "https://api.llmgateway.io/v1/audio/speech" \
-H "Authorization: Bearer $LLM_GATEWAY_API_KEY" \
-H "Content-Type: application/json" \
-d '{
"model": "eleven-multilingual-v2",
"input": "Hello, welcome to LLM Gateway!",
"voice": "Sarah"
}' \
--output speech.mp3
```
# Request Timeouts
URL: https://docs.llmgateway.io/features/timeouts
# Request Timeouts [#request-timeouts]
The gateway enforces hard time limits on every request. These protect the
platform from stuck upstream connections, but they matter to you directly if
you run long generations or agentic pipelines: a single completion that runs
longer than the limit is terminated.
| Limit | Default | Applies to |
| ----------------- | ---------- | -------------------------------------------------------- |
| **Streaming** | 20 minutes | Streaming completions (`stream: true`) |
| **Non-streaming** | 10 minutes | Non-streaming completions |
| **End-to-end** | 25 minutes | Overall ceiling for the whole request, including retries |
## How the limits behave [#how-the-limits-behave]
* **They are total-duration limits, not idle limits.** The timer starts when
the gateway opens the upstream provider request and keeps running for the
entire response — a stream is cut at the limit even while it is actively
producing tokens.
* **They apply per request, not per session or conversation.** Every
completion call gets a fresh window. A long-running agent that makes many
calls over hours is unaffected; only a *single* call exceeding the limit
fails.
* **Tool execution doesn't count.** When a completion finishes with
`tool_calls`, the HTTP request ends. The time your application spends
running tools (or coordinating subagents) between requests never consumes
the window.
* **On timeout** the gateway returns a `504` with type `timeout_error` (see
[Error Handling](https://docs.llmgateway.io/resources/error-handling)). If the limit is hit
mid-stream, the stream terminates.
## Long-running agentic workloads [#long-running-agentic-workloads]
Coordinator/subagent architectures often hold a "master" completion open while
work happens elsewhere. To stay within the limits:
* **Keep any single completion under 20 minutes.** Structure the coordinator
as a loop of discrete completions (the standard tool-calling pattern) rather
than one long-lived request that spans the whole investigation.
* **Stream long generations.** Non-streaming requests are capped at 10
minutes; streaming raises the per-request budget to 20 minutes and delivers
partial output as it is produced.
* **Split very long outputs.** If a single generation legitimately needs more
than 20 minutes (very large outputs on slow models, extensive reasoning),
break it into continuation requests.
## Changing the limits [#changing-the-limits]
**Per-project overrides (Enterprise)** can be set under **Project Settings →
Routing** — see [Per-Project Routing
Configuration](https://docs.llmgateway.io/features/routing#per-project-routing-configuration-enterprise).
Overrides can only *lower* the timeouts: the defaults above are the
infrastructure ceiling on the hosted platform and cannot be raised per
project.
**Self-hosted deployments** control the limits with environment variables on
the gateway service:
| Variable | Default | Controls |
| ------------------------- | --------- | ------------------------- |
| `AI_STREAMING_TIMEOUT_MS` | `1200000` | Streaming completions |
| `AI_TIMEOUT_MS` | `600000` | Non-streaming completions |
| `GATEWAY_TIMEOUT_MS` | `1500000` | End-to-end ceiling |
When raising the limits on a self-hosted deployment, raise the surrounding
infrastructure in lockstep: your load balancer's backend/response timeout and
the gateway's shutdown grace period (`SHUTDOWN_GRACE_PERIOD_MS`, and e.g.
Kubernetes `terminationGracePeriodSeconds`) must all be at least as long as
the longest stream you allow, or rollouts and intermediaries will still cut
long requests.
If your workload genuinely needs single completions longer than 20 minutes on
the hosted platform, contact us at [contact@llmgateway.io](mailto:contact@llmgateway.io) — the ceiling is an
infrastructure setting, not a per-model constraint.
# Transcription
URL: https://docs.llmgateway.io/features/transcription
# Transcription [#transcription]
LLMGateway exposes a dedicated `/v1/audio/transcriptions` endpoint for
speech-to-text. It transcribes audio files into text with word-level
timestamps, optional speaker diarization, and inverse text normalization
(spoken numbers and currencies formatted in their written form).
Use it when you want to:
* Turn recordings, voicemails, or podcast episodes into text
* Generate captions or searchable transcripts with per-word timing
* Feed spoken content into a downstream model or RAG pipeline
For the full request and response schema, see the
[API reference](https://docs.llmgateway.io/v1_audio_transcriptions).
## Endpoint [#endpoint]
`POST https://api.llmgateway.io/v1/audio/transcriptions`
Authenticate with your LLMGateway API key:
```bash
-H "Authorization: Bearer $LLM_GATEWAY_API_KEY"
```
The current model is `grok-stt-1-0`, billed at **$0.10 per hour** of input
audio (against the duration reported by the provider).
## Parameters [#parameters]
The request body is `multipart/form-data`. Either `file` or `url` must be
provided.
| Parameter | Type | Default | Description |
| -------------- | ------ | -------- | --------------------------------------------------------------------------------------------------------- |
| `model` | string | required | The transcription model to use |
| `file` | file | — | The audio file to transcribe (WAV, MP3, OGG, Opus, FLAC, AAC, MP4, M4A, and more) |
| `url` | string | — | URL of an audio file to download and transcribe instead of uploading one |
| `language` | string | — | Language code (e.g. `en`). When set, enables formatting of numbers and currencies into their written form |
| `diarize` | string | `false` | When `"true"`, each word in the response includes a `speaker` field identifying the detected speaker |
| `filler_words` | string | `false` | When `"true"`, filler words (e.g. "uh", "um") are kept in the transcript instead of being removed |
| `keyterm` | string | — | A key term to bias transcription toward (e.g. product names). Repeat the field for multiple terms |
## Response [#response]
The response includes the full transcript, audio duration, and word-level
timestamps:
```json
{
"text": "The balance is $167,983.15.",
"language": "English",
"duration": 3.45,
"words": [
{ "text": "The", "start": 0.24, "end": 0.48 },
{ "text": "balance", "start": 0.48, "end": 0.96 },
{ "text": "is", "start": 0.96, "end": 1.12 },
{ "text": "$167,983.15.", "start": 1.12, "end": 3.2 }
]
}
```
## curl [#curl]
```bash
curl -X POST "https://api.llmgateway.io/v1/audio/transcriptions" \
-H "Authorization: Bearer $LLM_GATEWAY_API_KEY" \
-F model=grok-stt-1-0 \
-F language=en \
-F file=@audio.mp3
```
### Transcribing from a URL [#transcribing-from-a-url]
```bash
curl -X POST "https://api.llmgateway.io/v1/audio/transcriptions" \
-H "Authorization: Bearer $LLM_GATEWAY_API_KEY" \
-F model=grok-stt-1-0 \
-F url="https://example.com/audio.mp3"
```
# Video Generation
URL: https://docs.llmgateway.io/features/video-generation
# Video Generation [#video-generation]
LLMGateway supports asynchronous video generation through an OpenAI-compatible `POST /v1/videos` flow.
Currently available models:
* **Veo 3.1** through `avalanche` (1080p, 4k) and `google-vertex` (720p, 1080p, 4k)
* **Seedance 2.0** and **Seedance 1.5 Pro** through `bytedance` (720p, 1080p), **Seedance 2.0 Fast** through `bytedance` (720p only)
* **Seedance 2.0 Mini** through `bytedance` (480p, 720p)
* **KLING v3.0** and **KLING v3.0 Turbo** through `atlascloud` (720p, 1080p; KLING v3.0 also 4k)
You can find the current list of video-capable models on our [models page with the video filter enabled](https://llmgateway.io/models?filters=1\&videoGeneration=true) or programmatically through the [/v1/models endpoint](https://docs.llmgateway.io/v1_models).
## What Works Today [#what-works-today]
* `POST /v1/videos`
* `GET /v1/videos/{video_id}`
* `GET /v1/videos/{video_id}/content`
* Optional signed callbacks with `callback_url` and `callback_secret`
## Request Format [#request-format]
LLMGateway currently supports a focused subset of the OpenAI video API.
### Supported fields [#supported-fields]
| Field | Type | Required | Description |
| ------------------ | ------- | -------- | -------------------------------------------------------------------------------------------------------------------------- |
| `model` | string | yes | Any video-capable model from the filtered models page |
| `prompt` | string | yes | Text prompt for the video |
| `seconds` | number | yes | Duration in seconds. Supported values depend on the model (see below) |
| `size` | string | no | `widthxheight`, limited to the sizes supported by the selected model and provider |
| `audio` | boolean | no | Whether to include audio in the output (default `true`). Only honored when the model supports both audio and silent output |
| `image` | object | no | Optional first frame for image-to-video generation (see first/last frame inputs below) |
| `last_frame` | object | no | Optional ending frame when `image` is provided (see first/last frame inputs below) |
| `reference_images` | array | no | One to three provider-specific image inputs |
| `input_reference` | object | no | Alias for one or more `reference_images` |
| `reference_videos` | array | no | One to three reference video HTTPS URLs (Seedance 2.0 only, see below) |
| `reference_audios` | array | no | One to three reference audio HTTPS URLs (Seedance 2.0 only, see below) |
| `callback_url` | string | no | LLMGateway extension for completion webhooks |
| `callback_secret` | string | no | LLMGateway extension used to sign webhook deliveries |
### Sizes and durations by model [#sizes-and-durations-by-model]
| Model family | Provider | Supported sizes | Supported durations |
| ----------------- | --------------- | -------------------------------------------------------------------------- | ------------------- |
| Veo 3.1 | `google-vertex` | `1280x720`, `720x1280`, `1920x1080`, `1080x1920`, `3840x2160`, `2160x3840` | `4`, `6`, `8`, `10` |
| Veo 3.1 | `avalanche` | `1920x1080`, `1080x1920`, `3840x2160`, `2160x3840` | `8` |
| Seedance 2.0 | `bytedance` | `1280x720`, `720x1280`, `1920x1080`, `1080x1920` | `4`–`15` |
| Seedance 2.0 Fast | `bytedance` | `1280x720`, `720x1280` | `4`–`15` |
| Seedance 2.0 Mini | `bytedance` | `1280x720`, `720x1280`, `848x480`, `854x480`, `480x854` | `4`–`15` |
| Seedance 1.5 Pro | `bytedance` | `1280x720`, `720x1280`, `1920x1080`, `1080x1920` | `5`, `10` |
| KLING v3.0 | `atlascloud` | `1280x720`, `720x1280`, `1920x1080`, `1080x1920`, `3840x2160`, `2160x3840` | `5`, `10` |
| KLING v3.0 Turbo | `atlascloud` | `1280x720`, `720x1280`, `1920x1080`, `1080x1920` | `5`, `10` |
Requests return `400` when the selected provider cannot serve the requested `size` or `seconds`. Seedance and KLING v3.0 derive `aspect_ratio` from the requested `size` (16:9 for landscape, 9:16 for portrait).
**KLING v3.0 Turbo** always generates audio and does not support `audio: false`; silent requests return a `400`. Use **KLING v3.0** (`kling-v3-0`) when you need silent output.
### First/last frame inputs [#firstlast-frame-inputs]
Frame inputs interpolate a video between a starting frame and an optional ending frame. You provide the first frame as `image` and, optionally, the ending frame as `last_frame`. The gateway tags each one with the correct role for the provider, so you don't set roles yourself.
| Field | Required | Accepted input | Available on |
| ------------ | ------------------ | -------------------------------- | ------------------------------------------------------------------------------------------------------------------------------- |
| `image` | for frame mode | HTTPS URL **or** base64 data URL | **Seedance 2.0** (`bytedance`), **KLING v3.0 / Turbo** (`atlascloud`), Veo 3.1 (`google-vertex`, `avalanche`), `minimax`, `xai` |
| `last_frame` | no (needs `image`) | HTTPS URL **or** base64 data URL | **Seedance 2.0** (`bytedance`), **KLING v3.0 / Turbo** (`atlascloud`), Veo 3.1 (`google-vertex`, `avalanche`) |
#### Rules and limits [#rules-and-limits]
* **Seedance scope.** Frame inputs are supported on **Seedance 2.0**, **Seedance 2.0 Fast**, and **Seedance 2.0 Mini** (`seedance-2-0`, `seedance-2-0-fast`, `seedance-2-0-mini`). Sending `image`/`last_frame` to Seedance 1.5 Pro or any other ByteDance model returns a `400`.
* **KLING scope.** Frame inputs are supported on **KLING v3.0** and **KLING v3.0 Turbo** (`kling-v3-0`, `kling-v3-0-turbo`). The gateway uploads base64 frames to AtlasCloud's media endpoint automatically, so both HTTPS URLs and base64 data URLs are accepted.
* **`last_frame` requires `image`.** Providing `last_frame` without `image` returns a `400`.
* **Not combinable with references.** First/last frame inputs (`image`, `last_frame`) cannot be combined with reference inputs (`reference_images`, `input_reference`, `reference_videos`, `reference_audios`).
#### Example (Seedance 2.0) [#example-seedance-20]
```bash
curl -X POST "https://api.llmgateway.io/v1/videos" \
-H "Authorization: Bearer $LLM_GATEWAY_API_KEY" \
-H "Content-Type: application/json" \
-d '{
"model": "seedance-2-0",
"prompt": "Morph smoothly from the first frame into the last frame",
"seconds": 5,
"size": "1280x720",
"image": { "image_url": "https://example.com/first-frame.png" },
"last_frame": { "image_url": "https://example.com/last-frame.png" }
}'
```
#### Example (KLING v3.0 image-to-video) [#example-kling-v30-image-to-video]
```bash
curl -X POST "https://api.llmgateway.io/v1/videos" \
-H "Authorization: Bearer $LLM_GATEWAY_API_KEY" \
-H "Content-Type: application/json" \
-d '{
"model": "kling-v3-0",
"prompt": "Animate the scene with gentle camera motion",
"seconds": 5,
"size": "1280x720",
"image": { "image_url": "https://example.com/first-frame.png" }
}'
```
### Reference-guided generation (Seedance 2.0) [#reference-guided-generation-seedance-20]
Seedance 2.0 (`seedance-2-0`, `seedance-2-0-fast`, `seedance-2-0-mini`) can generate a video that is guided by reference **images**, **videos**, and **audio** — sometimes called omni-reference. You attach references as top-level fields in the same `POST /v1/videos` payload; the gateway forwards each one to the provider tagged with the correct role, so you don't set roles yourself.
| Reference type | Payload field | Count | Accepted input | Available on |
| -------------- | -------------------------------------------- | ----- | -------------------------------- | ---------------------------------------------------- |
| Image | `reference_images` (`input_reference` alias) | 1–3 | HTTPS URL **or** base64 data URL | Seedance 2.0, Veo 3.1 (`google-vertex`, `avalanche`) |
| Video | `reference_videos` | 1–3 | HTTPS URL only | Seedance 2.0 |
| Audio | `reference_audios` | 1–3 | HTTPS URL only | Seedance 2.0 |
Each list item accepts either a bare URL string or an object form:
* `reference_images`: `"https://…/subject.png"` or `{ "image_url": "https://…/subject.png" }`
* `reference_videos`: `"https://…/motion.mp4"` or `{ "video_url": "https://…/motion.mp4" }`
* `reference_audios`: `"https://…/track.mp3"` or `{ "audio_url": "https://…/track.mp3" }`
You can mix all three reference types in one request. The `prompt` can be a light instruction (for example `"adapt this to show more detail"`) — the references drive the result.
#### Rules and limits [#rules-and-limits-1]
* **HTTPS only for video and audio.** `reference_videos` and `reference_audios` must be publicly reachable HTTPS URLs (the provider fetches them). base64 data URLs are rejected for video/audio; images may be HTTPS URLs or base64 data URLs.
* **Reference video resolution.** Seedance requires reference video frames to be at least \~409,600 pixels (roughly 480p or larger). Low-resolution clips such as 360p are rejected with a `400`.
* **Not combinable with frames.** Reference inputs (`reference_images`, `reference_videos`, `reference_audios`) cannot be combined with the first/last frame inputs (`image`, `last_frame`).
* **Provider scope.** Reference videos and audio are only supported on Seedance 2.0 models; sending them to other models returns a `400`. **KLING v3.0** does not support any reference inputs (`reference_images`, `reference_videos`, `reference_audios`); use first/last frame inputs instead.
* **Moderation still applies.** The output is subject to the provider's content moderation. Blocked generations finish as `failed` and are logged with a `content_filter` finish reason.
#### Examples [#examples]
Reference images only (subjects / style):
```bash
curl -X POST "https://api.llmgateway.io/v1/videos" \
-H "Authorization: Bearer $LLM_GATEWAY_API_KEY" \
-H "Content-Type: application/json" \
-d '{
"model": "seedance-2-0",
"prompt": "The subject walks through a neon-lit market at night",
"seconds": 5,
"size": "1280x720",
"reference_images": [
{ "image_url": "https://example.com/subject.png" },
{ "image_url": "https://example.com/style.png" }
]
}'
```
Reference video only (motion / scene — let the clip drive the output):
```bash
curl -X POST "https://api.llmgateway.io/v1/videos" \
-H "Authorization: Bearer $LLM_GATEWAY_API_KEY" \
-H "Content-Type: application/json" \
-d '{
"model": "seedance-2-0",
"prompt": "adapt this to show more detail",
"seconds": 5,
"size": "1280x720",
"reference_videos": ["https://example.com/reference-motion.mp4"]
}'
```
All three reference types combined:
```bash
curl -X POST "https://api.llmgateway.io/v1/videos" \
-H "Authorization: Bearer $LLM_GATEWAY_API_KEY" \
-H "Content-Type: application/json" \
-d '{
"model": "seedance-2-0",
"prompt": "The subject performs the choreography from the reference video",
"seconds": 5,
"size": "1280x720",
"reference_images": [
{ "image_url": "https://example.com/subject.png" }
],
"reference_videos": [
"https://example.com/reference-motion.mp4"
],
"reference_audios": [
"https://example.com/reference-track.mp3"
]
}'
```
### Not supported yet [#not-supported-yet]
* multipart uploads
* `n` values other than `1`
* remix/list/delete video endpoints
## Create a Video [#create-a-video]
Video generation requires at least `$1.00` in available organization credits before the job is submitted upstream.
Pricing is per second of generated video. For Seedance and KLING v3.0, enabling audio can increase the per-second rate on models that price audio and video separately.
Veo 3.1:
| Model | Provider | Supported sizes | Price |
| ------------------------------- | --------------- | ------------------------------------------------ | ---------------- |
| `veo-3.1-generate-preview` | `google-vertex` | `1280x720`, `720x1280`, `1920x1080`, `1080x1920` | `$0.40 / second` |
| `veo-3.1-fast-generate-preview` | `google-vertex` | `1280x720`, `720x1280`, `1920x1080`, `1080x1920` | `$0.15 / second` |
| `veo-3.1-generate-preview` | `google-vertex` | `3840x2160`, `2160x3840` | `$0.60 / second` |
| `veo-3.1-fast-generate-preview` | `google-vertex` | `3840x2160`, `2160x3840` | `$0.35 / second` |
| `veo-3.1-generate-preview` | `avalanche` | `1920x1080`, `1080x1920` | `$0.40 / second` |
| `veo-3.1-fast-generate-preview` | `avalanche` | `1920x1080`, `1080x1920` | `$0.15 / second` |
| `veo-3.1-generate-preview` | `avalanche` | `3840x2160`, `2160x3840` | `$0.60 / second` |
| `veo-3.1-fast-generate-preview` | `avalanche` | `3840x2160`, `2160x3840` | `$0.35 / second` |
Seedance (ByteDance):
| Model | Provider | Resolution | With audio | Video only |
| ------------------- | ----------- | ---------- | ------------------- | ------------------- |
| `seedance-2-0` | `bytedance` | 720p | `$0.1512 / second` | `$0.1512 / second` |
| `seedance-2-0` | `bytedance` | 1080p | `$0.3402 / second` | `$0.3402 / second` |
| `seedance-2-0-fast` | `bytedance` | 720p | `$0.121 / second` | `$0.121 / second` |
| `seedance-2-0-mini` | `bytedance` | 480p | `$0.0378 / second` | `$0.0378 / second` |
| `seedance-2-0-mini` | `bytedance` | 720p | `$0.0756 / second` | `$0.0756 / second` |
| `seedance-1-5-pro` | `bytedance` | 720p | `$0.05184 / second` | `$0.02592 / second` |
| `seedance-1-5-pro` | `bytedance` | 1080p | `$0.1166 / second` | `$0.05832 / second` |
KLING (AtlasCloud):
| Model | Provider | Resolution | With audio | Video only |
| ------------------ | ------------ | ---------- | ----------------- | ----------------- |
| `kling-v3-0` | `atlascloud` | 720p | `$0.126 / second` | `$0.084 / second` |
| `kling-v3-0` | `atlascloud` | 1080p | `$0.168 / second` | `$0.112 / second` |
| `kling-v3-0` | `atlascloud` | 4k | `$0.42 / second` | `$0.42 / second` |
| `kling-v3-0-turbo` | `atlascloud` | 720p | `$0.168 / second` | n/a (audio only) |
| `kling-v3-0-turbo` | `atlascloud` | 1080p | `$0.21 / second` | n/a (audio only) |
```bash
curl -X POST "https://api.llmgateway.io/v1/videos" \
-H "Authorization: Bearer $LLM_GATEWAY_API_KEY" \
-H "Content-Type: application/json" \
-d '{
"model": "veo-3.1-generate-preview",
"prompt": "A cinematic aerial shot flying above a rainforest waterfall at sunrise",
"seconds": 8,
"size": "1920x1080"
}'
```
Example response:
```json
{
"id": "v_123",
"object": "video",
"model": "veo-3.1-generate-preview",
"status": "queued",
"progress": 0,
"created_at": 1773600000,
"completed_at": null,
"expires_at": null,
"error": null
}
```
## Retrieve Job Status [#retrieve-job-status]
```bash
curl "https://api.llmgateway.io/v1/videos/v_123" \
-H "Authorization: Bearer $LLM_GATEWAY_API_KEY"
```
Typical statuses:
* `queued`
* `in_progress`
* `completed`
* `failed`
* `canceled`
* `expired`
`avalanche` requests for `1080p` and `4k` stay `in_progress` until the upgraded output is ready. The gateway keeps polling the upstream upgrade endpoints and only marks the job `completed` once the requested resolution is available.
`google-vertex` follows Vertex AI's long-running operation flow. The gateway submits Veo generation with `predictLongRunning`, polls with `fetchPredictOperation`, and streams the final bytes through the gateway content endpoint once the operation is done.
`bytedance` uses the ModelArk `/contents/generations/tasks` endpoint. The gateway submits the job, polls the upstream task status, and exposes the final video bytes through the gateway content endpoint once the task succeeds.
`atlascloud` uses the AtlasCloud `/api/v1/model/generateVideo` endpoint and polls `/api/v1/model/prediction/{id}` for status. The gateway resolves the upstream KLING variant (standard, turbo, or 4k) and task type (text-to-video or image-to-video) from your request, then streams the final video bytes through the gateway content endpoint once the prediction completes.
## Download the Video [#download-the-video]
Once the job is complete, stream the resulting video bytes from the content endpoint:
```bash
curl "https://api.llmgateway.io/v1/videos/v_123/content" \
-H "Authorization: Bearer $LLM_GATEWAY_API_KEY" \
--output video.mp4
```
## Signed Callbacks [#signed-callbacks]
LLMGateway can notify your application when the job reaches a terminal state.
```bash
curl -X POST "https://api.llmgateway.io/v1/videos" \
-H "Authorization: Bearer $LLM_GATEWAY_API_KEY" \
-H "Content-Type: application/json" \
-d '{
"model": "veo-3.1-fast-generate-preview",
"prompt": "A slow-motion close-up of waves crashing against black volcanic rock",
"seconds": 8,
"callback_url": "https://example.com/webhooks/video",
"callback_secret": "whsec_your_secret_here"
}'
```
### Delivery behavior [#delivery-behavior]
* Callbacks are sent only for terminal states in v1
* Event types are `video.completed` and `video.failed`
* Deliveries retry with exponential backoff on network errors, timeouts, and non-2xx responses
* Each attempt is recorded internally in the webhook delivery log table
### Headers [#headers]
* `webhook-id`
* `webhook-timestamp`
* `webhook-signature`
### Signature format [#signature-format]
LLMGateway signs the string:
```text
{webhook-id}.{webhook-timestamp}.{raw-request-body}
```
using HMAC-SHA256 with your `callback_secret`, then sends:
```text
webhook-signature: v1,{base64_signature}
```
### Verification example [#verification-example]
```ts
import { createHmac, timingSafeEqual } from "node:crypto";
function verifyWebhook(
body: string,
webhookId: string,
webhookTimestamp: string,
webhookSignature: string,
secret: string,
) {
const expected = createHmac("sha256", secret)
.update(`${webhookId}.${webhookTimestamp}.${body}`)
.digest("base64");
const provided = webhookSignature.replace(/^v1,/, "");
return timingSafeEqual(Buffer.from(expected), Buffer.from(provided));
}
```
## Related Docs [#related-docs]
* [Image Generation](https://docs.llmgateway.io/features/image-generation)
* [Routing](https://docs.llmgateway.io/features/routing)
* [Models API](https://docs.llmgateway.io/v1_models)
# Vision Support
URL: https://docs.llmgateway.io/features/vision
# Vision Support [#vision-support]
LLMGateway supports vision-enabled models that can analyze and describe images. You can provide images via HTTPS URLs or inline base64-encoded data.
## Vision-Enabled Models [#vision-enabled-models]
You can find all vision-enabled models on our [models page with vision filter](https://llmgateway.io/models?filters=1\&vision=true). These models can process both text and image content in the same request.
## Image Formats [#image-formats]
### Using HTTPS URLs [#using-https-urls]
You can provide any publicly accessible HTTPS URL pointing to an image:
```bash
curl -X POST "https://api.llmgateway.io/v1/chat/completions" \
-H "Authorization: Bearer $LLM_GATEWAY_API_KEY" \
-H "Content-Type: application/json" \
-d '{
"model": "gpt-4o",
"messages": [
{
"role": "user",
"content": [
{
"type": "text",
"text": "What do you see in this image?"
},
{
"type": "image_url",
"image_url": {
"url": "https://example.com/image.jpg"
}
}
]
}
]
}'
```
### Using Base64 Inline Data [#using-base64-inline-data]
You can also provide images as base64-encoded data URIs:
```bash
curl -X POST "https://api.llmgateway.io/v1/chat/completions" \
-H "Authorization: Bearer $LLM_GATEWAY_API_KEY" \
-H "Content-Type: application/json" \
-d '{
"model": "gpt-4o",
"messages": [
{
"role": "user",
"content": [
{
"type": "text",
"text": "Describe this image"
},
{
"type": "image_url",
"image_url": {
"url": "data:image/jpeg;base64,/9j/4AAQSkZJRgABAQEASABIAAD..."
}
}
]
}
]
}'
```
## Content Array Format [#content-array-format]
When using vision models, the `content` field should be an array containing both text and image content blocks:
* **Text content**: `{"type": "text", "text": "Your message"}`
* **Image content**: `{"type": "image_url", "image_url": {"url": "image_url_or_data_uri"}}`
## Multiple Images [#multiple-images]
You can include multiple images in a single request:
```bash
curl -X POST "https://api.llmgateway.io/v1/chat/completions" \
-H "Authorization: Bearer $LLM_GATEWAY_API_KEY" \
-H "Content-Type: application/json" \
-d '{
"model": "gpt-4o",
"messages": [
{
"role": "user",
"content": [
{
"type": "text",
"text": "Compare these two images"
},
{
"type": "image_url",
"image_url": {
"url": "https://example.com/image1.jpg"
}
},
{
"type": "image_url",
"image_url": {
"url": "https://example.com/image2.jpg"
}
}
]
}
]
}'
```
## Simple String Content [#simple-string-content]
For vision models, you can still use simple string content for text-only
messages. The array format is only required when including images.
```bash
curl -X POST "https://api.llmgateway.io/v1/chat/completions" \
-H "Authorization: Bearer $LLM_GATEWAY_API_KEY" \
-H "Content-Type: application/json" \
-d '{
"model": "gpt-4o",
"messages": [
{
"role": "user",
"content": "Hello! How can you help me today?"
}
]
}'
```
## Supported Image Types [#supported-image-types]
Vision models typically support common image formats including:
* JPEG (.jpg, .jpeg)
* PNG (.png)
* WebP (.webp)
* GIF (.gif)
The specific formats supported may vary by model provider. Check the individual model documentation for format limitations and file size restrictions.
## Error Handling [#error-handling]
If an image URL is inaccessible or the image format is unsupported, the gateway will handle the error gracefully and may substitute a placeholder or error message in the request to the underlying model.
# Native Web Search
URL: https://docs.llmgateway.io/features/web-search
# Native Web Search [#native-web-search]
LLM Gateway supports native web search capabilities that allow models to access real-time information from the internet. This feature is useful for answering questions about current events, recent news, live data, and other time-sensitive information that may not be in the model's training data.
## How It Works [#how-it-works]
When you include the `web_search` tool in your request, the model can search the web to gather relevant information before generating a response:
1. You send a request with the `web_search` tool enabled
2. The model determines if web search is needed based on the query
3. If needed, the model performs web searches to gather current information
4. The model synthesizes the search results and generates a response
5. Citations are included in the response to show information sources
## Supported Providers [#supported-providers]
Native web search is available on select models. See all models with native web search support on our [models page](https://llmgateway.io/models?filters=1\&webSearch=true).
## Basic Usage [#basic-usage]
To enable web search, add the `web_search` tool to your request:
```bash
curl -X POST "https://api.llmgateway.io/v1/chat/completions" \
-H "Authorization: Bearer $LLM_GATEWAY_API_KEY" \
-H "Content-Type: application/json" \
-d '{
"model": "gpt-5.2",
"messages": [
{
"role": "user",
"content": "What is the current weather in San Francisco?"
}
],
"tools": [
{
"type": "web_search"
}
]
}'
```
### Example Response [#example-response]
```json
{
"id": "chatcmpl-abc123",
"object": "chat.completion",
"created": 1234567890,
"model": "openai/gpt-5.2",
"choices": [
{
"index": 0,
"message": {
"role": "assistant",
"content": "The current weather in San Francisco is 57°F (14°C) with mostly cloudy skies...",
"annotations": [
{
"type": "url_citation",
"url": "https://weather.com/...",
"title": "San Francisco Weather"
}
]
},
"finish_reason": "stop"
}
],
"usage": {
"prompt_tokens": 15,
"completion_tokens": 150,
"total_tokens": 165,
"cost": 0.0315
}
}
```
## Web Search Options [#web-search-options]
The `web_search` tool accepts optional configuration parameters:
### User Location [#user-location]
Provide location context to get more relevant local search results:
```json
{
"type": "web_search",
"user_location": {
"city": "San Francisco",
"region": "California",
"country": "US",
"timezone": "America/Los_Angeles"
}
}
```
### Search Context Size [#search-context-size]
Control the amount of web content retrieved (OpenAI only):
```json
{
"type": "web_search",
"search_context_size": "medium"
}
```
Available values:
* `low` - Minimal search context, faster responses
* `medium` - Balanced context (default)
* `high` - Maximum search context, more comprehensive
### Max Uses [#max-uses]
Limit the number of searches per request (provider-dependent):
```json
{
"type": "web_search",
"max_uses": 3
}
```
## Using with SDKs [#using-with-sdks]
### OpenAI SDK (Python) [#openai-sdk-python]
```python
from openai import OpenAI
client = OpenAI(
base_url="https://api.llmgateway.io/v1",
api_key="your-api-key"
)
response = client.chat.completions.create(
model="gpt-5.2",
messages=[
{"role": "user", "content": "What are the latest news headlines today?"}
],
tools=[{"type": "web_search"}]
)
print(response.choices[0].message.content)
```
### OpenAI SDK (TypeScript) [#openai-sdk-typescript]
```typescript
import OpenAI from "openai";
const client = new OpenAI({
baseURL: "https://api.llmgateway.io/v1",
apiKey: "your-api-key",
});
const response = await client.chat.completions.create({
model: "gpt-5.2",
messages: [{ role: "user", content: "What are the latest tech news?" }],
tools: [{ type: "web_search" }],
});
console.log(response.choices[0].message.content);
```
## Streaming [#streaming]
Web search works with streaming responses. Citations are included in the final chunks:
```bash
curl -X POST "https://api.llmgateway.io/v1/chat/completions" \
-H "Authorization: Bearer $LLM_GATEWAY_API_KEY" \
-H "Content-Type: application/json" \
-d '{
"model": "gpt-5.2",
"messages": [
{"role": "user", "content": "What is the current stock price of Apple?"}
],
"tools": [{"type": "web_search"}],
"stream": true
}'
```
## Citations and Sources [#citations-and-sources]
Web search responses include citations to show where information was sourced from. These appear in the `annotations` field of the message:
```json
{
"annotations": [
{
"type": "url_citation",
"url": "https://example.com/article",
"title": "Article Title",
"start_index": 0,
"end_index": 50
}
]
}
```
Citation format may vary slightly between providers, but LLM Gateway
normalizes them into a consistent structure.
## Cost Tracking [#cost-tracking]
Web search costs are rolled into the total `cost` reported in the usage object:
```json
{
"usage": {
"prompt_tokens": 15,
"completion_tokens": 150,
"total_tokens": 165,
"cost": 0.0125,
"cost_details": {
"upstream_inference_cost": 0.0115,
"upstream_inference_prompt_cost": 0.0015,
"upstream_inference_completions_cost": 0.01,
"total_cost": 0.0125,
"input_cost": 0.0015,
"output_cost": 0.01,
"web_search_cost": 0.001
}
}
}
```
Web search is billed at $0.01 per search call for reasoning models (GPT-5, o-series) and $0.025 per call for non-reasoning models. The web search charge is included in the top-level `cost` value and surfaced separately as `cost_details.web_search_cost`.
## Combining with Function Tools [#combining-with-function-tools]
You can use web search alongside regular function tools:
```json
{
"tools": [
{ "type": "web_search" },
{
"type": "function",
"function": {
"name": "get_weather",
"description": "Get weather for a location",
"parameters": {
"type": "object",
"properties": {
"location": { "type": "string" }
}
}
}
}
]
}
```
Some dedicated search models only support web search and do not support
additional function tools. Use `gpt-5.2` or other GPT-5 series models if you
need both web search and function tools.
## Use Cases [#use-cases]
### Current Events and News [#current-events-and-news]
```json
{
"messages": [
{ "role": "user", "content": "What are the major news stories today?" }
],
"tools": [{ "type": "web_search" }]
}
```
### Real-Time Data [#real-time-data]
```json
{
"messages": [
{ "role": "user", "content": "What is the current price of Bitcoin?" }
],
"tools": [{ "type": "web_search" }]
}
```
### Research and Fact-Checking [#research-and-fact-checking]
```json
{
"messages": [
{
"role": "user",
"content": "What are the latest findings on climate change?"
}
],
"tools": [{ "type": "web_search" }]
}
```
### Local Information [#local-information]
```json
{
"messages": [
{
"role": "user",
"content": "What restaurants are open near me right now?"
}
],
"tools": [
{
"type": "web_search",
"user_location": {
"city": "New York",
"country": "US"
}
}
]
}
```
## Best Practices [#best-practices]
1. **Use GPT-5.2**: For the best web search experience with full tool support, use `gpt-5.2`
2. **Provide location context**: When queries are location-dependent, include `user_location` for more relevant results
3. **Monitor costs**: Web search incurs per-query costs in addition to token costs
4. **Check citations**: Always review the citations in responses to verify information sources
5. **Use streaming**: For user-facing applications, enable streaming to show responses as they're generated
## Error Handling [#error-handling]
If you try to use web search with a model that doesn't support it:
```json
{
"error": {
"message": "Model gpt-4o does not support native web search. Remove the web_search tool or use a model that supports it. See https://llmgateway.io/models?features=webSearch for supported models.",
"type": "invalid_request_error"
}
}
```
To avoid this error, only use the `web_search` tool with [native web search enabled models](https://llmgateway.io/models?filters=1\&webSearch=true).
# Agent Skills
URL: https://docs.llmgateway.io/guides/agent-skills
**Agent Skills** are structured guidelines for AI coding agents, optimized for use with LLM Gateway and the AI SDK. They provide best practices and reusable instructions that help AI agents generate higher-quality code.
## What Are Agent Skills? [#what-are-agent-skills]
Agent Skills are packaged sets of rules and guidelines that teach AI coding agents how to implement specific features correctly. Each skill covers:
* API integration patterns
* Frontend rendering best practices
* Error handling strategies
* Performance optimization techniques
## Available Skills [#available-skills]
### Image Generation [#image-generation]
The Image Generation skill teaches AI agents how to properly implement image generation features:
* **API Integration** — correctly calling image generation APIs
* **Frontend Rendering** — displaying generated images efficiently
* **Error Handling** — graceful degradation and retry logic
* **Performance** — caching, lazy loading, and optimization
### Changelog Writer [#changelog-writer]
The Changelog Writer skill drafts a polished LLM Gateway changelog entry and its OpenGraph image in one pass:
* **House style** — writes in the established changelog voice: problem first, benefits over features, plain and confident
* **Correct format** — generates the dated Markdown file with valid frontmatter (`id`, `slug`, `date`, `title`, `summary`, `image`)
* **OG image prompt** — hands back a ready-to-run `gpt-image-2` prompt at the recommended **1536×1024** OpenGraph resolution
* **Validation** — formats and builds the entry before you commit
It ships as a [Claude Code skill](https://docs.claude.com/en/docs/claude-code/skills) — a single `SKILL.md` file. Trigger it by typing `changelog` (or "write a changelog entry") in Claude Code.
## Claude Code Skills [#claude-code-skills]
Some skills ship as **[Claude Code skills](https://docs.claude.com/en/docs/claude-code/skills)**: a single `SKILL.md` file with YAML frontmatter that Claude Code loads automatically when its description matches what you ask. The **Changelog Writer** above is one of them.
Install one by copying its folder into your project's `.claude/skills/` directory:
```bash
# from the llmgateway-templates repo
cp -r skills/changelog /path/to/your/project/.claude/skills/
```
Then trigger it by name inside Claude Code:
```
> changelog
```
Place the folder in `~/.claude/skills/` instead to make the skill available across every project. Browse the available Claude Code skills in the [llmgateway-templates repository](https://github.com/theopenco/llmgateway-templates/tree/main/skills).
## Installation [#installation]
### Prerequisites [#prerequisites]
Ensure you have Node.js 18+ and pnpm 9+ installed:
```bash
node --version # v18.0.0 or higher
pnpm --version # 9.0.0 or higher
```
### Clone the Repository [#clone-the-repository]
```bash
git clone https://github.com/theopenco/agent-skills.git
cd agent-skills
```
### Install Dependencies [#install-dependencies]
```bash
pnpm install
```
### Build Skills [#build-skills]
Build all skills to generate the documentation:
```bash
pnpm build:all
```
Or build a specific skill:
```bash
pnpm build
```
## Using Skills in Your Project [#using-skills-in-your-project]
After building, each skill generates an `AGENTS.md` file that can be used with AI coding agents like Claude, Cursor, or Copilot.
### With Claude Code [#with-claude-code]
Add the generated `AGENTS.md` content to your project's `CLAUDE.md` file:
```bash
cat skills/image-generation/AGENTS.md >> CLAUDE.md
```
### With Cursor [#with-cursor]
Add the skill content to your `.cursorrules` file:
```bash
cat skills/image-generation/AGENTS.md >> .cursorrules
```
### With Other AI Agents [#with-other-ai-agents]
Most AI coding tools support custom instructions. Copy the skill content into your tool's configuration.
## Project Structure [#project-structure]
```
agent-skills/
├── packages/
│ └── skills-build/ # Build tooling
├── skills/
│ └── image-generation/ # Individual skill
│ ├── rules/ # Rule files
│ ├── AGENTS.md # Generated documentation
│ └── metadata.json # Skill metadata
└── package.json
```
## Contributing [#contributing]
### Adding New Rules [#adding-new-rules]
### Fork and Clone [#fork-and-clone]
Fork the repository and create a feature branch:
```bash
git checkout -b feat/new-rule
```
### Create a Rule File [#create-a-rule-file]
Rules follow a standardized template with YAML frontmatter containing `title`, `impact` (high/medium/low), and `tags`. The body includes sections for Context, Incorrect examples, and Correct examples with TypeScript code blocks.
See existing rules in `skills/image-generation/rules/` for reference.
### Validate and Build [#validate-and-build]
```bash
pnpm validate
pnpm build:all
```
### Submit a Pull Request [#submit-a-pull-request]
Push your changes and open a PR.
### Impact Levels [#impact-levels]
When creating rules, use these impact levels:
* **high** — Critical for correctness or security
* **medium** — Important for quality and maintainability
* **low** — Nice-to-have improvements
## Development Commands [#development-commands]
| Command | Description |
| ---------------- | --------------------------- |
| `pnpm install` | Install dependencies |
| `pnpm build:all` | Build all skills |
| `pnpm build` | Build a specific skill |
| `pnpm validate` | Validate rule files |
| `pnpm dev` | Development mode with watch |
## More Resources [#more-resources]
* [GitHub Repository](https://github.com/theopenco/agent-skills) — Source code and contributions
* [LLM Gateway CLI](https://docs.llmgateway.io/guides/cli) — Project scaffolding tool
* [Templates](https://llmgateway.io/templates) — Production-ready starter projects
Want to contribute a new skill or rule? Check out the [contribution
guidelines](https://github.com/theopenco/agent-skills#contributing) on GitHub.
# Autohand Code Integration
URL: https://docs.llmgateway.io/guides/autohand
Autohand Code is an autonomous AI coding agent that works in your terminal, IDE, and Slack. With LLM Gateway, you can route all Autohand Code requests through a single gateway—use any of 200+ models from 40+ providers, with full cost tracking and smart routing.
## Setup [#setup]
### Sign Up for LLM Gateway [#sign-up-for-llm-gateway]
[Sign up free](https://llmgateway.io/signup) — no credit card required. Copy your API key from the dashboard.
### Set Environment Variables [#set-environment-variables]
Configure Autohand Code to use LLM Gateway:
```bash
export OPENAI_BASE_URL=https://api.llmgateway.io/v1
export OPENAI_API_KEY=llmgtwy_your_api_key_here
```
### Run Autohand Code [#run-autohand-code]
```bash
autohand
```
All requests will now be routed through LLM Gateway.
## Why Use LLM Gateway with Autohand Code [#why-use-llm-gateway-with-autohand-code]
* **200+ models** — GPT-5, Claude Opus, Gemini, Llama, and more from 40+ providers
* **Smart routing** — Automatically selects the best provider based on uptime, throughput, price, and latency
* **Cost tracking** — Monitor exactly how much each autonomous agent costs
* **Single bill** — No need to manage multiple API provider accounts
* **Response caching** — Repeated requests hit cache automatically
* **Automatic failover** — If one provider is down, requests route to another
## Configuration File [#configuration-file]
You can also configure LLM Gateway in Autohand Code's config file:
```json
{
"provider": {
"llmgateway": {
"baseUrl": "https://api.llmgateway.io/v1",
"apiKey": "llmgtwy_your_api_key_here"
}
},
"model": "gpt-5"
}
```
## Choosing Models [#choosing-models]
You can use any model from the [models page](https://llmgateway.io/models).
| Model | Best For |
| ------------------- | ------------------------------------------- |
| `gpt-5` | Latest OpenAI flagship, highest quality |
| `claude-opus-4-6` | Anthropic's most capable model |
| `claude-sonnet-4-6` | Fast reasoning with extended thinking |
| `gemini-2.5-pro` | Google's latest flagship, 1M context window |
| `o3` | Advanced reasoning tasks |
| `gpt-5-mini` | Cost-effective, quick responses |
| `gemini-2.5-flash` | Fast responses, good for high-volume |
| `deepseek-v3.1` | Open-source with vision and tools |
## Autohand Code Features with LLM Gateway [#autohand-code-features-with-llm-gateway]
### Terminal (CLI) [#terminal-cli]
Autohand Code CLI works seamlessly with LLM Gateway. Set the environment variables and use all Autohand Code commands as normal—multi-file editing, agentic search, and autonomous code generation all work out of the box.
### IDE Integration [#ide-integration]
Autohand Code's VS Code and Zed extensions respect the same environment variables. Set them in your shell profile and the IDE integration will automatically route through LLM Gateway.
### Slack Integration [#slack-integration]
When using Autohand Code through Slack, configure the LLM Gateway base URL in your Autohand Code server settings to route all Slack-triggered coding tasks through the gateway.
## Monitoring Usage [#monitoring-usage]
Once configured, all Autohand Code requests appear in your LLM Gateway dashboard:
* **Request logs** — See every prompt and response
* **Cost breakdown** — Track spending by model and time period
* **Usage analytics** — Understand your AI usage patterns
View all available models on the [models page](https://llmgateway.io/models).
Need help? Join our [Discord community](https://llmgateway.io/discord) for
support and troubleshooting assistance.
# Claude Code Integration
URL: https://docs.llmgateway.io/guides/claude-code
Claude Code is locked to Anthropic's API by default. With LLM Gateway, you can point it at any model—GPT-5, Gemini, Llama, or 180+ others—while keeping the same Anthropic API format Claude Code expects.
Three environment variables. No code changes. Full cost tracking in your dashboard.
## Setup [#setup]
### Sign Up for LLM Gateway [#sign-up-for-llm-gateway]
[Sign up free](https://llmgateway.io/signup) — no credit card required. Copy your API key from the dashboard.
### Set Environment Variables [#set-environment-variables]
Configure Claude Code to use LLM Gateway:
```bash
export ANTHROPIC_BASE_URL=https://api.llmgateway.io
export ANTHROPIC_AUTH_TOKEN=llmgtwy_your_api_key_here
# optional: specify a model, otherwise it uses the default Claude model
export ANTHROPIC_MODEL=gpt-5 # or any model from our catalog
```
### Run Claude Code [#run-claude-code]
```bash
claude
```
All requests will now be routed through LLM Gateway.
## Why This Works [#why-this-works]
LLM Gateway's `/v1/messages` endpoint speaks Anthropic's API format natively. We handle the translation to each provider behind the scenes. This means:
* **Use any model** — GPT-5, Gemini, Llama, or Claude itself
* **Keep your workflow** — Claude Code doesn't know the difference
* **Track costs** — Every request appears in your LLM Gateway dashboard
* **Automatic caching** — Repeated requests hit cache, saving money
## Choosing Models [#choosing-models]
You can use any model from the [models page](https://llmgateway.io/models).
### Use OpenAI's Latest Models [#use-openais-latest-models]
```bash
# Use the latest GPT model
export ANTHROPIC_MODEL=gpt-5
# Use a cost-effective alternative
export ANTHROPIC_MODEL=gpt-5-mini
```
### Use Google's Gemini [#use-googles-gemini]
```bash
export ANTHROPIC_MODEL=gemini-2.5-pro
```
### Use Anthropic's Claude Models [#use-anthropics-claude-models]
```bash
export ANTHROPIC_MODEL=anthropic/claude-3-5-sonnet-20241022
```
## Environment Variables [#environment-variables]
### ANTHROPIC\_MODEL [#anthropic_model]
Specifies the main model to use for primary requests.
```bash
export ANTHROPIC_MODEL=gpt-5
```
### Complete Configuration Example [#complete-configuration-example]
```bash
export ANTHROPIC_BASE_URL=https://api.llmgateway.io
export ANTHROPIC_AUTH_TOKEN=llmgtwy_your_api_key_here
export ANTHROPIC_MODEL=gpt-5
export ANTHROPIC_SMALL_FAST_MODEL=gpt-5-nano
```
## Making Manual API Requests [#making-manual-api-requests]
If you want to test the endpoint directly, you can make manual requests:
```bash
curl -X POST "https://api.llmgateway.io/v1/messages" \
-H "Authorization: Bearer $LLM_GATEWAY_API_KEY" \
-H "Content-Type: application/json" \
-d '{
"model": "gpt-5",
"messages": [
{"role": "user", "content": "Hello, how are you?"}
],
"max_tokens": 100
}'
```
### Response Format [#response-format]
The endpoint returns responses in Anthropic's message format:
```json
{
"id": "msg_abc123",
"type": "message",
"role": "assistant",
"model": "gpt-5",
"content": [
{
"type": "text",
"text": "Hello! I'm doing well, thank you for asking. How can I help you today?"
}
],
"stop_reason": "end_turn",
"stop_sequence": null,
"usage": {
"input_tokens": 13,
"output_tokens": 20
}
}
```
## What You Get [#what-you-get]
* **Any model in Claude Code** — GPT-5 for heavy lifting, GPT-4o Mini for routine tasks
* **Cost visibility** — See exactly what each coding agent costs
* **One bill** — Stop managing separate accounts for OpenAI, Anthropic, Google
* **Response caching** — Repeated requests (like linting the same file) hit cache
* **Discounts** — Check [discounted models](https://llmgateway.io/models?discounted=true) for savings up to 90%
View all available models on the [models page](https://llmgateway.io/models).
Need help? Join our [Discord community](https://llmgateway.io/discord) for
support and troubleshooting assistance.
# LLM Gateway CLI
URL: https://docs.llmgateway.io/guides/cli
The **LLM Gateway CLI** (`@llmgateway/cli`) is a command-line utility for launching coding agents pre-configured with LLM Gateway, scaffolding projects, discovering models, and managing your LLM Gateway account — API keys, spending budgets, and usage analytics — straight from the terminal.
## Installation [#installation]
Run commands directly without installation:
```bash
npx @llmgateway/cli init
```
Install globally for faster access:
```bash
npm install -g @llmgateway/cli
```
Then run commands directly (`lg` works as a shorthand alias):
```bash
llmgateway init
lg init
```
## Quick Start [#quick-start]
### Initialize a Project [#initialize-a-project]
Create a new project from a template:
```bash
npx @llmgateway/cli init
```
Or specify the template and name directly:
```bash
npx @llmgateway/cli init --template image-generation --name my-ai-app
```
### Sign In [#sign-in]
Sign in with your LLM Gateway account to unlock key management, budgets, and usage analytics:
```bash
npx @llmgateway/cli auth login --email you@example.com
```
Or store a gateway API key only (enough for making gateway requests):
```bash
npx @llmgateway/cli auth login --key
```
Credentials are stored in `~/.llmgateway/config.json`. The `LLMGATEWAY_API_KEY` environment variable takes precedence over a stored key.
### Start Development [#start-development]
Navigate to your project and start the development server:
```bash
cd my-ai-app
npx @llmgateway/cli dev
```
Or specify a custom port:
```bash
npx @llmgateway/cli dev --port 3000
```
## Launch Coding Agents [#launch-coding-agents]
### `launch` [#launch]
Start any supported coding agent pre-wired to LLM Gateway: one API key, 200+ models, and every request tracked in your [dashboard](https://llmgateway.io/dashboard).
```bash
# Interactive agent picker
npx @llmgateway/cli launch
# Launch a specific agent (shortcuts work too: `llmgateway claude`)
npx @llmgateway/cli launch claude
npx @llmgateway/cli launch opencode
npx @llmgateway/cli launch codex
# Pick a model — launcher flags go before the agent name
npx @llmgateway/cli launch -m gpt-5.5 claude
# Everything after the agent name is passed to the agent itself
npx @llmgateway/cli launch claude --continue
# List all supported agents and see which are installed
npx @llmgateway/cli launch --list
# Inspect what would run without launching
npx @llmgateway/cli launch --dry-run codex
```
Every supported agent also works as a direct shortcut, e.g. `npx @llmgateway/cli claude` or `npx @llmgateway/cli devpass-code`. The launcher configures each agent automatically — environment variables, config files, or the agent's own key-registration command, whichever that agent needs — without overwriting your existing setup.
The API key is resolved from `--key`, the `LLMGATEWAY_API_KEY` environment variable, or the key stored by `llmgateway auth login --key` — in that order. Before launching, the key is verified against the gateway; a stale key (e.g. one you rolled or deleted) is reported with its exact source and the launcher falls back to the next valid one, prompting you for a fresh key if none works. If an agent isn't installed, the launcher prints its official install command and exits.
See the [integration guides](https://llmgateway.io/guides) for per-agent setup
details, and run `npx @llmgateway/cli launch --list` for the up-to-date list
of supported agents.
## Project Commands [#project-commands]
### `init` [#init]
Initialize a new project from a template.
```bash
npx @llmgateway/cli init [directory] [options]
```
**Options:**
* `-t, --template ` — Template to use (default: `image-generation`)
* `-n, --name ` — Project name
**Examples:**
```bash
# Interactive mode
npx @llmgateway/cli init
# With options
npx @llmgateway/cli init --template image-generation --name my-app
```
### `list` [#list]
Display available project templates, grouped by category. Alias: `ls`.
```bash
npx @llmgateway/cli list
```
**Options:**
* `--json` — Output in JSON format
### `models` [#models]
Browse and filter available AI models.
```bash
npx @llmgateway/cli models [options]
```
**Options:**
* `-c, --capability ` — Filter by capability (e.g., `image`, `text`)
* `-p, --provider ` — Filter by provider (e.g., `openai`, `anthropic`)
* `-s, --search ` — Search models by name
* `--json` — Output in JSON format
**Examples:**
```bash
# List all models
npx @llmgateway/cli models
# Filter by provider
npx @llmgateway/cli models --provider openai
# Search models
npx @llmgateway/cli models --search gpt
```
### `add` [#add]
Add tools or API routes to an existing project.
```bash
npx @llmgateway/cli add [type] [name]
```
Runs interactively when `type` (`tool` or `route`) and `name` are omitted.
**Tools available:**
* `weather` — Weather lookup functionality
* `search` — Web search capability
* `calculator` — Mathematical operations
**API routes available:**
* `generate` — Text generation endpoint
* `chat` — Chat completion endpoint with streaming
### `dev` [#dev]
Start the local development server using your project's package manager.
```bash
npx @llmgateway/cli dev [options]
```
**Options:**
* `-p, --port ` — Port to run on
### `upgrade` [#upgrade]
Update LLM Gateway dependencies (`@llmgateway/ai-sdk-provider`, `@llmgateway/models`, `@llmgateway/cli`) in your project.
```bash
npx @llmgateway/cli upgrade [options]
```
**Options:**
* `--check` — Check for updates without installing
### `docs` [#docs]
Open the documentation in your browser.
```bash
npx @llmgateway/cli docs [topic]
```
**Topics:** `models`, `api`, `sdk`, `quickstart` — omit to open the docs home and see all topics.
## Account Commands [#account-commands]
The commands below require a dashboard session — sign in first with
`llmgateway auth login --email`. A gateway API key alone is not enough for
account management.
### `auth` [#auth]
Manage authentication (dashboard session and gateway API key).
```bash
# Sign in with email & password (full access), or paste an API key
npx @llmgateway/cli auth login
npx @llmgateway/cli auth login --email you@example.com
npx @llmgateway/cli auth login --key
# Check authentication status (session + API key)
npx @llmgateway/cli auth status
# Show the signed-in user
npx @llmgateway/cli auth whoami
# Remove stored session and API key
npx @llmgateway/cli auth logout
```
### `keys` [#keys]
Create and manage gateway API keys.
```bash
npx @llmgateway/cli keys
```
#### `keys create` [#keys-create]
Create a new API key, optionally with spending limits and an expiry.
```bash
npx @llmgateway/cli keys create --description "CI key" --limit 100 --expires 30d
```
**Options:**
* `-p, --project ` — Project the key belongs to
* `-d, --description ` — Key description
* `-l, --limit ` — Total spending limit in USD (e.g. `100` or `49.99`)
* `--period-limit ` — Spending limit per rolling period in USD
* `--period ` — Rolling period for `--period-limit` (`12h`, `1d`, `2w`, `1mo`; default `1mo`)
* `-e, --expires ` — TTL as a duration (`30d`, `12h`) or an ISO date
* `--json` — Output in JSON format
The token is only displayed once at creation time — save it immediately.
#### `keys list` [#keys-list]
List API keys with spend, budget, and expiry. Alias: `keys ls`.
**Options:**
* `-p, --project ` — Filter by project
* `--all` — Show all keys in the org (admin/owner only)
* `--json` — Output in JSON format
#### `keys update ` [#keys-update-id]
Activate or deactivate an API key.
**Options:**
* `--activate` — Set the key to active
* `--deactivate` — Set the key to inactive
* `-e, --expires ` — New expiry as a duration (`30d`) or ISO date (needed to reactivate expired keys)
#### `keys limit ` [#keys-limit-id]
Set spending limits on an API key (same as `budget set`).
**Options:**
* `-l, --limit ` — Total spending limit in USD
* `--period-limit ` — Spending limit per rolling period in USD
* `--period ` — Rolling period (`12h`, `1d`, `2w`, `1mo`; default `1mo`)
* `--clear` — Remove all spending limits
#### `keys roll ` [#keys-roll-id]
Regenerate the token for an API key. The old token becomes invalid immediately.
**Options:**
* `-y, --yes` — Skip confirmation
#### `keys delete ` [#keys-delete-id]
Delete an API key. Alias: `keys rm`.
**Options:**
* `-y, --yes` — Skip confirmation
### `budget` [#budget]
Manage API key spending limits.
```bash
# Set a total and/or rolling-period budget
npx @llmgateway/cli budget set --limit 100 --period-limit 25 --period 1w
# Remove all spending limits
npx @llmgateway/cli budget set --clear
# Show budget and current spend
npx @llmgateway/cli budget get
```
**`budget set` options:** `-l, --limit `, `--period-limit `, `--period `, `--clear`
**`budget get` options:** `-p, --project `, `--json`
### `usage` [#usage]
View usage and cost analytics.
```bash
npx @llmgateway/cli usage [options]
```
**Options:**
* `-o, --org ` — Aggregate usage across an organization
* `-p, --project ` — Filter by project
* `-k, --api-key ` — Filter by API key
* `--by ` — Break down by `model` or `key`
* `-r, --range ` — Time range: `1h`, `4h`, `24h`, `7d`, `30d`, `365d` (default `7d`)
* `--days ` — Look back N days instead of `--range`
* `--from ` / `--to ` — Custom date range (`YYYY-MM-DD`)
* `--json` — Output in JSON format
**Examples:**
```bash
# Last 7 days for the default project
npx @llmgateway/cli usage
# Cost per model over the last 30 days
npx @llmgateway/cli usage --by model --range 30d
# Whole-org aggregate
npx @llmgateway/cli usage --org
```
#### `usage sources` [#usage-sources]
Break down usage by session/agent source to see which agents or sessions are spending.
```bash
npx @llmgateway/cli usage sources [options]
```
**Options:** `-p, --project `, `-r, --range ` (`7d`, `30d`), `--from `, `--to `, `--json`
### `orgs` [#orgs]
List your organizations with plan and credit balance. Alias: `orgs ls`.
```bash
npx @llmgateway/cli orgs list [--json]
```
### `projects` [#projects]
Manage projects and the CLI's default project.
```bash
# List projects (optionally filtered by org)
npx @llmgateway/cli projects list [--org ] [--json]
# Set the default project used by keys/budget/usage commands
npx @llmgateway/cli projects use
```
### `credits` [#credits]
Show organization credit balances.
```bash
npx @llmgateway/cli credits [--org ] [--json]
```
## Available Templates [#available-templates]
### Web Applications [#web-applications]
* **`embeddable-credits`** — Monetize your AI app in 5 minutes. End-user wallets and in-app credit purchases ("Stripe for AI") with the embeddable SDK.
* **`image-generation`** — Full-stack AI image generation app (Next.js 16, React 19). Multi-provider support with a unified API.
* **`ai-chatbot`** — AI chatbot with streaming responses.
* **`og-image-generator`** — AI-powered OG image generator.
* **`feedback-dashboard`** — Customer feedback sentiment dashboard.
* **`writing-assistant`** — AI writing assistant with text actions.
* **`qa-agent`** — AI-powered QA testing agent with browser automation, real-time action timeline, and live browser preview.
* **`showcase`** — Public, filterable gallery of apps built with LLM Gateway templates. Static and deployable, with a "Submit your app" flow.
### Bots [#bots]
* **`slack-qa-bot`** — Slack bot that streams AI answers and keeps thread context.
### CLI Agents [#cli-agents]
* **`weather-agent`** — Answers weather queries using tool calling.
* **`lead-agent`** — Researches people and posts results to Discord.
* **`changelog-generator-agent`** — Generates changelogs from git history.
* **`email-drafter-agent`** — Drafts polished emails from rough notes.
* **`sentiment-analyzer-agent`** — Analyzes text sentiment.
* **`data-extractor-agent`** — Extracts structured entities from text.
```bash
npx @llmgateway/cli init --template qa-agent
```
## Configuration [#configuration]
The CLI stores configuration in `~/.llmgateway/config.json`:
```json
{
"apiKey": "llmgtwy_...",
"defaultTemplate": "image-generation",
"sessionEmail": "you@example.com",
"defaultOrgId": "org_...",
"defaultProjectId": "proj_..."
}
```
Signing in with `auth login --email` also stores a dashboard session used by the account commands (`keys`, `budget`, `usage`, `orgs`, `projects`, `credits`).
### Environment Variables [#environment-variables]
* `LLMGATEWAY_API_KEY` — Gateway API key; takes precedence over the config file:
```bash
export LLMGATEWAY_API_KEY="llmgtwy_..."
```
* `LLMGATEWAY_API_URL` — Override the management API base URL (defaults to `https://internal.llmgateway.io`), useful for self-hosted deployments.
## More Resources [#more-resources]
* [Agents](https://llmgateway.io/agents) — Pre-built AI agents
* [Templates](https://llmgateway.io/templates) — Production-ready starter projects
* [GitHub Repository](https://github.com/theopenco/llmgateway-templates) — Source code and issues
Need help or want to request a feature? Open an issue on
[GitHub](https://github.com/theopenco/llmgateway-templates/issues).
# Cline Integration
URL: https://docs.llmgateway.io/guides/cline
[Cline](https://cline.bot) is an autonomous AI coding assistant that lives in your VS Code editor. It can create and edit files, run terminal commands, and help you build complex projects. You can configure Cline to use LLM Gateway for access to multiple AI providers with unified billing and cost tracking.
## Prerequisites [#prerequisites]
* VS Code based IDE installed
* An LLM Gateway API key
## Setup [#setup]
Cline supports OpenAI-compatible API endpoints, making it straightforward to integrate with LLM Gateway.
### Install Cline Extension [#install-cline-extension]
1. Open VS Code
2. Go to the Extensions view (Cmd/Ctrl + Shift + X)
3. Search for "Cline"
4. Click **Install** on the Cline extension
### Open Cline Settings [#open-cline-settings]
1. Click on the Cline icon in the VS Code sidebar
2. Click the settings gear icon in the Cline panel
### Configure API Provider [#configure-api-provider]
1. In the API Provider dropdown, select **OpenAI Compatible**
2. Enter the following details:
* **Base URL**: `https://api.llmgateway.io/v1`
* **API Key**: Your LLM Gateway API key
* **Model ID**: Choose a model (e.g., `claude-opus-4-5-20251101`, `gpt-5.2`, `gemini-3-pro-preview`, `deepseek-3.2`). See [provider-specific routing](https://docs.llmgateway.io/features/routing#provider-specific-routing) for more options.
### Test the Integration [#test-the-integration]
1. Open a project in VS Code
2. Click on the Cline icon in the sidebar
3. Type a message like "Create a hello world function in Python"
4. Cline should respond and offer to create the file
All requests will now be routed through LLM Gateway.
View all available models on the [models page](https://llmgateway.io/models).
## Features [#features]
Once configured, you can use all of Cline's features with LLM Gateway:
### Autonomous Coding [#autonomous-coding]
* Create new files and projects from scratch
* Edit existing code based on natural language instructions
* Refactor and improve code quality
### Terminal Commands [#terminal-commands]
* Run build commands, tests, and scripts
* Install dependencies
* Execute any terminal operation
### File Management [#file-management]
* Create, read, and modify files
* Navigate your codebase
* Search for relevant code
## Model Selection Tips [#model-selection-tips]
### Using Provider-Specific Models [#using-provider-specific-models]
To use a specific provider's version of a model, prefix the model ID with the provider name. See [provider-specific routing](https://docs.llmgateway.io/features/routing#provider-specific-routing) for more options.
### Using Discounted Models [#using-discounted-models]
LLM Gateway offers discounted access to some models. Find them on the [models page](https://llmgateway.io/models?view=grid\&filters=1\&discounted=true) and copy the model ID.
### Using Free Models [#using-free-models]
Some models are available for free. Browse them on the [models page](https://llmgateway.io/models?view=grid\&filters=1\&free=true).
Need help? Join our [Discord community](https://llmgateway.io/discord) for
support and troubleshooting assistance.
## Benefits of Using LLM Gateway with Cline [#benefits-of-using-llm-gateway-with-cline]
* **Multi-Provider Access**: Use models from OpenAI, Anthropic, Google, and more through a single API
* **Cost Control**: Track and limit your AI spending with detailed usage analytics
* **Unified Billing**: One account for all providers instead of managing multiple API keys
* **Caching**: Reduce costs with response caching for repeated requests
* **Analytics**: Monitor usage patterns and costs in the dashboard
# Codex CLI Integration
URL: https://docs.llmgateway.io/guides/codex-cli
Codex CLI is OpenAI's open-source terminal coding agent. By default it connects to OpenAI's API, but with LLM Gateway you can route it through a single gateway—use GPT-5.3 Codex, Gemini, Claude, or any of 200+ models while keeping full cost visibility.
One config file. No code changes. Full cost tracking in your dashboard.
## Setup [#setup]
### Sign Up for LLM Gateway [#sign-up-for-llm-gateway]
[Sign up free](https://llmgateway.io/signup) — no credit card required. Copy your API key from the dashboard.
### Log Out of ChatGPT [#log-out-of-chatgpt]
If you're logged into ChatGPT in Codex CLI, the stored session will override your custom config. Log out first:
```bash
codex logout
```
### Create Config File [#create-config-file]
Create or edit `~/.codex/config.toml`:
```bash
model = "auto"
model_reasoning_effort = "high"
openai_base_url = "https://api.llmgateway.io/v1"
```
### Run Codex CLI [#run-codex-cli]
```bash
codex
```
On first launch, Codex will prompt you for authentication. Select **Provide your own API key**, then enter your LLM Gateway API key (starts with `llmgtwy_`).
All requests will now be routed through LLM Gateway.
## Why This Works [#why-this-works]
LLM Gateway's `/v1` endpoint is fully OpenAI-compatible. Codex CLI sends requests to our gateway instead of OpenAI directly, and we route them to the right provider behind the scenes. This means:
* **Use any model** — GPT-5.3 Codex, Gemini, Claude, or 180+ others
* **Keep your workflow** — Codex CLI doesn't know the difference
* **Track costs** — Every request appears in your LLM Gateway dashboard
* **Automatic caching** — Repeated requests hit cache, saving money
## Configuration Explained [#configuration-explained]
### Base URL [#base-url]
The `openai_base_url` field points Codex CLI to LLM Gateway instead of OpenAI:
```bash
openai_base_url = "https://api.llmgateway.io/v1"
```
### Model Selection [#model-selection]
Use `auto` to let LLM Gateway pick the best model, or set a specific one from the [models page](https://llmgateway.io/models):
```bash
model = "auto"
# or pick a specific model
model = "gpt-5.3-codex"
```
### Reasoning Effort [#reasoning-effort]
Control how much reasoning the model uses. Options are `low`, `medium`, and `high`:
```bash
model_reasoning_effort = "high"
```
## Choosing Models [#choosing-models]
Use `auto` to let LLM Gateway pick the best model automatically, or choose a specific one from the [models page](https://llmgateway.io/models):
```bash
# let LLM Gateway pick the best model
model = "auto"
# or pick a specific model
model = "gpt-5.3-codex"
```
## What You Get [#what-you-get]
* **Any model in Codex CLI** — GPT-5.3 Codex for heavy lifting, lighter models for routine tasks
* **Cost visibility** — See exactly what each coding agent costs
* **One bill** — Stop managing separate accounts for OpenAI, Anthropic, Google
* **Response caching** — Repeated requests hit cache automatically
* **Discounts** — Check [discounted models](https://llmgateway.io/models?discounted=true) for savings up to 90%
## Troubleshooting [#troubleshooting]
### Data retention required [#data-retention-required]
If you see an error like:
```
The Responses API requires data retention to be enabled.
```
Codex CLI uses the OpenAI Responses API (`/v1/responses`), which requires data retention to be enabled. To fix this:
1. Go to your [organization settings](https://llmgateway.io/dashboard) and navigate to **Settings > Policies**
2. Select **Retain All Data** and click **Save Settings**
If you prefer not to enable data retention, you can configure Codex CLI to use the Chat Completions API instead by setting the `OPENAI_CHAT_COMPLETIONS_PATH` environment variable, if supported by your Codex CLI version.
### Authentication errors [#authentication-errors]
If you see `401 Unauthorized` or requests going to `api.openai.com` instead of LLM Gateway:
1. Make sure you've run `codex logout` to clear any ChatGPT session
2. Verify `openai_base_url` is set in `~/.codex/config.toml`
3. When Codex prompts for authentication, select **Provide your own API key** and enter your LLM Gateway key (starts with `llmgtwy_`)
### Model not found [#model-not-found]
Verify the model ID matches exactly what's listed on the [models page](https://llmgateway.io/models). Model IDs are case-sensitive.
### Connection issues [#connection-issues]
Check that `openai_base_url` is set to `https://api.llmgateway.io/v1` (note the `/v1` at the end).
View all available models on the [models page](https://llmgateway.io/models).
Need help? Join our [Discord community](https://llmgateway.io/discord) for
support and troubleshooting assistance.
# Continue CLI Integration
URL: https://docs.llmgateway.io/guides/continue
[Continue](https://docs.continue.dev) is an open-source AI code assistant available as a CLI tool. By configuring it to use LLM Gateway, you get access to 200+ models from 40+ providers with unified cost tracking.
One config file. Any model. Full cost visibility.
## Prerequisites [#prerequisites]
* An LLM Gateway API key — [sign up free](https://llmgateway.io/signup) (no credit card required)
## Setup [#setup]
### Install Continue CLI [#install-continue-cli]
Install Continue CLI globally:
```bash
npm install -g @continuedev/cli
```
### Get Your API Key [#get-your-api-key]
[Sign up](https://llmgateway.io/signup) or log in to your LLM Gateway dashboard. Navigate to **API Keys** and create a new key. Copy it — it starts with `llmgtwy_`.
### Create a Config File [#create-a-config-file]
Create the Continue config directory and config file:
```bash
mkdir -p ~/.continue
```
Then create `~/.continue/config.yaml` with your LLM Gateway configuration:
```yaml
name: llmgateway
version: 0.0.1
models:
- name: claude-sonnet-4-6
provider: openai
model: claude-sonnet-4-6
apiBase: https://api.llmgateway.io/v1
apiKey: llmgtwy_your-api-key-here
```
Replace `llmgtwy_your-api-key-here` with your actual API key from the
dashboard.
### Add More Models (Optional) [#add-more-models-optional]
Add as many models as you want from the [models page](https://llmgateway.io/models):
```yaml
name: llmgateway
version: 0.0.1
models:
- name: claude-sonnet-4-6
provider: openai
model: claude-sonnet-4-6
apiBase: https://api.llmgateway.io/v1
apiKey: llmgtwy_your-api-key-here
- name: gpt-5.5
provider: openai
model: gpt-5.5
apiBase: https://api.llmgateway.io/v1
apiKey: llmgtwy_your-api-key-here
- name: gemini-3.1-pro
provider: openai
model: gemini-3.1-pro
apiBase: https://api.llmgateway.io/v1
apiKey: llmgtwy_your-api-key-here
```
All models use `provider: openai` since LLM Gateway exposes an OpenAI-compatible API.
### Start Using Continue [#start-using-continue]
Launch Continue CLI with the `--config` flag pointing to your config file:
```bash
cn --config ~/.continue/config.yaml
```
All requests now route through LLM Gateway. You'll see usage, costs, and logs in your dashboard.
## Why Use LLM Gateway with Continue [#why-use-llm-gateway-with-continue]
* **200+ models** — Claude, GPT, Gemini, Llama, DeepSeek, and more
* **One API key** — Stop managing separate keys for each provider
* **Cost tracking** — See exactly what each session costs in your dashboard
* **Response caching** — Repeated requests hit cache automatically
* **Automatic fallback** — If a provider is down, requests route to an alternative
* **Volume discounts** — Check [discounted models](https://llmgateway.io/models?discounted=true) for savings up to 90%
## Configuration Details [#configuration-details]
### Provider Setting [#provider-setting]
Always use `provider: openai` in your Continue config. LLM Gateway exposes an OpenAI-compatible API, so Continue's OpenAI provider handles all models correctly — including Claude, Gemini, and others.
### Project-Specific Config [#project-specific-config]
Place a `.continue/config.yaml` in your project root to override the global config for that project:
```yaml
name: project-config
version: 0.0.1
models:
- name: gpt-5.5
provider: openai
model: gpt-5.5
apiBase: https://api.llmgateway.io/v1
apiKey: llmgtwy_your-api-key-here
```
### Using with the --config Flag [#using-with-the---config-flag]
Point to any config file:
```bash
cn --config path/to/config.yaml
```
## Switching Models [#switching-models]
Add multiple models to your config and switch between them in the Continue interface. In the CLI, you can specify a model with the `--model` flag if supported, or update your config file.
## Locking to a Specific Provider [#locking-to-a-specific-provider]
By default, LLM Gateway automatically fails over to alternative providers if your chosen provider is experiencing downtime. To disable fallback, add a custom header:
```yaml
models:
- name: claude-sonnet-4-6
provider: openai
model: claude-sonnet-4-6
apiBase: https://api.llmgateway.io/v1
apiKey: llmgtwy_your-api-key-here
requestOptions:
headers:
X-No-Fallback: "true"
```
Disabling fallback means requests will fail if the chosen provider is down.
See the [routing docs](https://docs.llmgateway.io/features/routing) for details.
## Troubleshooting [#troubleshooting]
### "Failed to parse config" error [#failed-to-parse-config-error]
Make sure your config file includes `name` and `version` fields at the top level:
```yaml
name: llmgateway
version: 0.0.1
models:
- ...
```
### Onboarding wizard still appears [#onboarding-wizard-still-appears]
If running `cn` without `--config` shows an onboarding prompt, create the sentinel file to skip it:
```bash
touch ~/.continue/.onboarding_complete
```
Or always launch with the `--config` flag to bypass onboarding entirely.
### Model not found [#model-not-found]
Verify the model ID matches exactly what's listed on the [models page](https://llmgateway.io/models). Model IDs are case-sensitive.
### Connection timeout [#connection-timeout]
Check that `apiBase` is set to `https://api.llmgateway.io/v1` (note the `/v1` at the end).
### Authentication errors [#authentication-errors]
Make sure your `apiKey` starts with `llmgtwy_` and is valid. Check your [dashboard](https://llmgateway.io/dashboard) to confirm the key is active.
### Provider must be "openai" [#provider-must-be-openai]
LLM Gateway uses an OpenAI-compatible API. Even when using Claude or Gemini models, set `provider: openai` in your Continue config. The gateway handles routing to the correct upstream provider.
View all available models on the [models page](https://llmgateway.io/models).
Need help? Join our [Discord community](https://llmgateway.io/discord) for
support and troubleshooting assistance.
# Cursor Integration
URL: https://docs.llmgateway.io/guides/cursor
Cursor is an AI-powered code editor built on VSCode. You can point Cursor's custom OpenAI base URL at LLM Gateway to use any of our 200+ models in the AI panel — both **plan mode** and **agent mode**.
**Plan and agent mode.** Cursor routes its AI panel — plan mode and agent mode
— through the custom API key + base URL, so both work with LLM Gateway. Tab
autocomplete and inline edit (Cmd/Ctrl + K) remain locked to Cursor's own
backend and will not route through the gateway. If you want every request in
your workflow to go through LLM Gateway, use a terminal agent like [Claude
Code](https://docs.llmgateway.io/guides/claude-code), [Codex CLI](https://docs.llmgateway.io/guides/codex-cli),
[Cline](https://docs.llmgateway.io/guides/cline), [Continue CLI](https://docs.llmgateway.io/guides/continue), or [Hermes
Agent](https://docs.llmgateway.io/guides/hermes-agent).
## Prerequisites [#prerequisites]
* An LLM Gateway account with an API key
* Cursor IDE installed
* Basic understanding of Cursor's AI features
## Setup [#setup]
Cursor supports OpenAI-compatible API endpoints, making it easy to integrate with LLM Gateway.
### Get Your API Key [#get-your-api-key]
1. Log in to your [LLM Gateway dashboard](https://llmgateway.io/dashboard)
2. Navigate to **API Keys** section
3. Create a new API key and copy the key
### Configure Cursor Settings [#configure-cursor-settings]
1. Open Cursor and go to **Settings** then Click on "Cursor Settings"
2. Click on "Models"
3. Click on "Add OpenAI API Key"
3. Scroll down to **OpenAI API Key** section
4. Click on **Add OpenAI API Key**
5. Enter your LLM Gateway API key
6. In the same Models settings, find the **Override OpenAI Base URL** option
7. Enable the override option
8. Enter the LLM Gateway endpoint: `https://api.llmgateway.io/v1`
### Select Models [#select-models]
1. In the **Models** section, you can now select from available models
2. Choose any [LLM Gateway supported model](https://llmgateway.io/models):
* For chat: Use models like `gpt-5`, `gpt-4o`, `claude-sonnet-4-5`
* For custom models: Add the provider name before the model name (e.g. `custom/my-model`)
* For discounted models: copy the ids from from the [models page](https://llmgateway.io/models?view=grid\&filters=1\&discounted=true)
* For free models: copy the ids from from the [models page](https://llmgateway.io/models?view=grid\&filters=1\&free=true)
* For reasoning models: copy the ids from from the [models page](https://llmgateway.io/models?view=grid\&filters=1\&reasoning=true)
### Test the Integration [#test-the-integration]
1. Open any code file in Cursor
2. Try using the AI chat (Cmd/Ctrl + L) in plan mode
3. Then switch the panel to agent mode and run a small multi-file task
All AI requests will now be routed through LLM Gateway.
## What Works (and What Doesn't) [#what-works-and-what-doesnt]
Cursor honors the custom OpenAI base URL for the **AI panel** (Cmd/Ctrl + L) — both plan mode and agent mode. Tab autocomplete and inline edit still use Cursor's own backend, even after you save the LLM Gateway key.
### Works through LLM Gateway [#works-through-llm-gateway]
* **Plan mode (Cmd/Ctrl + L)** — Ask questions, plan changes, get explanations, debug.
* **Agent mode** — Cursor's coding agent runs multi-file edits with your gateway models.
All of these requests route through LLM Gateway and appear in your dashboard.
### Does NOT work through LLM Gateway [#does-not-work-through-llm-gateway]
* **Inline Edit (Cmd/Ctrl + K)** — Locked to Cursor's backend.
* **Autocomplete / Tab completion** — Locked to Cursor's backend.
If you want every request in your workflow — including edits and completions — to route through LLM Gateway, use [Claude Code](https://docs.llmgateway.io/guides/claude-code), [Codex CLI](https://docs.llmgateway.io/guides/codex-cli), [Cline](https://docs.llmgateway.io/guides/cline), [Continue CLI](https://docs.llmgateway.io/guides/continue), or [Hermes Agent](https://docs.llmgateway.io/guides/hermes-agent).
### Model Routing [#model-routing]
With LLM Gateway's [routing features](https://docs.llmgateway.io/features/routing), you can:
* **Chooses cost-effective models** by default for optimal price-to-performance ratio
* **Automatically scales to more powerful models** based on your request's context size
* **Handles large contexts intelligently** by selecting models with appropriate context windows
## Troubleshooting [#troubleshooting]
### Authentication Errors [#authentication-errors]
If you see authentication errors:
* Verify your API key is correct
* Check that the base URL is set to `https://api.llmgateway.io/v1`
* Ensure your LLM Gateway account has sufficient credits
### Model Not Found [#model-not-found]
If you see "model not found" errors:
* Verify the model ID exists in the [models page](https://llmgateway.io/models)
* Check that you're using the correct model name format
* Some models may require specific provider configurations in your LLM Gateway dashboard
### Slow Responses [#slow-responses]
If responses are slow:
* Check your internet connection
* Monitor your usage in the LLM Gateway dashboard
* Switch to a faster chat model from the [models page](https://llmgateway.io/models)
### Autocomplete / inline edit still uses Cursor's models [#autocomplete--inline-edit-still-uses-cursors-models]
This is expected. Cursor routes the AI panel — plan mode and agent mode — through the custom API key, but tab autocomplete and inline edit are locked to Cursor's own backend. See [What Works (and What Doesn't)](#what-works-and-what-doesnt) above.
Need help? Join our [Discord community](https://llmgateway.io/discord) for
support and troubleshooting assistance.
## Benefits of Using LLM Gateway with Cursor [#benefits-of-using-llm-gateway-with-cursor]
* **Multi-Provider Access**: Use models from OpenAI, Anthropic, Google, Open-source models and more
* **Cost Control**: Track and limit your AI spending with detailed usage analytics
* **Caching**: Reduce costs with response caching
* **Analytics**: Monitor usage patterns and costs
# DevPass Code
URL: https://docs.llmgateway.io/guides/devpass-code
[DevPass Code](https://github.com/theopenco/devpass-code) is a terminal coding agent that talks **only** to LLM Gateway. It's a rebranded fork of [opencode](https://github.com/anomalyco/opencode) (MIT), trimmed down to two providers that both point at LLM Gateway's OpenAI-compatible API. Every request is tagged with `x-source: devpass-code`, so DevPass usage is attributed correctly and you get access to all \~190 text models LLM Gateway offers.
Log in once from your terminal with a single click in the browser — no copy-pasting API keys unless you want to.
## Install [#install]
Install DevPass Code globally from npm:
```bash
npm i -g devpass-code
```
Or with Homebrew:
```bash
brew install theopenco/tap/devpass-code
```
Other options: an install script (`curl -fsSL https://raw.githubusercontent.com/theopenco/devpass-code/main/install | bash`), an AUR package (`devpass-code-bin`), a Docker image (`ghcr.io/theopenco/devpass-code`), and Windows binaries on [GitHub releases](https://github.com/theopenco/devpass-code/releases).
To run from source instead, clone the repository, `bun install`, then:
```bash
bun run packages/devpass-code/src/index.ts --help
```
## Authenticate [#authenticate]
DevPass Code supports one-click browser login, just like Claude Code. Start the login flow:
```bash
devpass-code auth login
```
### Pick a provider [#pick-a-provider]
Choose either **LLM Gateway** (pay-as-you-go with your own API key) or **LLM Gateway DevPass** (the DevPass coding subscription). See [Providers](#providers) below for the difference.
### Log in with browser [#log-in-with-browser]
Select **"Log in with browser."** DevPass Code opens [https://llmgateway.io/connect/cli](https://llmgateway.io/connect/cli) and starts a local loopback server.
### Approve in the browser [#approve-in-the-browser]
Approve the request in your browser. The API key is delivered back to the local loopback server automatically — nothing to copy or paste.
### Start coding [#start-coding]
Your credentials are saved to `~/.local/share/devpass-code/auth.json`. You're ready to go.
Prefer to paste a key? Choose **"Paste an API key"** during `devpass-code auth
login` and enter a key from your [LLM Gateway
dashboard](https://llmgateway.io/dashboard). You can also set the
`LLMGATEWAY_API_KEY` environment variable to skip the prompt entirely.
## Providers [#providers]
DevPass Code ships exactly two providers. Both hit `https://api.llmgateway.io/v1` (OpenAI-compatible) and expose the same \~190 text models — the only difference is how usage is billed.
| Provider | Billing |
| ----------------------- | ------------------------------------------------------------------------------------------------------- |
| **LLM Gateway** | Pay-as-you-go with your own API key |
| **LLM Gateway DevPass** | The DevPass coding subscription — billing is handled automatically by the gateway based on your account |
Both providers route through the same gateway, so you can switch between them
at any time without changing anything else. View all available models on the
[models page](https://llmgateway.io/models).
## Use it [#use-it]
Once authenticated, start DevPass Code in any project directory and describe what you want to build. All requests route through LLM Gateway with `x-source: devpass-code`, so every prompt and its cost appear in your [dashboard](https://llmgateway.io/dashboard).
## Configuration [#configuration]
* **Config file** — Place a `devpass-code.json` in your project (or global config directory) to customize models and behavior.
* **`LLMGATEWAY_API_KEY`** — Provide your LLM Gateway API key without running the login flow.
* **`DEVPASS_APP_URL`** — Override the app URL used for browser login (defaults to `https://llmgateway.io`).
## Why Use LLM Gateway with DevPass Code [#why-use-llm-gateway-with-devpass-code]
* **\~190 text models** — GPT-5, Claude, Gemini, Llama, and more, all through one endpoint
* **One-click login** — Approve in the browser, key delivered automatically
* **DevPass billing** — The DevPass subscription is handled automatically by the gateway
* **Cost tracking** — See exactly what each coding session costs in your dashboard
* **Response caching** — Repeated requests hit cache automatically
Source, issues, and releases live at
[github.com/theopenco/devpass-code](https://github.com/theopenco/devpass-code).
Need help? Join our [Discord community](https://llmgateway.io/discord) for
support and troubleshooting assistance.
# Hermes Agent Integration
URL: https://docs.llmgateway.io/guides/hermes-agent
[Hermes Agent](https://github.com/nousresearch/hermes-agent) is an open-source AI coding agent for your terminal built by Nous Research. It supports tool use, browser automation, multi-provider routing, skills, and MCP servers. By pointing it at LLM Gateway you get access to 200+ models from 40+ providers, all tracked in one dashboard.
One config change. No code changes. Full cost tracking.
## Prerequisites [#prerequisites]
* Hermes Agent installed — see [installation](#installation) below or visit the [Hermes Agent repo](https://github.com/nousresearch/hermes-agent)
* An LLM Gateway API key — [sign up free](https://llmgateway.io/signup) (no credit card required)
## Installation [#installation]
Install Hermes Agent using the official install script:
```bash
curl -fsSL https://raw.githubusercontent.com/NousResearch/hermes-agent/main/scripts/install.sh | bash
```
After installation, reload your shell and verify:
```bash
source ~/.bashrc
hermes --version
```
The installer handles Python 3.11, Node.js, ripgrep, and other dependencies
automatically. See the [repo](https://github.com/nousresearch/hermes-agent)
for Windows (PowerShell) and manual install options.
## Setup [#setup]
### Run the Setup Wizard [#run-the-setup-wizard]
Run `hermes setup` to launch the interactive setup wizard. You can choose either **Quick setup** (option 1) for provider, model, and messaging configuration, or **Full setup** (option 2) to configure everything including tools, skills, and advanced options:
```bash
hermes setup
```
In this guide we use Quick setup, but Full setup works the same way — it just includes additional configuration steps.
### Configure Inference Provider [#configure-inference-provider]
The wizard will ask you to configure your inference provider. Select **Custom OpenAI-compatible endpoint** and enter the LLM Gateway base URL:
```
API base URL: https://api.llmgateway.io/v1
```
Then paste your LLM Gateway API key (starts with `llmgtwy_`):
### Choose a Model [#choose-a-model]
The wizard presents a list of 200+ available models. Type a model name or select from the list. Popular choices include `claude-sonnet-4-6`, `gpt-5.5`, or `gemini-3.1-pro`:
### Set Context Length [#set-context-length]
Leave the context length blank to auto-detect (recommended), or specify a custom value:
### Set Display Name [#set-display-name]
Give your provider configuration a display name. This appears in the Hermes status bar when chatting:
### Select Terminal Backend [#select-terminal-backend]
Choose your terminal backend. In this guide we use **Local** (run directly on this machine), but you can pick any option based on your requirements — Docker for isolated containers, SSH for remote machines, Modal for serverless sandboxes, Daytona for cloud dev environments, and more:
### Setup Complete [#setup-complete]
Once done, Hermes shows you where your config files are stored and how to edit them. It will prompt **"Launch hermes chat now? \[Y/n]"** — press `Y` to start an interactive agent session immediately:
Your configuration files:
* **Settings:** `~/.hermes/config.yaml`
* **API Keys:** `~/.hermes/.env`
* **Data:** `~/.hermes/cron/`, `sessions/`, `logs/`
Once you press `Y`, Hermes launches a full agent session connected to LLM Gateway. You can start chatting right away.
## DevPass Compatibility [#devpass-compatibility]
Hermes Agent is fully compatible with [DevPass coding plans](https://docs.llmgateway.io/features/coding-agents). The gateway automatically detects Hermes via multiple signals:
* **X-Source header** — Hermes sends `X-Source: https://hermes-agent.nousresearch.com` (auto-detected)
* **User-Agent** — `HermesAgent/` is recognized
* **X-Title** — Title containing "hermes agent" is matched
* **HTTP-Referer** — Any referer URL containing `hermes-agent.nousresearch.com`
No configuration is needed on your side — DevPass plans automatically allow Hermes traffic.
Native LLM Gateway provider support is being added to Hermes Agent upstream.
Once merged, you'll be able to select "LLM Gateway" directly as a provider in
`hermes setup` instead of using "Custom OpenAI-compatible endpoint".
## Using Hermes with LLM Gateway [#using-hermes-with-llm-gateway]
Once configured, all requests route through LLM Gateway. You'll see the provider name (e.g., "LLMGATEWAY") in the Hermes status bar.
### Switching Models at Runtime [#switching-models-at-runtime]
You can switch models mid-session using the `/model` slash command (similar to how Claude Code uses slash commands). Just type `/model` followed by the model name:
Switch to any model available through LLM Gateway — from Claude to GPT to open-source models — without leaving your session:
Add `--global` to persist the model change across sessions.
### CLI Model Override [#cli-model-override]
You can also override the model from the command line:
```bash
# Use a specific model for this session
hermes chat --model gpt-5.5
# Use a powerful model for complex tasks
hermes chat --model claude-opus-4-6
```
## Why Use LLM Gateway with Hermes Agent [#why-use-llm-gateway-with-hermes-agent]
* **200+ models** — Claude, GPT, Gemini, Llama, DeepSeek, and more
* **One API key** — Stop managing separate keys for each provider
* **Cost tracking** — See exactly what each session costs in your dashboard
* **Response caching** — Repeated requests hit cache automatically
* **Automatic fallback** — If a provider is down, requests route to an alternative
* **Volume discounts** — Check [discounted models](https://llmgateway.io/models?discounted=true) for savings up to 90%
## One-Shot Mode [#one-shot-mode]
For scripting or CI pipelines, use the `-q` flag for a one-shot prompt:
```bash
hermes chat -q "Explain what this function does" -Q
```
The `-Q` flag enables quiet mode, suppressing the banner and spinner for clean output. For pure one-shot mode (no interactive session):
```bash
hermes chat -z "Generate a README for this project"
```
## Useful Hermes Commands [#useful-hermes-commands]
| Command | Purpose |
| ---------------------- | --------------------------------------- |
| `hermes` | Start interactive chat (default) |
| `hermes setup` | Run the setup wizard |
| `hermes setup model` | Change model/provider |
| `hermes chat -q "..."` | One-shot prompt |
| `hermes model` | Choose provider and model interactively |
| `hermes config edit` | Open config in your editor |
| `hermes doctor` | Diagnose connection/config issues |
| `hermes sessions` | Browse and manage past sessions |
| `hermes --continue` | Resume most recent session |
| `hermes update` | Update to latest version |
## Locking to a Specific Provider [#locking-to-a-specific-provider]
By default, LLM Gateway automatically fails over to alternative providers if your chosen provider is experiencing downtime. To disable fallback and always route to one provider, you can add the header via Hermes's request configuration.
Disabling fallback means requests will fail if the chosen provider is down.
See the [routing docs](https://docs.llmgateway.io/features/routing) for details.
## Troubleshooting [#troubleshooting]
### Model not found [#model-not-found]
If you get a "model not supported" error, check that your model ID matches exactly what's listed on the [models page](https://llmgateway.io/models). Model IDs are case-sensitive.
### Connection timeout [#connection-timeout]
Verify your `base_url` is set to `https://api.llmgateway.io/v1` (note the `/v1` at the end). You can also check the `HERMES_API_TIMEOUT` environment variable if you're hitting timeouts on long-running requests.
### Authentication errors [#authentication-errors]
Make sure your `api_key` starts with `llmgtwy_` and is valid. Check your [dashboard](https://llmgateway.io/dashboard) to confirm the key is active.
### Diagnosing issues [#diagnosing-issues]
Run `hermes doctor` to check your configuration, connectivity, and credentials:
```bash
hermes doctor
```
### Old config overrides [#old-config-overrides]
If you previously used a different provider (e.g., OpenRouter), make sure to update both `provider` and `base_url` fields. The `provider` must be set to `"custom"` for LLM Gateway. Also check `~/.hermes/.env` for any leftover `OPENROUTER_API_KEY` or other provider keys that might take precedence.
View all available models on the [models page](https://llmgateway.io/models).
Need help? Join our [Discord community](https://llmgateway.io/discord) for
support and troubleshooting assistance.
# Kilo Code Integration
URL: https://docs.llmgateway.io/guides/kilo-code
[Kilo Code](https://kilo.ai/) is an AI coding assistant that runs as a VS Code extension. It supports autonomous coding, file editing, terminal commands, and browser automation. LLM Gateway is a built-in provider in Kilo Code, so setup takes under a minute — no manual base URL configuration required.
## Prerequisites [#prerequisites]
* VS Code or a VS Code-based editor (Cursor, Windsurf, etc.)
* An LLM Gateway API key — [sign up free](https://llmgateway.io/signup) (no credit card required)
## Setup [#setup]
### Install Kilo Code [#install-kilo-code]
Open VS Code, go to the Extensions view (Ctrl+Shift+X / Cmd+Shift+X), search for **Kilo Code**, and click **Install**.
Alternatively, install from the [VS Code Marketplace](https://marketplace.visualstudio.com/items?itemName=kilocode.kilo-code).
### Open Providers Settings [#open-providers-settings]
Click the Kilo Code icon in the VS Code sidebar, then open **Settings > Providers**. You'll see the list of popular providers:
### Find LLM Gateway [#find-llm-gateway]
Click **Show more providers** at the bottom of the list. In the "Connect provider" dialog, type `llm` in the search box — **LLM Gateway** will appear:
Click the **+** button next to LLM Gateway.
### Enter Your API Key [#enter-your-api-key]
Kilo Code will show the **Connect LLM Gateway** dialog. Paste your LLM Gateway API key (starts with `llmgtwy_`) and click **Submit**:
[Sign up](https://llmgateway.io/signup) or log in to your LLM Gateway dashboard and navigate to **API Keys** to get your key.
### Start Coding [#start-coding]
Once connected, select an LLM Gateway model from the model picker at the bottom of the chat panel. All requests now route through LLM Gateway — you'll see usage, costs, and logs in your [dashboard](https://llmgateway.io/dashboard):
## Why Use LLM Gateway with Kilo Code [#why-use-llm-gateway-with-kilo-code]
* **200+ models** — Claude, GPT, Gemini, Llama, DeepSeek, and more from 40+ providers
* **One API key** — Stop managing separate keys for each provider
* **Cost tracking** — See exactly what each session costs in your dashboard
* **Response caching** — Repeated requests hit cache automatically
* **Automatic fallback** — If a provider is down, requests route to an alternative
* **Volume discounts** — Check [discounted models](https://llmgateway.io/models?discounted=true) for savings up to 90%
## Features [#features]
Once configured, you can use all of Kilo Code's features with LLM Gateway:
* **Autonomous coding** — Create and edit files, build features from natural language
* **Terminal commands** — Run builds, tests, and scripts directly from the chat
* **Browser automation** — Preview and interact with web apps
* **Checkpoints** — Save and restore session states
* **Multiple modes** — Switch between Code, Architect, Ask, and Debug modes
## Switching Models [#switching-models]
Click the model name at the bottom of the Kilo Code chat panel to open the model picker. Select any LLM Gateway model — the switch takes effect immediately for the next message.
## Troubleshooting [#troubleshooting]
### LLM Gateway not in provider list [#llm-gateway-not-in-provider-list]
Click **Show more providers** at the bottom of the Providers page. In the search dialog, type "llm" or "gateway" to find it.
### Authentication errors [#authentication-errors]
Make sure your API key starts with `llmgtwy_` and is active. Check your [dashboard](https://llmgateway.io/dashboard) to confirm the key is valid.
### Model not found [#model-not-found]
Verify the model ID matches exactly what's listed on the [models page](https://llmgateway.io/models). Model IDs are case-sensitive.
View all available models on the [models page](https://llmgateway.io/models).
Need help? Join our [Discord community](https://llmgateway.io/discord) for
support and troubleshooting assistance.
# Kimi Code Integration
URL: https://docs.llmgateway.io/guides/kimi-code
[Kimi Code CLI](https://github.com/MoonshotAI/kimi-code) is an open-source, AI-powered coding agent developed by Moonshot AI designed to automate software development tasks directly within your terminal. It can read and edit code, execute shell commands, search files, and autonomously manage complex coding workflows.
Kimi Code features first-class support for the **models.dev** registry, a community-maintained model catalog. This allows Kimi Code to query and configure LLM Gateway dynamically — fetching all compatible models, capabilities (such as thinking or vision), and pricing without requiring manual TOML editing.
## Prerequisites [#prerequisites]
* An LLM Gateway API key — [sign up free](https://llmgateway.io/signup) (no credit card required)
## Setup [#setup]
### Install Kimi Code CLI [#install-kimi-code-cli]
If you haven't already, install Kimi Code CLI.
* **macOS or Linux**:
```bash
curl -fsSL https://code.kimi.com/kimi-code/install.sh | bash
```
* **Homebrew (macOS/Linux)**:
```bash
brew install kimi-code
```
* **Windows (PowerShell)**:
```powershell
irm https://code.kimi.com/kimi-code/install.ps1 | iex
```
Confirm the installation:
```bash
kimi --version
```
### Launch Kimi Code and Open the Provider Manager [#launch-kimi-code-and-open-the-provider-manager]
Start the interactive terminal in your project directory:
```bash
kimi
```
Once loaded, type the `/provider` command and press Enter. Select **Known third-party provider** to fetch the catalog from the registry:
### Select LLM Gateway [#select-llm-gateway]
Type `llm` to filter the providers and select **LLM Gateway** from the list:
### Enter Your API Key [#enter-your-api-key]
When prompted, paste your LLM Gateway API key and press Enter. Kimi Code will save it securely to your local configuration:
Your credentials are saved locally to `~/.kimi-code/config.toml`.
### Select a Model and Toggle Thinking [#select-a-model-and-toggle-thinking]
The LLM Gateway catalog is now loaded. Use the arrow keys to browse or type to search for your desired model. Select the `llmgateway` tab to view only LLM Gateway models.
You can also toggle the **Thinking** option (On/Off) at the bottom depending on the model's capabilities:
For example, type `gpt-5.5` to find the latest reasoning model, select it, and press Enter:
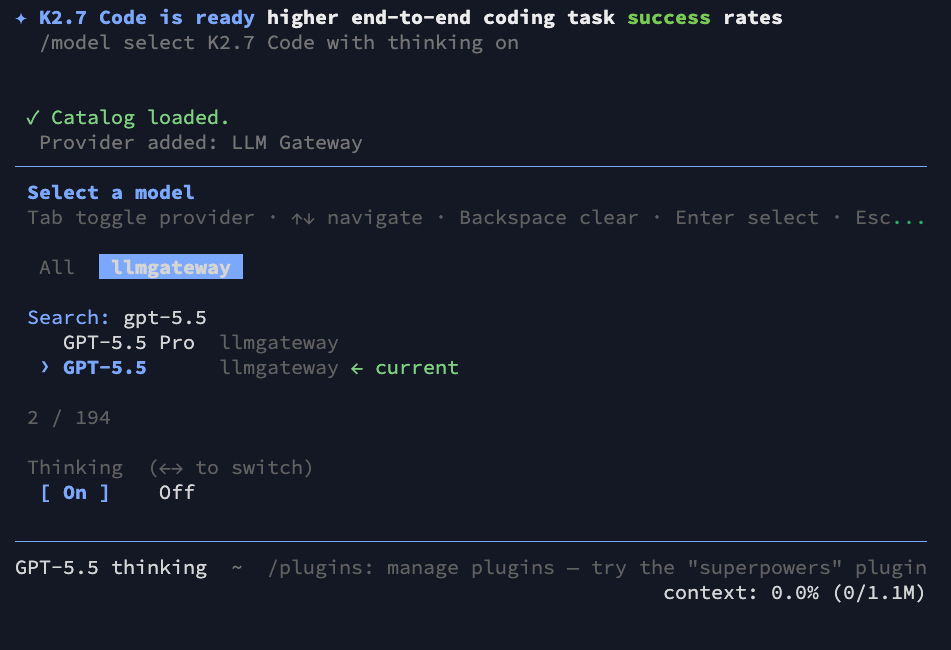
### Start Coding [#start-coding]
All set! Kimi Code is now configured. Your requests will be securely routed through LLM Gateway, allowing you to use advanced models for local autonomous coding while showing real-time usage and cost statistics on your LLM Gateway dashboard.
Use `/model` in the terminal session at any time to switch models.
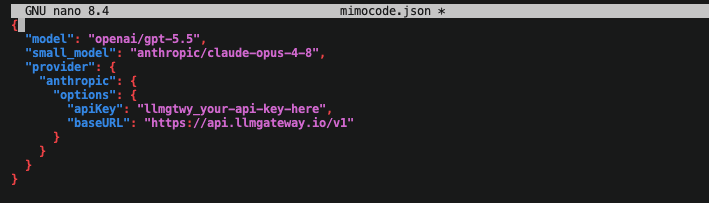
## Manual Configuration (Advanced) [#manual-configuration-advanced]
If you prefer to configure your environment manually without using the interactive provider manager, you can write settings directly to your configuration file at `~/.kimi-code/config.toml` (or `C:\Users\\.kimi-code\config.toml` on Windows).
Here is an example TOML configuration that registers **GPT-5.5**, **Claude 3.7 Sonnet**, **DeepSeek R1**, and **Qwen3.7 Max** manually:
```toml
default_model = "llmgateway/gpt-5.5"
[providers.llmgateway]
type = "openai"
api_key = "llmgtwy_your_api_key_here"
base_url = "https://api.llmgateway.io/v1"
[models."llmgateway/gpt-5.5"]
provider = "llmgateway"
model = "gpt-5.5"
max_context_size = 1050000
max_output_size = 128000
capabilities = [ "thinking", "tool_use" ]
display_name = "GPT-5.5"
[models."llmgateway/claude-3.7-sonnet"]
provider = "llmgateway"
model = "claude-3.7-sonnet"
max_context_size = 200000
max_output_size = 8192
capabilities = [ "image_in", "thinking", "tool_use" ]
display_name = "Claude 3.7 Sonnet"
[models."llmgateway/deepseek-r1"]
provider = "llmgateway"
model = "deepseek-r1"
max_context_size = 131072
max_output_size = 8192
capabilities = [ "thinking", "tool_use" ]
display_name = "DeepSeek R1"
[models."llmgateway/qwen3.7-max"]
provider = "llmgateway"
model = "qwen3.7-max"
max_context_size = 1000000
max_output_size = 65536
capabilities = [ "thinking", "tool_use" ]
display_name = "Qwen3.7 Max"
```
## Why Use LLM Gateway with Kimi Code CLI [#why-use-llm-gateway-with-kimi-code-cli]
* **200+ models** — Access GPT-5.5, Gemini, Llama, DeepSeek, and more in a single CLI configuration.
* **Unified cost tracking** — Get a detailed breakdown of costs per prompt and session in your dashboard.
* **Response caching** — Automatically cache repeated requests (such as parsing or building commands) to save API costs.
* **Automatic fallback** — Keep coding even if a provider encounters temporary downtime.
* **Volume discounts** — Access selected models with up to 90% savings compared to standard pricing.
View all available models on the [models page](https://llmgateway.io/models).
Need help? Join our [Discord community](https://llmgateway.io/discord) for
support and troubleshooting assistance.
# Model Context Protocol (MCP)
URL: https://docs.llmgateway.io/guides/mcp
LLM Gateway provides a Model Context Protocol (MCP) server that enables AI assistants like Claude Code to access multiple LLM providers through a unified interface. This allows you to use any model from OpenAI, Anthropic, Google, and more directly from your AI coding assistant.
## What is MCP? [#what-is-mcp]
The Model Context Protocol (MCP) is an open standard that allows AI assistants to connect with external tools and data sources. LLM Gateway's MCP server exposes tools for:
* **Chat completions** - Send messages to any supported LLM
* **Image generation** - Generate images using models like Qwen Image
* **Nano Banana image generation** - Generate images with Gemini 3 Pro Image Preview and optionally save to disk
* **Model discovery** - List available models with capabilities and pricing
## Available Tools [#available-tools]
### `chat` [#chat]
Send a message to any LLM and get a response.
**Parameters:**
* `model` (string) - The model to use (e.g., `"gpt-4o"`, `"claude-sonnet-4-20250514"`)
* `messages` (array) - Array of messages with `role` and `content`
* `temperature` (number, optional) - Sampling temperature (0-2)
* `max_tokens` (number, optional) - Maximum tokens to generate
**Example:**
```json
{
"model": "gpt-4o",
"messages": [{ "role": "user", "content": "Explain quantum computing" }],
"temperature": 0.7
}
```
### `generate-image` [#generate-image]
Generate images from text prompts using AI image models.
**Parameters:**
* `prompt` (string) - Text description of the image to generate
* `model` (string, optional) - Image model (default: `"qwen-image-plus"`)
* `size` (string, optional) - Image size (default: `"1024x1024"`)
* `n` (number, optional) - Number of images (1-4, default: 1)
**Example:**
```json
{
"prompt": "A serene mountain landscape at sunset",
"model": "qwen-image-max",
"size": "1024x1024"
}
```
### `generate-nano-banana` [#generate-nano-banana]
Generate an image using Gemini 3 Pro Image Preview ("Nano Banana"). Returns an inline image preview, and optionally saves the image to disk when the server is configured with an upload directory.
**Parameters:**
* `prompt` (string) - Text description of the image to generate
* `filename` (string, optional) - Filename for the saved image, no path separators allowed (default: `nano-banana-{timestamp}.png`)
* `aspect_ratio` (string, optional) - Aspect ratio: `"1:1"`, `"16:9"`, `"4:3"`, or `"5:4"`
**Example:**
```json
{
"prompt": "A pixel-art cat sitting on a rainbow",
"filename": "hero-image.png",
"aspect_ratio": "16:9"
}
```
**Saving images to disk** requires the `UPLOAD_DIR` environment variable to be
set on the MCP server. When set, images are saved to that directory. Without
it, images are returned inline only — no files are written to disk. See
[Enabling local image saving](#enabling-local-image-saving) for setup
instructions.
### `list-models` [#list-models]
List available LLM models with capabilities and pricing.
**Parameters:**
* `include_deactivated` (boolean, optional) - Include deactivated models
* `exclude_deprecated` (boolean, optional) - Exclude deprecated models
* `limit` (number, optional) - Maximum models to return (default: 20)
* `family` (string, optional) - Filter by family (e.g., `"openai"`, `"anthropic"`)
### `list-image-models` [#list-image-models]
List all available image generation models.
**Example output:**
```
# Image Generation Models
## Qwen Image Plus
- **Model ID:** `qwen-image-plus`
- **Description:** Text-to-image with excellent text rendering
- **Price:** $0.03 per request
## Qwen Image Max
- **Model ID:** `qwen-image-max`
- **Description:** Highest quality text-to-image
- **Price:** $0.075 per request
```
## Setup [#setup]
### Get Your API Key [#get-your-api-key]
1. Log in to your [LLM Gateway dashboard](https://llmgateway.io/dashboard)
2. Navigate to **API Keys** section
3. Create a new API key and copy it
### Configure Claude Code [#configure-claude-code]
Run the following command in your terminal:
```bash
claude mcp add --transport http --scope user llmgateway https://api.llmgateway.io/mcp \
--header "Authorization: Bearer your-api-key-here"
```
**Alternative: Manual configuration**
You can also add the MCP server manually by editing `~/.claude.json` (user scope) or `.mcp.json` in your project root (project scope):
```json
{
"mcpServers": {
"llmgateway": {
"url": "https://api.llmgateway.io/mcp",
"headers": {
"Authorization": "Bearer your-api-key-here"
}
}
}
}
```
Restart Claude Code after manual configuration changes.
### Test the Integration [#test-the-integration]
Try using the tools in Claude Code:
* "Use the chat tool to ask GPT-4o about TypeScript best practices"
* "Generate an image of a futuristic city using the generate-image tool"
* "Use generate-nano-banana to create a hero image for my landing page"
* "List all available models from Anthropic"
### Get Your API Key [#get-your-api-key-1]
1. Log in to your [LLM Gateway dashboard](https://llmgateway.io/dashboard)
2. Navigate to **API Keys** section
3. Create a new API key and copy it
4. Set it as an environment variable: `export LLM_GATEWAY_API_KEY="your-api-key-here"`
### Configure Codex [#configure-codex]
Run the following command in your terminal:
```bash
codex mcp add llmgateway --url https://api.llmgateway.io/mcp \
--bearer-token-env-var LLM_GATEWAY_API_KEY
```
**Alternative: Manual configuration**
You can also add the MCP server manually by editing `~/.codex/config.toml`:
```toml
[mcp_servers.llmgateway]
url = "https://api.llmgateway.io/mcp"
bearer_token_env_var = "LLM_GATEWAY_API_KEY"
```
### Test the Integration [#test-the-integration-1]
Run `/mcp` in the Codex TUI to confirm the `llmgateway` server is connected. Try:
* "Use the chat tool to ask GPT-4o about TypeScript best practices"
* "Generate an image of a futuristic city using the generate-image tool"
* "Use generate-nano-banana to create a hero image for my landing page"
* "List all available models from Anthropic"
### Get Your API Key [#get-your-api-key-2]
1. Log in to your [LLM Gateway dashboard](https://llmgateway.io/dashboard)
2. Navigate to **API Keys** section
3. Create a new API key and copy it
### Configure Cursor [#configure-cursor]
Add the following to your Cursor MCP configuration file (`~/.cursor/mcp.json`):
```json
{
"mcpServers": {
"llmgateway": {
"url": "https://api.llmgateway.io/mcp",
"headers": {
"Authorization": "Bearer your-api-key-here"
}
}
}
}
```
Or open the Command Palette (`Cmd/Ctrl + Shift + P`), search for **"Cursor Settings"**, then go to **Tools & Integrations** > **Add Custom MCP** and paste the configuration above.
Cursor v0.48.0+ is required for Streamable HTTP MCP support.
### Test the Integration [#test-the-integration-2]
Open a chat in **Agent Mode**, click the **Select Tools** icon, and verify the LLM Gateway tools appear. Try:
* "Use the chat tool to ask GPT-4o about TypeScript best practices"
* "Generate an image of a futuristic city using the generate-image tool"
* "Use generate-nano-banana to create a hero image for my landing page"
* "List all available models from Anthropic"
LLM Gateway's MCP server supports the standard HTTP Streamable transport. Configure your client with:
* **Endpoint:** `https://api.llmgateway.io/mcp`
* **Authentication:** Bearer token via `Authorization` header or `x-api-key` header
* **Protocol Version:** 2024-11-05
**Direct HTTP Example:**
```bash
curl -X POST https://api.llmgateway.io/mcp \
-H "Content-Type: application/json" \
-H "Authorization: Bearer your-api-key" \
-d '{
"jsonrpc": "2.0",
"id": 1,
"method": "tools/list"
}'
```
**Server-Sent Events (SSE):**
For real-time updates, connect with `Accept: text/event-stream`:
```bash
curl -N https://api.llmgateway.io/mcp \
-H "Accept: text/event-stream" \
-H "Authorization: Bearer your-api-key"
```
## Use Cases [#use-cases]
### Multi-Model Access in Claude Code [#multi-model-access-in-claude-code]
Use Claude Code to interact with models it doesn't natively support:
```
Use the chat tool with model "gpt-4o" to analyze this code for security issues.
```
### Image Generation [#image-generation]
Generate images directly from your AI assistant:
```
Use generate-image to create a logo for my new startup.
It should be minimalist, blue and white, representing AI and cloud computing.
```
### Nano Banana (Gemini Image Generation) [#nano-banana-gemini-image-generation]
Generate images with Gemini 3 Pro for use in your project:
```
Use generate-nano-banana to create a hero image for my landing page with a 16:9 aspect ratio.
```
### Cost-Effective Model Selection [#cost-effective-model-selection]
Query available models to find the best option for your task:
```
List models from OpenAI and Anthropic, then use the cheapest one for this simple task.
```
## Authentication [#authentication]
The MCP server supports two authentication methods:
1. **Bearer Token** - `Authorization: Bearer your-api-key`
2. **API Key Header** - `x-api-key: your-api-key`
Your API key is the same one you use for the REST API and works across all LLM Gateway services.
## OAuth Support [#oauth-support]
For applications that prefer OAuth authentication, LLM Gateway's MCP server implements OAuth 2.0:
* **Authorization Endpoint:** `/oauth/authorize`
* **Token Endpoint:** `/oauth/token`
* **Registration Endpoint:** `/oauth/register`
* **Supported Flows:** Authorization Code, Client Credentials
## Enabling Local Image Saving [#enabling-local-image-saving]
By default, `generate-nano-banana` returns images inline without writing to disk. To enable saving generated images to the server filesystem, the `UPLOAD_DIR` environment variable must be set on the **gateway host** at startup. This is a server-side setting — it cannot be configured from the client.
This is only possible for **self-hosted** MCP deployments. Configure `UPLOAD_DIR` using your deployment method:
* **Docker:** Pass `-e UPLOAD_DIR=/data/images` or add it to your `docker-compose.yml` environment section.
* **systemd:** Add `Environment=UPLOAD_DIR=/data/images` to your service unit file.
* **.env file:** Add `UPLOAD_DIR=/data/images` to the `.env` file loaded by your gateway process.
The shared hosted endpoint (`api.llmgateway.io`) does not support configuring
`UPLOAD_DIR`. On the hosted service, images are always returned inline — no
files are written to disk. To enable server-side image saving, you must
self-host the MCP server and set `UPLOAD_DIR` at startup.
## Troubleshooting [#troubleshooting]
### Connection Errors [#connection-errors]
If you're having trouble connecting:
1. Verify your API key is valid
2. Check the endpoint URL is correct: `https://api.llmgateway.io/mcp`
3. Ensure your firewall allows outbound HTTPS connections
### Tool Not Found [#tool-not-found]
If tools aren't appearing:
1. Restart your MCP client
2. Check the configuration syntax
3. Verify the MCP server is responding: `GET https://api.llmgateway.io/mcp`
### Rate Limiting [#rate-limiting]
The MCP server respects your account's rate limits. If you're hitting limits:
1. Check your usage in the dashboard
2. Consider upgrading your plan
3. Implement request queuing in your application
Need help? Join our [Discord community](https://llmgateway.io/discord) for
support.
## Benefits [#benefits]
* **Unified Access** - Use 200+ models from 40+ providers through one interface
* **Cost Tracking** - Monitor usage and costs in the LLM Gateway dashboard
* **Caching** - Automatic response caching reduces costs and latency
* **Fallback** - Automatic provider failover ensures reliability
* **Image Generation** - Generate images directly from your AI assistant
# MiMo Code Integration
URL: https://docs.llmgateway.io/guides/mimocode
[MiMo Code](https://mimo.xiaomi.com/mimocode) is an AI-powered coding agent command-line tool developed by Xiaomi. It can understand your code repository, plan changes, safely execute shell commands, edit files, and autonomously manage complex software development tasks in your terminal.
By configuring MiMo Code to route through LLM Gateway, you can point it at any model—GPT-5.5, Gemini, Llama, Claude, or 210+ others—while keeping the same API format MiMo Code expects, with full cost tracking in your dashboard.
## Prerequisites [#prerequisites]
* An LLM Gateway API key — [sign up free](https://llmgateway.io/signup) (no credit card required)
## Setup [#setup]
### Install MiMo Code [#install-mimo-code]
If you haven't already, install MiMo Code by running the official installation command in your terminal:
```bash
curl -fsSL https://mimo.xiaomi.com/install | bash
```
Confirm the installation by checking the help command:
```bash
mimo --help
```
### Configure mimocode.json [#configure-mimocodejson]
Create or edit your MiMo Code configuration file at `~/.config/mimocode/mimocode.json` (on Linux/macOS) or `~/.mimocode/mimocode.json`.
Specify the default models you want to use and route the `anthropic` provider to your LLM Gateway endpoint. Here is an example configuration that sets up **Claude Opus 4.8**, **GPT-5.5**, **DeepSeek V4 Pro**, **MiniMax M3**, and **Qwen3.7 Max**:
```json
{
"model": "anthropic/claude-opus-4-8",
"small_model": "anthropic/claude-4-5-haiku-latest",
"provider": {
"anthropic": {
"options": {
"apiKey": "llmgtwy_your_api_key_here",
"baseURL": "https://api.llmgateway.io/v1"
},
"models": {
"gpt-5.5": {
"name": "gpt-5.5"
},
"claude-opus-4-8": {
"name": "claude-opus-4-8"
},
"deepseek-v4-pro": {
"name": "deepseek-v4-pro"
},
"minimax-m3": {
"name": "minimax-m3"
},
"qwen3.7-max": {
"name": "qwen3.7-max"
}
}
}
}
}
```
Replace `llmgtwy_your_api_key_here` with your actual LLM Gateway API key from
the dashboard.
### Alternatively: Use Environment Variables [#alternatively-use-environment-variables]
If you prefer to configure the provider dynamically, you can export the standard Anthropic environment variables before starting MiMo Code:
```bash
export ANTHROPIC_API_KEY=llmgtwy_your_api_key_here
export ANTHROPIC_BASE_URL=https://api.llmgateway.io/v1
```
### Run MiMo Code [#run-mimo-code]
Navigate to your project folder and launch the TUI or run a prompt directly:
```bash
mimo
```
Or run it with a message:
```bash
mimo run "Your coding prompt here"
```
All requests will now be routed through LLM Gateway, allowing you to use advanced models for local autonomous coding while showing real-time usage and cost statistics on your LLM Gateway dashboard.
## Configuration Details [#configuration-details]
### The Provider Options [#the-provider-options]
To point MiMo Code to LLM Gateway, you define the `baseURL` and `apiKey` inside the `options` of the `anthropic` provider block.
```json
"provider": {
"anthropic": {
"options": {
"apiKey": "llmgtwy_your_api_key_here",
"baseURL": "https://api.llmgateway.io/v1"
}
}
}
```
### Defining Custom Models [#defining-custom-models]
Because MiMo Code CLI restricts requests to built-in models by default, any custom model you wish to target (such as `gpt-5.5` or `deepseek-v4-pro`) must be registered in the `models` dictionary within the `anthropic` provider config:
```json
"models": {
"gpt-5.5": {
"name": "gpt-5.5"
}
}
```
Once registered, you can set them as your default model or small model using the `anthropic/` prefix (e.g. `"model": "anthropic/gpt-5.5"`).
## Why Use LLM Gateway with MiMo Code [#why-use-llm-gateway-with-mimo-code]
* **200+ models** — Access GPT-5.5, Gemini, Llama, DeepSeek, and more in a single CLI configuration.
* **Unified cost tracking** — Get a detailed breakdown of costs per prompt and session in your dashboard.
* **Response caching** — Automatically cache repeated requests (such as parsing or building commands) to save API costs.
* **Automatic fallback** — Keep coding even if a provider encounters temporary downtime.
* **Volume discounts** — Access selected models with up to 90% savings compared to standard pricing.
View all available models on the [models page](https://llmgateway.io/models).
Need help? Join our [Discord community](https://llmgateway.io/discord) for
support and troubleshooting assistance.
# N8n Integration
URL: https://docs.llmgateway.io/guides/n8n
n8n is a powerful workflow automation tool that can be enhanced with AI capabilities through LLM Gateway. This guide shows how to integrate LLM Gateway into your n8n workflows.
## Prerequisites [#prerequisites]
* An LLM Gateway account with an API key
* n8n instance (self-hosted or cloud)
* Basic understanding of n8n workflows
## Setup [#setup]
The easiest way to use LLM Gateway with n8n is through the OpenAI node with custom configuration.
### Add OpenAI Credentials [#add-openai-credentials]
1. In n8n, go to **Settings** → **Credentials**
2. Click **Add Credential** → **OpenAI**
3. Configure as follows:
* **API Key**: Your LLM Gateway API key
* **Base URL**: `https://api.llmgateway.io/v1`
* **Organization ID**: Leave blank
### Configure OpenAI Node [#configure-openai-node]
1. Add an **AI Agent** node to your workflow
2. Add a **Chat Model** edge to the node
3. Configure the node to use the LLMGateway provider
Note: You have to toggle off the responses API. LLMGateway does not support
it.
4. Select your desired options
* **Model**: Use any [LLMGateway model](https://llmgateway.io/models) ID (e.g., `gpt-5`)
* **Options**: Optionally, configure LLM parameters
### Test Workflow [#test-workflow]
Finally, try running your workflow with a test prompt.
# OpenClaw Integration
URL: https://docs.llmgateway.io/guides/openclaw
[OpenClaw](https://docs.openclaw.ai/) is a self-hosted gateway that connects your favorite chat apps—WhatsApp, Telegram, Discord, iMessage, and more—to AI coding agents. With LLM Gateway as a custom provider, you can route all your OpenClaw traffic through a single API, use any of 200+ models, and keep full visibility into usage and costs.
## Setup [#setup]
### Sign Up for LLM Gateway [#sign-up-for-llm-gateway]
[Sign up free](https://llmgateway.io/signup) — no credit card required. Copy your API key from the dashboard.
### Set Your API Key [#set-your-api-key]
```bash
export LLMGATEWAY_API_KEY=llmgtwy_your_api_key_here
```
### Configure OpenClaw [#configure-openclaw]
Add LLM Gateway as a custom provider in your `~/.openclaw/openclaw.json`:
```json
{
"models": {
"mode": "merge",
"providers": {
"llmgateway": {
"baseUrl": "https://api.llmgateway.io/v1",
"apiKey": "${LLMGATEWAY_API_KEY}",
"api": "openai-completions",
"models": [
{
"id": "gpt-5.4",
"name": "GPT-5.4",
"contextWindow": 128000,
"maxTokens": 32000
},
{
"id": "claude-opus-4-6",
"name": "Claude Opus 4.6",
"contextWindow": 200000,
"maxTokens": 8192
},
{
"id": "gemini-3-1-pro-preview",
"name": "Gemini 3.1 Pro",
"contextWindow": 1000000,
"maxTokens": 8192
}
]
}
}
},
"agents": {
"defaults": {
"model": {
"primary": "llmgateway/gpt-5.4"
}
}
}
}
```
### Start Chatting [#start-chatting]
Launch OpenClaw and start chatting across your connected channels. All requests will be routed through LLM Gateway.
## Why Use LLM Gateway with OpenClaw [#why-use-llm-gateway-with-openclaw]
* **Model flexibility** — Switch between GPT-5.4, Claude Opus, Gemini, or any of 200+ models
* **Cost tracking** — Monitor exactly how much your chat agents cost to run
* **Single bill** — No need to manage multiple API provider accounts
* **Response caching** — Repeated queries hit cache, reducing costs
* **Rate limit handling** — Automatic fallback between providers
## Switching Models [#switching-models]
Change the primary model in your config to switch between any model:
```json
{
"agents": {
"defaults": {
"model": { "primary": "llmgateway/claude-opus-4-6" }
}
}
}
```
## Model Fallback Chain [#model-fallback-chain]
OpenClaw supports fallback models. If the primary model is unavailable, it automatically falls back:
```json
{
"agents": {
"defaults": {
"model": {
"primary": "llmgateway/gpt-5.4",
"fallbacks": ["llmgateway/claude-opus-4-6"]
}
}
}
}
```
## Available Models [#available-models]
LLM Gateway uses root model IDs with smart routing—automatically selecting the best provider based on uptime, throughput, price, and latency. You can use any model from the [models page](https://llmgateway.io/models). Flagship models include:
| Model | Best For |
| ------------------------ | ------------------------------------------- |
| `gpt-5.4` | Latest OpenAI flagship, highest quality |
| `claude-opus-4-6` | Anthropic's most capable model |
| `claude-sonnet-4-6` | Fast reasoning with extended thinking |
| `gemini-3-1-pro-preview` | Google's latest flagship, 1M context window |
| `o3` | Advanced reasoning tasks |
| `gpt-5.4-pro` | Premium tier with extended reasoning |
| `gemini-2.5-flash` | Fast responses, good for high-volume |
| `claude-haiku-4-5` | Cost-effective, quick responses |
| `grok-3` | xAI flagship |
| `deepseek-v3.1` | Open-source with vision and tools |
For more details on routing behavior, see [routing](https://docs.llmgateway.io/features/routing).
View all available models on the [models page](https://llmgateway.io/models).
## Tips for Chat Agents [#tips-for-chat-agents]
### Optimize Costs [#optimize-costs]
1. **Use smaller models for simple tasks** — Claude Haiku or Gemini Flash handle basic Q\&A well
2. **Enable caching** — LLM Gateway caches identical requests automatically
3. **Set token limits** — Configure max tokens to prevent runaway costs
### Improve Response Quality [#improve-response-quality]
1. **Choose the right model** — Claude Opus excels at nuanced conversation, GPT-5.4 at general tasks
2. **Use system prompts** — Configure your agent's personality and capabilities
3. **Test multiple models** — LLM Gateway makes it easy to A/B test different providers
Need help? Join our [Discord community](https://llmgateway.io/discord) for
support and troubleshooting assistance.
# OpenCode Desktop Integration
URL: https://docs.llmgateway.io/guides/opencode-desktop
[OpenCode Desktop](https://opencode.ai/download) is the GUI desktop app version of OpenCode — an open-source AI coding agent with a full visual interface for managing providers, models, and sessions. LLM Gateway is a built-in provider, so setup takes under a minute with no config files required.
Looking for the CLI version? See the [OpenCode CLI guide](https://docs.llmgateway.io/guides/opencode).
## Prerequisites [#prerequisites]
* OpenCode Desktop installed — [download for Windows or macOS](https://opencode.ai/download)
* An LLM Gateway API key — [sign up free](https://llmgateway.io/signup) (no credit card required)
## Installation [#installation]
Download OpenCode Desktop from [opencode.ai/download](https://opencode.ai/download) and install it for your platform:
* **macOS (Apple Silicon)** — `.dmg` installer
* **macOS (Intel)** — `.dmg` installer
* **Windows** — `.exe` installer
You can also install on macOS via Homebrew:
```bash
brew install --cask opencode-desktop
```
## Setup [#setup]
### Open Providers Settings [#open-providers-settings]
Launch OpenCode Desktop. Click the **Providers** section in the left sidebar under **Server**. You'll see the list of built-in providers:
### Find LLM Gateway [#find-llm-gateway]
Click **Show more providers** at the bottom of the list, or click **+ Connect** on any entry to open the provider search. Type `LLM` in the search box — **LLM Gateway** will appear under "Other":
Select **LLM Gateway** from the list.
### Enter Your API Key [#enter-your-api-key]
OpenCode will show the **Connect LLM Gateway** dialog. Paste your LLM Gateway API key (starts with `llmgtwy_`) and click **Continue**:
[Sign up](https://llmgateway.io/signup) or log in to your LLM Gateway dashboard and navigate to **API Keys** to get your key.
### Select a Model [#select-a-model]
Once connected, open the model picker from the chat input bar. Type `llm` to filter LLM Gateway models — you'll see all available models including Claude Opus 4.7, Claude Sonnet 4.6, DeepSeek, Gemini, and more:
### Start Building [#start-building]
Select a model and start chatting. All requests route through LLM Gateway — you'll see usage, costs, and logs in your [dashboard](https://llmgateway.io/dashboard):
## Why Use LLM Gateway with OpenCode Desktop [#why-use-llm-gateway-with-opencode-desktop]
* **200+ models** — Claude, GPT, Gemini, Llama, DeepSeek, and more from 40+ providers
* **One API key** — Stop managing separate keys for each provider
* **Cost tracking** — See exactly what each session costs in your dashboard
* **Response caching** — Repeated requests hit cache automatically
* **Automatic fallback** — If a provider is down, requests route to an alternative
* **Volume discounts** — Check [discounted models](https://llmgateway.io/models?discounted=true) for savings up to 90%
## Switching Models [#switching-models]
You can switch models at any time from the model picker in the chat input bar. Click the current model name, type `llm` to filter to LLM Gateway models, and select a new one. The switch takes effect immediately for the next message.
## Locking to a Specific Provider [#locking-to-a-specific-provider]
By default, LLM Gateway automatically fails over to alternative providers if your chosen provider is experiencing downtime. To disable fallback for a specific model, you can pass the `X-No-Fallback` header via a custom `opencode.json` in your project root:
```json
{
"provider": {
"llmgateway": {
"options": {
"headers": {
"X-No-Fallback": "true"
}
}
}
}
}
```
Disabling fallback means requests will fail if the chosen provider is down.
See the [routing docs](https://docs.llmgateway.io/features/routing) for details.
## Troubleshooting [#troubleshooting]
### LLM Gateway doesn't appear in provider list [#llm-gateway-doesnt-appear-in-provider-list]
Click **Show more providers** at the bottom of the Providers page to expand the full list, then search for "LLM".
### Authentication errors [#authentication-errors]
Make sure your API key starts with `llmgtwy_` and is active. Check your [dashboard](https://llmgateway.io/dashboard) to confirm the key is valid.
### Models not loading after connect [#models-not-loading-after-connect]
Try disconnecting and reconnecting the provider from Settings > Providers. If models still don't load, check your internet connection and verify the key is valid.
View all available models on the [models page](https://llmgateway.io/models).
Need help? Join our [Discord community](https://llmgateway.io/discord) for
support and troubleshooting assistance.
# OpenCode Integration
URL: https://docs.llmgateway.io/guides/opencode
[OpenCode](https://opencode.ai) is an open-source AI coding agent for your terminal, IDE, or desktop. LLM Gateway is a built-in provider in OpenCode, so setup takes under a minute — no config files or npm adapters required. You get access to 200+ models from 40+ providers, all tracked in one dashboard.
## Prerequisites [#prerequisites]
* OpenCode installed — visit the [OpenCode download page](https://opencode.ai/download) for your platform
* An LLM Gateway API key
## Setup [#setup]
### Launch OpenCode [#launch-opencode]
Start OpenCode from your terminal:
```bash
opencode
```
**In VS Code/Cursor:**
1. Install the OpenCode extension from the marketplace
2. Open Command Palette (Ctrl+Shift+P or Cmd+Shift+P)
3. Type "OpenCode" and select "Open opencode"
### Open the Provider List [#open-the-provider-list]
Once OpenCode launches, run the `/providers` or `/connect` command to open the provider selection screen.
### Select LLM Gateway [#select-llm-gateway]
LLM Gateway is listed as a built-in provider. Select "LLM Gateway" from the provider list.
### Enter Your API Key [#enter-your-api-key]
OpenCode will prompt you for your API key. Enter your LLM Gateway API key and press Enter. OpenCode will automatically save your credentials securely.
[Sign up for LLM Gateway](https://llmgateway.io/signup) and create an API key from your dashboard.
### Start Using OpenCode [#start-using-opencode]
You're all set! OpenCode is now connected to LLM Gateway. You can start asking questions and building with AI.
## Why Use LLM Gateway with OpenCode [#why-use-llm-gateway-with-opencode]
* **200+ models** — GPT-5, Claude, Gemini, Llama, and more from 40+ providers
* **One API key** — Stop juggling credentials for every provider
* **Cost tracking** — See what each coding agent costs in your dashboard
* **Response caching** — Repeated requests hit cache automatically
* **Volume discounts** — The more you use, the more you save
## Adding Custom Models [#adding-custom-models]
The built-in provider gives you access to all standard LLM Gateway models. If you want to add custom model aliases or configure models not yet listed in the built-in provider, you can create a `config.json` in your OpenCode configuration directory:
**macOS/Linux:** `~/.config/opencode/config.json`
**Windows:** `C:\Users\YourUsername\.config\opencode\config.json`
```json
{
"provider": {
"llmgateway": {
"npm": "@ai-sdk/openai-compatible",
"name": "LLM Gateway",
"options": {
"baseURL": "https://api.llmgateway.io/v1"
},
"models": {
"deepseek/deepseek-chat": {
"name": "DeepSeek Chat"
},
"meta/llama-3.3-70b": {
"name": "Llama 3.3 70B"
}
}
}
}
}
```
After updating `config.json`, restart OpenCode to see the new models.
## Locking to a Specific Provider [#locking-to-a-specific-provider]
By default, LLM Gateway automatically fails over to alternative providers if your chosen provider is experiencing downtime. If you want to lock into a specific provider/model mapping — for example to guarantee a fixed price or to always use a single provider — pass the `X-No-Fallback` header. Requests will then be sent only to the provider you specified, with no automatic fallback.
```json
{
"provider": {
"llmgateway": {
"npm": "@ai-sdk/openai-compatible",
"name": "LLM Gateway",
"options": {
"baseURL": "https://api.llmgateway.io/v1",
"headers": {
"X-No-Fallback": "true"
}
}
}
}
}
```
Disabling fallback means requests will fail if the chosen provider is down.
See the [routing docs](https://docs.llmgateway.io/features/routing) for details.
## Switching Models [#switching-models]
Select a different model directly in the OpenCode interface, or update the `model` field in your configuration:
```json
{
"model": "llmgateway/gpt-5-mini"
}
```
View all available models on the [models page](https://llmgateway.io/models).
## Troubleshooting [#troubleshooting]
### Connection timeout [#connection-timeout]
Check that you have an active internet connection and that your API key is valid from the [dashboard](https://llmgateway.io/dashboard).
### Custom models not showing up [#custom-models-not-showing-up]
After editing `config.json`, restart OpenCode completely for changes to take effect.
### 404 Not Found errors with custom config [#404-not-found-errors-with-custom-config]
If you are using a custom `config.json`, verify your `baseURL` is set to `https://api.llmgateway.io/v1` (note the `/v1` at the end).
## Configuration Tips [#configuration-tips]
* **Global configuration**: Use `~/.config/opencode/config.json` to apply settings across all projects
* **Project-specific**: Place `opencode.json` in your project root to override global settings for that project
* **Model selection**: You can specify different models for different types of tasks using OpenCode's agent configuration
Need help? Join our [Discord community](https://llmgateway.io/discord) for
support and troubleshooting assistance.
# Pi Integration
URL: https://docs.llmgateway.io/guides/pi
[Pi](https://pi.dev) is a minimal terminal-based coding agent that gives an AI full access to read, write, edit, and run shell commands in your project. By pointing Pi at LLM Gateway, you can use any of our 200+ models — GPT-5.5, Gemini 3.1 Pro, Claude Opus 4.7, DeepSeek V4, and more — with full cost tracking and caching.
## Prerequisites [#prerequisites]
* An LLM Gateway account with an API key
* Pi installed (`curl -fsSL https://pi.dev/install.sh | bash`)
* Basic terminal familiarity
## Setup [#setup]
Pi uses a `models.json` configuration file to define providers and models. We'll add LLM Gateway as a custom provider.
### Get Your API Key [#get-your-api-key]
1. Log in to your [LLM Gateway dashboard](https://llmgateway.io/dashboard)
2. Navigate to **API Keys** section
3. Create a new API key and copy the key
### Configure Pi [#configure-pi]
Open (or create) the Pi models configuration file at `~/.pi/agent/models.json` and add LLM Gateway as a provider:
```json
{
"providers": {
"llmgateway": {
"baseUrl": "https://api.llmgateway.io/v1",
"api": "openai-completions",
"apiKey": "llmgtwy_your_api_key_here",
"models": [
{ "id": "gpt-5.5", "name": "GPT-5.5" },
{ "id": "claude-opus-4-7", "name": "Claude Opus 4.7" },
{ "id": "gemini-3.1-pro", "name": "Gemini 3.1 Pro" },
{ "id": "deepseek-v4", "name": "DeepSeek V4", "reasoning": true }
]
}
}
}
```
Replace `llmgtwy_your_api_key_here` with your actual API key from Step 1.
Pi reloads `models.json` when you open the `/model` menu — no restart needed
after editing.
### Select Your Model [#select-your-model]
1. Run `pi` in any project directory
2. Type `/model` to open the model selector
3. Select your LLM Gateway model from the list
All requests now route through LLM Gateway with full cost tracking.
### Test the Integration [#test-the-integration]
Ask Pi to do something in your project to verify everything works:
```
> hello
```
You should see the response streaming from your chosen model. Check your [LLM Gateway dashboard](https://llmgateway.io/dashboard) to confirm the request appears in your usage logs.
## Adding More Models [#adding-more-models]
You can add any model from the [LLM Gateway models page](https://llmgateway.io/models) to your `models.json`. Just add entries to the `models` array:
```json
{
"providers": {
"llmgateway": {
"baseUrl": "https://api.llmgateway.io/v1",
"api": "openai-completions",
"apiKey": "llmgtwy_your_api_key_here",
"models": [
{ "id": "gpt-5.5", "name": "GPT-5.5" },
{ "id": "gpt-5.5-mini", "name": "GPT-5.5 Mini" },
{ "id": "claude-opus-4-7", "name": "Claude Opus 4.7" },
{ "id": "claude-sonnet-4-6", "name": "Claude Sonnet 4.6" },
{ "id": "gemini-3.1-pro", "name": "Gemini 3.1 Pro" },
{ "id": "gemini-3.1-flash", "name": "Gemini 3.1 Flash" },
{ "id": "deepseek-v4", "name": "DeepSeek V4", "reasoning": true },
{
"id": "deepseek-v4-mini",
"name": "DeepSeek V4 Mini",
"reasoning": true
}
]
}
}
}
```
## Using Environment Variables for the API Key [#using-environment-variables-for-the-api-key]
Instead of hardcoding your key, you can reference an environment variable:
```json
{
"providers": {
"llmgateway": {
"baseUrl": "https://api.llmgateway.io/v1",
"api": "openai-completions",
"apiKey": "LLM_GATEWAY_API_KEY",
"models": [{ "id": "gpt-5.5", "name": "GPT-5.5" }]
}
}
}
```
Then set the variable in your shell profile:
```bash
export LLM_GATEWAY_API_KEY=llmgtwy_your_api_key_here
```
## Troubleshooting [#troubleshooting]
### Authentication Errors [#authentication-errors]
* Verify your API key is correct in `~/.pi/agent/models.json`
* Check that the base URL is set to `https://api.llmgateway.io/v1`
* Ensure your LLM Gateway account has sufficient credits
### Model Not Found [#model-not-found]
* Verify the model ID exists on the [models page](https://llmgateway.io/models)
* Model IDs are case-sensitive — copy them exactly as shown
### Connection Issues [#connection-issues]
* Check your internet connection
* Ensure `api` is set to `"openai-completions"` (not `"openai-responses"`)
* Monitor your usage in the LLM Gateway dashboard
Need help? Join our [Discord community](https://llmgateway.io/discord) for
support and troubleshooting assistance.
## Benefits of Using LLM Gateway with Pi [#benefits-of-using-llm-gateway-with-pi]
* **Any Model**: Use GPT-5.5, Claude Opus 4.7, Gemini 3.1 Pro, DeepSeek V4, or 200+ others
* **Cost Tracking**: Every Pi request appears in your dashboard with token counts and costs
* **Caching**: Repeated requests hit cache automatically, saving money
* **One Key**: Manage all providers through a single API key
* **No Vendor Lock-in**: Switch models by changing one line in your config
# AWS Bedrock Integration
URL: https://docs.llmgateway.io/integrations/aws-bedrock
AWS Bedrock is Amazon's fully managed service that provides access to foundation models from leading AI companies. This guide shows how to create AWS Bedrock Long-Term API Keys and integrate them with LLM Gateway.
## Prerequisites [#prerequisites]
* An AWS account with Bedrock access enabled
* LLM Gateway account or self-hosted instance
## Overview [#overview]
AWS Bedrock supports **Long-Term API Keys** for simplified authentication. These keys provide direct API access without requiring IAM credentials or complex authentication flows.
## Create AWS Bedrock Long-Term API Key [#create-aws-bedrock-long-term-api-key]
### Enable Model Access in Bedrock [#enable-model-access-in-bedrock]
1. Log into the **AWS Console**
2. Navigate to **AWS Bedrock** service
3. Go to **Model access** in the left sidebar
4. Click **Manage model access**
5. Enable the models you want to use (e.g., Claude 3.5, Llama 3)
6. Wait for access to be granted (usually instant for most models)
### Create Long-Term API Key [#create-long-term-api-key]
1. In AWS Bedrock console, navigate to **API Keys** in the left sidebar
2. Click **Create Long-Term API Key**
3. Set expiry date ("Never expires" is recommended)
4. Click **Generate**
5. **Important**: Copy the API key immediately - it's only shown once!
## Add to LLM Gateway [#add-to-llm-gateway]
### Navigate to Provider Keys [#navigate-to-provider-keys]
1. Log into [LLM Gateway Dashboard](https://llmgateway.io/dashboard)
2. Select your organization and project
3. Go to **Provider Keys** in the sidebar
### Add AWS Bedrock Provider Key [#add-aws-bedrock-provider-key]
1. Click **Add** for **AWS Bedrock**
2. Paste your Long-Term API Key
3. **Select Region Prefix** based on where you want to use your models:
* **us.** - For US regions (`us-east-1`, `us-west-2`)
* **eu.** - For European regions (`eu-central-1`, `eu-west-1`)
* **global.** - For global/cross-region endpoints
4. Click **Add Key**
The system will validate your key and confirm the connection.
### Test the Integration [#test-the-integration]
Test your integration with a simple API call:
```bash
curl -X POST https://api.llmgateway.io/v1/chat/completions \
-H "Authorization: Bearer YOUR_LLMGATEWAY_API_KEY" \
-H "Content-Type: application/json" \
-d '{
"model": "aws-bedrock/claude-3-5-sonnet",
"messages": [
{
"role": "user",
"content": "Hello from AWS Bedrock!"
}
]
}'
```
Replace `YOUR_LLMGATEWAY_API_KEY` with your LLM Gateway API key.
## Available Models [#available-models]
Once configured, you can access all AWS Bedrock models through LLM Gateway:
* **Anthropic Claude**: `aws-bedrock/claude-3-5-sonnet`, `aws-bedrock/claude-3-5-haiku`
* **Meta Llama**: `aws-bedrock/llama-3-2-90b`, `aws-bedrock/llama-3-2-11b`
* **Amazon Titan**: `aws-bedrock/amazon.titan-text-express-v1`
* **And more...**
Browse all available models at [llmgateway.io/models](https://llmgateway.io/models?provider=aws-bedrock)
## Troubleshooting [#troubleshooting]
### "Model not available" error [#model-not-available-error]
* Verify you've enabled model access in AWS Bedrock console
* Check that the region where you created your key has access to the model
* Some models are only available in specific regions
### Rate limiting [#rate-limiting]
* AWS Bedrock has request quotas per model and region
* Monitor usage in AWS Bedrock console
* Consider requesting quota increases for high-volume workloads
# Azure Integration
URL: https://docs.llmgateway.io/integrations/azure
Azure provides access to OpenAI's powerful language models through Microsoft's enterprise cloud infrastructure. This guide shows how to create an Azure resource, deploy models, and integrate them with LLM Gateway.
Only OpenAI models are supported via Azure at this time. [Open an
issue](https://github.com/theopenco/llmgateway/issues/new) to request support
for other model types.
## Prerequisites [#prerequisites]
* An Azure account with an active subscription
* LLM Gateway account or self-hosted instance
## Overview [#overview]
Azure provides enterprise-grade access to OpenAI models with enhanced security, compliance, and regional availability. LLM Gateway integrates seamlessly with Azure deployments.
## Create Azure Resource [#create-azure-resource]
### Create an Azure OpenAI Resource [#create-an-azure-openai-resource]
1. Log into the **Azure Portal** ([https://portal.azure.com](https://portal.azure.com))
2. Click **Create a resource**
3. Search for **Azure OpenAI** and select it
4. Click **Create**
5. Configure the resource:
* **Subscription**: Select your Azure subscription
* **Resource group**: Create new or select existing
* **Region**: Choose a region (e.g., East US, West Europe)
* **Name**: Enter a unique resource name (this will be your ``)
* **Pricing tier**: Select Standard S0
6. Click **Review + create**, then **Create**
7. Wait for deployment to complete
**Important**: Note your resource name - it will be used in the base URL: `https://.openai.azure.com`
### Deploy Models [#deploy-models]
1. Navigate to your Azure resource in the Azure Portal
2. Click **Go to Azure OpenAI Studio** or visit [https://oai.azure.com](https://oai.azure.com)
3. In Azure Studio, select **Deployments** from the left sidebar
4. Click **Create new deployment**
5. Configure your deployment:
* **Model**: Select a model (e.g., gpt-4o, gpt-4o-mini, gpt-4-turbo)
* **Deployment name**: Enter a name (this must match the model identifier you'll use – use the pre-filled name)
* **Model version**: Select the latest version
* **Deployment type**: Global Standard
6. Click **Create**
7. Repeat for additional models you want to use
**Note**: The deployment name must match the expected model name:
* For `gpt-4o-mini` → deployment name should be `gpt-4o-mini`
* For `gpt-35-turbo` → deployment name should be `gpt-35-turbo`
etc.
### Get API Key [#get-api-key]
1. In the Azure Portal, go to your Azure resource
2. Click **Keys and Endpoint** in the left sidebar
3. Copy **Key 1** or **Key 2**
4. Note your **Endpoint** URL (should be `https://.openai.azure.com`)
**Important**: Keep your API key secure - it provides access to your Azure deployments.
## Add to LLM Gateway [#add-to-llm-gateway]
### Navigate to Provider Keys [#navigate-to-provider-keys]
1. Log into [LLM Gateway Dashboard](https://llmgateway.io/dashboard)
2. Select your organization and project
3. Go to **Provider Keys** in the sidebar
### Add Azure Provider Key [#add-azure-provider-key]
1. Click **Add** for **Azure**
2. Enter your **API Key** from Azure Portal
3. Enter your **Resource Name** (the name from your Azure endpoint URL)
* Example: If your endpoint is `https://my-openai-resource.openai.azure.com`, enter `my-openai-resource`
4. Select your preferred **type** (Azure OpenAI or AI Foundry)
5. Adapt the **Validation Model** to a model that you already deployed and is available
This is a one time check to ensure the API key is valid and the model can be accessed.
6. Click **Add Key**
The system will validate your key and confirm the connection.
### Test the Integration [#test-the-integration]
Test your integration with a simple API call:
```bash
curl -X POST https://api.llmgateway.io/v1/chat/completions \
-H "Authorization: Bearer YOUR_LLMGATEWAY_API_KEY" \
-H "Content-Type: application/json" \
-d '{
"model": "azure/gpt-4o-mini",
"messages": [
{
"role": "user",
"content": "Hello from Azure!"
}
]
}'
```
Replace `YOUR_LLMGATEWAY_API_KEY` with your LLM Gateway API key.
## Available Models [#available-models]
Once configured, you can access your Azure deployments through LLM Gateway:
* **GPT-4o**: `azure/gpt-4o`
* **GPT-4o Mini**: `azure/gpt-4o-mini`
* **GPT-3.5 Turbo**: `azure/gpt-3.5-turbo` (note: use gpt-3.5-turbo as llmgateway model name instead of gpt-35-turbo)
**Note**: Only models you have deployed in Azure Studio will be available. Ensure your deployment names match the expected model identifiers.
Browse all available models at [llmgateway.io/models](https://llmgateway.io/models?provider=azure)
## Troubleshooting [#troubleshooting]
### "Deployment not found" error [#deployment-not-found-error]
* Verify you've created a deployment in Azure Studio
* Ensure the deployment name exactly matches the model name you're requesting
* Check that the deployment is in the same resource as your API key
### "Resource not found" error [#resource-not-found-error]
* Verify the resource name is correct (check your Azure Portal endpoint URL)
* Ensure your API key belongs to the correct Azure resource
* Confirm the resource is in an active state in Azure Portal
### Rate limiting [#rate-limiting]
* Azure has Tokens Per Minute (TPM) quotas per deployment
* Monitor usage in Azure Studio under **Quotas**
* Request quota increases through Azure Portal if needed for high-volume workloads
### Region availability [#region-availability]
* Not all models are available in all Azure regions
* Check [Azure model availability](https://learn.microsoft.com/en-us/azure/ai-services/openai/concepts/models#model-summary-table-and-region-availability) for your region
* Consider creating resources in multiple regions for better availability
# Vertex AI Anthropic Integration
URL: https://docs.llmgateway.io/integrations/vertex-anthropic
Run Claude models (Sonnet, Opus, Haiku) on Google Cloud Vertex AI through LLM Gateway. This guide shows how to set up a GCP service account and integrate it with LLM Gateway using automatic OAuth2 token management — no manual token rotation required.
## Prerequisites [#prerequisites]
* A Google Cloud project with billing enabled
* LLM Gateway account or self-hosted instance
## Set up Google Cloud [#set-up-google-cloud]
### Enable the Vertex AI API [#enable-the-vertex-ai-api]
In the [Google Cloud Console](https://console.cloud.google.com/apis/library/aiplatform.googleapis.com), enable the **Vertex AI API** for your project.
### Enable Claude Models in Model Garden [#enable-claude-models-in-model-garden]
Navigate to **Vertex AI > Model Garden** in the Cloud Console. Search for the Claude models you want to use and click **Enable** on each one.
Available models:
* `claude-sonnet-4-6`
* `claude-sonnet-4-5`
* `claude-haiku-4-5`
* `claude-opus-4-5`
* `claude-opus-4-6`
* `claude-opus-4-7`
### Create a Service Account [#create-a-service-account]
Create a service account with the required permissions:
```bash
# Create the service account
gcloud iam service-accounts create vertex-ai-caller \
--display-name="Vertex AI Caller" \
--project=YOUR_PROJECT_ID
# Grant the Vertex AI User role
gcloud projects add-iam-policy-binding YOUR_PROJECT_ID \
--member="serviceAccount:vertex-ai-caller@YOUR_PROJECT_ID.iam.gserviceaccount.com" \
--role="roles/aiplatform.user"
```
### Download the Service Account Key [#download-the-service-account-key]
```bash
gcloud iam service-accounts keys create service-account.json \
--iam-account=vertex-ai-caller@YOUR_PROJECT_ID.iam.gserviceaccount.com
```
Then convert it to a single-line string:
```bash
cat service-account.json | tr -d '\n'
```
Keep the output handy — you'll paste it into LLM Gateway in the next steps.
## Add to LLM Gateway [#add-to-llm-gateway]
### Navigate to Provider Keys [#navigate-to-provider-keys]
1. Log into [LLM Gateway Dashboard](https://llmgateway.io/dashboard)
2. Select your organization and project
3. Go to **Provider Keys** in the sidebar
### Add Vertex Anthropic Provider Key [#add-vertex-anthropic-provider-key]
1. Click **Add** for **Vertex AI (Anthropic)**
2. Paste the single-line service account JSON as the **API Key**
3. Leave **Region** empty to use the recommended `global` endpoint, or set a specific region (e.g. `us-east5`) if you need data residency
4. Click **Add Key**
The project ID is extracted automatically from the service account JSON — no separate project field is needed.
### Test the Integration [#test-the-integration]
```bash
curl -X POST https://api.llmgateway.io/v1/chat/completions \
-H "Authorization: Bearer YOUR_LLMGATEWAY_API_KEY" \
-H "Content-Type: application/json" \
-d '{
"model": "vertex-anthropic/claude-sonnet-4-6",
"messages": [
{
"role": "user",
"content": "Hello from Vertex Anthropic!"
}
]
}'
```
Replace `YOUR_LLMGATEWAY_API_KEY` with your LLM Gateway API key.
## Self-Host Configuration [#self-host-configuration]
If you're self-hosting LLM Gateway, configure the provider via environment variables instead of the dashboard:
```bash
LLM_VERTEX_ANTHROPIC_SERVICE_ACCOUNT_JSON={"type":"service_account","project_id":"YOUR_PROJECT_ID","private_key":"-----BEGIN RSA PRIVATE KEY-----\n...\n-----END RSA PRIVATE KEY-----\n","client_email":"vertex-ai-caller@YOUR_PROJECT_ID.iam.gserviceaccount.com","token_uri":"https://oauth2.googleapis.com/token"}
LLM_VERTEX_ANTHROPIC_REGION=global
```
The project ID is extracted automatically from the service account JSON — no
separate `LLM_VERTEX_ANTHROPIC_PROJECT` variable is needed.
## How Token Refresh Works [#how-token-refresh-works]
LLM Gateway handles the OAuth2 token lifecycle automatically:
1. On first request, the service account JSON is parsed and used to sign a JWT
2. The JWT is exchanged for an OAuth2 access token via Google's token endpoint
3. The token is cached in Redis with a **50-minute TTL** (Google tokens expire after 60 minutes)
4. An in-memory cache avoids Redis round-trips on subsequent requests
5. When the cached token expires, a new one is generated transparently
This means:
* No manual `gcloud auth print-access-token` commands
* No cron jobs to refresh tokens
* Works at any request rate (token generation happens at most once per 50 minutes)
* Multi-instance deployments share the cached token via Redis
## Available Regions [#available-regions]
LLM Gateway defaults to the **`global`** endpoint, which Anthropic recommends: requests are routed dynamically to whichever region has capacity, and there is no pricing premium.
| Region | Notes |
| ----------------- | --------------------------------------------- |
| `global` | Default — dynamic routing, no pricing premium |
| `us` | Multi-region (US only); 10% premium |
| `eu` | Multi-region (EU only); 10% premium |
| `us-east5` | Columbus, Ohio; 10% premium |
| `us-central1` | Iowa; 10% premium |
| `europe-west1` | Belgium; 10% premium |
| `europe-west4` | Netherlands; 10% premium |
| `asia-southeast1` | Singapore; 10% premium |
Regional and multi-region endpoints add a 10% pricing premium on Claude Sonnet
4.5 and newer models. They are also required if you need single-region data
residency or provisioned throughput. See [Anthropic's Vertex
docs](https://platform.claude.com/docs/en/api/claude-on-vertex-ai#global-multi-region-and-regional-endpoints)
for details.
## Available Models [#available-models]
Once configured, you can access Claude models on Vertex AI through LLM Gateway. Browse the full, up-to-date list at [llmgateway.io/models?provider=vertex-anthropic](https://llmgateway.io/models?provider=vertex-anthropic).
## Troubleshooting [#troubleshooting]
### 401 UNAUTHENTICATED / ACCESS\_TOKEN\_TYPE\_UNSUPPORTED [#401-unauthenticated--access_token_type_unsupported]
The gateway is sending an invalid token. Check:
* The service account JSON is valid and complete
* The service account has `roles/aiplatform.user` on the project
### 403 Permission Denied [#403-permission-denied]
The service account lacks permissions. Grant the `Vertex AI User` role:
```bash
gcloud projects add-iam-policy-binding YOUR_PROJECT_ID \
--member="serviceAccount:vertex-ai-caller@YOUR_PROJECT_ID.iam.gserviceaccount.com" \
--role="roles/aiplatform.user"
```
### Model Not Found [#model-not-found]
The Claude model may not be enabled in your project's Model Garden, or may not be available in the selected region. Check the [Model Garden](https://console.cloud.google.com/vertex-ai/model-garden) in Cloud Console.
# Activity
URL: https://docs.llmgateway.io/learn/activity
The Activity page shows a real-time log of every API request routed through LLM Gateway. Use it to debug requests, monitor performance, and track costs per call.
## Filters [#filters]
Filter the activity log using the controls at the top:
| Filter | Description |
| --------------------------- | ------------------------------------------------------- |
| **Time range** | Filter by a specific time period |
| **Unified reasons** | Filter by completion reason (e.g., stop, length, error) |
| **Providers** | Show requests for specific providers only |
| **Models** | Show requests for specific models only |
| **Custom header key/value** | Filter by custom metadata headers attached to requests |
## Activity List [#activity-list]
Each activity entry shows:
* **Status icon** — Green checkmark for completed, red circle for errors
* **Response preview** — First line of the model's response (when available)
* **Model** — The provider and model used (e.g., `google-vertex/gemini-3-pro-image-preview`)
* **Cache status** — Whether the response was served from cache
* **Tokens** — Total tokens consumed (input + output)
* **Duration** — How long the request took
* **Cost** — Inference cost for the request
* **Source** — Where the request originated from
* **Discount** — Any discount applied (e.g., "20% off")
* **Status badge** — `completed`, `upstream_error`, `gateway_error`, etc.
* **Timestamp** — Relative time (e.g., "about 4 hours ago")
### Actions per Entry [#actions-per-entry]
* **Open in new tab** — View the full request detail in a new browser tab
* **Expand** — Expand inline to see more details
## Activity Detail [#activity-detail]
Click on any activity entry to view its full detail page.
### Summary Cards [#summary-cards]
Five cards at the top provide a quick overview:
| Card | Description |
| ------------------ | ------------------------------- |
| **Duration** | Total request time in seconds |
| **Tokens** | Total tokens consumed |
| **Throughput** | Tokens per second |
| **Inference Cost** | Cost charged for this request |
| **Cache** | Whether the response was cached |
### Request Section [#request-section]
Details about the original request:
* **Requested Model** — The model ID sent in the API call
* **Used Model** — The actual model that served the request
* **Model Mapping** — The underlying model identifier
* **Provider** — The provider that handled the request
* **Requested Provider** — The provider specified in the request
* **Streamed** — Whether the response was streamed
* **Canceled** — Whether the request was canceled
* **Source** — The application or service that made the request
### Tokens Section [#tokens-section]
A detailed token breakdown:
* Prompt Tokens, Completion Tokens, Total Tokens
* Reasoning Tokens (for reasoning models)
* Image Input/Output Tokens (for vision/image models)
* Response Size
### Routing Section [#routing-section]
How LLM Gateway routed the request:
* **Selection** — The routing strategy used (e.g., `direct-provider-specified`)
* **Available** — Providers that were available for this model
* **Provider Scores** — Scoring breakdown showing availability, uptime, and latency for each provider
### Parameters Section [#parameters-section]
The model parameters sent with the request:
* Temperature, Max Tokens, Top P
* Frequency Penalty, Reasoning Effort
* Response Format
# Agents
URL: https://docs.llmgateway.io/learn/agents
The Agents page lets you monitor your AI coding agents — such as Claude Code, Empryo, SoulForge, OpenCode, and others — and track their activity, costs, and token usage across sessions.
## Agent Cards [#agent-cards]
Each agent is displayed as a card showing:
* **Name** — The agent's identifier (e.g., SoulForge, Claude Code)
* **Total cost** — Cumulative spend for this agent
* **Requests** — Total number of API requests made
* **Tokens** — Total tokens consumed
* **Last Active** — When the agent was last used
Click on any agent card to view its detailed activity.
## Agent Detail [#agent-detail]
The detail view shows all sessions for a specific agent. Each session row displays:
* **Time range** — When the session started and ended
* **Requests** — Number of API calls in the session
* **Tokens** — Total tokens consumed
* **Duration** — How long the session lasted
* **Cost** — Total cost for the session
Expand a session to see individual requests with their response previews, model used, cache status, token counts, cost, and source.
# Analytics
URL: https://docs.llmgateway.io/learn/analytics
The Analytics page shows where a project's spend actually goes. It breaks usage down by model — as a ranking and over time — so you can see which models drive cost, requests, and tokens across any date range.
Open it from the **Analytics** item in the project sidebar. Like the rest of the dashboard, the page respects the shared date-range picker at the top, so every chart reflects the same window.
## Cost by Model [#cost-by-model]
A horizontal bar chart that ranks the models used in the selected range. Switch the metric with the tabs above the chart:
| Tab | What it ranks |
| ------------ | -------------------------------------- |
| **Cost** | Total spend per model, in USD |
| **Requests** | Number of requests routed to the model |
| **Tokens** | Total tokens (input + output) |
Use it to spot the one or two models responsible for most of your bill, or to confirm that traffic is spread the way you expect.
## Cost by Model Over Time [#cost-by-model-over-time]
A stacked area chart that plots the same three metrics across the date range, with one band per model. It has the same **Cost / Requests / Tokens** tabs, plus a **Mappings / Canonical** toggle:
* **Mappings** — each model variant is shown separately, exactly as it was requested (for example a custom provider mapping is kept distinct from the built-in model).
* **Canonical** — variants of the same underlying model are collapsed into one canonical model (the provider prefix and tag are dropped), so `openai/gpt-5.5` and a custom mapping of it count as a single line.
Switch to **Canonical** when you care about the underlying model's total footprint; stay on **Mappings** when you need to compare specific routes.
## How the data is computed [#how-the-data-is-computed]
Both charts derive from the same activity data the rest of the dashboard already reads — there is no separate analytics pipeline to wait on. Aggregation happens per time bucket and is timezone-correct, so totals line up with the Activity and Usage pages for the same range.
For a per-key view of the same breakdowns, see [API Keys](https://docs.llmgateway.io/learn/api-keys#per-key-statistics). For an org-wide, per-person view on the Enterprise plan, see [Member Analytics](https://docs.llmgateway.io/learn/member-analytics).
# API Keys
URL: https://docs.llmgateway.io/learn/api-keys
The API Keys page is the main place to create, secure, and operate the keys
your apps use to authenticate with LLM Gateway.
Use this page to:
* Create project-specific API keys
* Set all-time and recurring spend limits per key
* Set an expiration (TTL) so a key disables itself automatically
* Track usage for each key, including the active recurring window
* Enable or disable keys without deleting them
* Configure IAM rules for model, provider, and pricing access
API keys are shown in full only once, immediately after creation. Copy and
store them securely before closing the dialog.
## Creating an API Key [#creating-an-api-key]
Click **Create API Key** and configure:
* **Name**: A label such as `production`, `staging`, or `ci`
* **Expiration (TTL)**: An optional time-to-live after which the key disables itself
* **All-time usage limit**: An optional lifetime spend cap for the key
* **Recurring usage limit**: An optional spend cap that resets on a schedule
Recurring limits support:
* Minimum window: **1 hour**
* Maximum window: **12 months**
* Units: **hour**, **day**, **week**, or **month**
This is useful when you want a key to stay below a fixed budget per hour, day,
week, or month, while still keeping a separate lifetime cap if needed.
## Expiration (TTL) [#expiration-ttl]
Turn on **Set expiration (TTL)** when creating a key to give it a limited
lifetime. Choose a value and a unit — **minutes**, **hours**, or **days** — and
the key is disabled automatically once that time passes. Leave it off for a key
that never expires.
Expired keys show an **Expired** indicator in the list and move to the
**Inactive** tab. To use one again, reactivate it and pick a **new future
expiration**:
* **Activate** an expired key and you'll be prompted to set a fresh TTL before it
comes back online
* Keys with no TTL, or whose TTL is still in the future, can be enabled and
disabled without setting a new expiration
This makes TTL keys ideal for temporary access — short-lived demos, CI runs, or
contractor keys that should not linger.
## Usage Limits [#usage-limits]
Each API key can enforce two independent limit types:
| Limit Type | What it does |
| ------------------------- | --------------------------------------------------------------- |
| **All-time usage limit** | Stops the key after it reaches a lifetime spend threshold |
| **Recurring usage limit** | Stops the key after it reaches the budget for the active window |
Examples:
* `$50` all-time for a temporary integration key
* `$10 / 1 day` for a development key
* `$500 / 1 month` for a production service key
If a key hits either limit, requests using that key are rejected until the key
is updated or, for recurring limits, the next window begins.
### How recurring windows work [#how-recurring-windows-work]
Recurring usage is tracked separately from total lifetime usage.
* The dashboard shows the key's **Current Period** usage
* The active window also shows when it **resets**
* When the configured window expires, usage for that window resets automatically
* Updating the recurring limit configuration resets the current window and starts
a new one
Usage includes both LLM Gateway credits and requests routed through your own
provider keys when applicable.
## API Keys List [#api-keys-list]
Each key in the list shows:
| Field | Description |
| ------------------ | ------------------------------------------------------------- |
| **Name** | The label you assigned to the key |
| **API Key** | A masked preview of the key |
| **Status** | Whether the key is active or inactive, plus its expiry if set |
| **Created** | When the key was created |
| **Usage** | Total tracked usage for the key |
| **Current Period** | Spend in the active recurring window, if configured |
| **Limits** | All-time and recurring limit summary |
| **IAM Rules** | Whether model/provider/pricing access controls are configured |
## Actions [#actions]
For each API key you can:
* **Update limits**: Change all-time or recurring limits
* **Disable or enable**: Pause usage without deleting the key (reactivating an
expired key prompts for a new expiration)
* **Configure IAM rules**: Restrict which models, providers, or pricing tiers the key can use
* **View Statistics**: Open a dedicated analytics page for that key (see below)
* **Delete**: Permanently remove the key
## Per-Key Statistics [#per-key-statistics]
The **View Statistics** action opens a dedicated page scoped to a single API
key, so you can see exactly what that key is doing without filtering the whole
project.
The page respects the shared date-range picker and shows:
* **Summary cards** — the key's cost, tokens, requests, and error rate for the
selected range.
* **Cost by Model** — a horizontal bar chart ranking the key's models by cost,
requests, or tokens.
* **Cost by Model Over Time** — a stacked area chart of the same metrics, with a
Mappings / Canonical toggle.
These are the same breakdowns as the project [Analytics](https://docs.llmgateway.io/learn/analytics) page,
narrowed to the one key — useful for confirming a key is healthy and spending on
the models you expect.
## IAM Rules [#iam-rules]
IAM rules let you narrow what an API key is allowed to access.
Supported rule types include:
* **Allow/Deny models**
* **Allow/Deny providers**
* **Allow/Deny pricing**
Use IAM rules when you want a key to be valid, but only for a specific subset of
models or providers. For a deeper explanation, see the [API Keys & IAM Rules
feature page](https://docs.llmgateway.io/features/api-keys).
Org admins can additionally set [member-level IAM
rules](https://docs.llmgateway.io/features/api-keys#member-level-iam-rules) on the [Team
page](https://docs.llmgateway.io/learn/team). Those act as a ceiling for every key the member creates:
key rules can only narrow access within them, never expand it. The IAM page
shows a notice when organization-level restrictions apply to your keys.
## Plan Limits [#plan-limits]
The page also shows how many API keys your current project is using relative to
your plan allowance.
* **Free**: Standard API key count limit
* **Enterprise**: Custom limits
If you reach the project key limit, the **Create API Key** button is disabled
until you delete unused keys or upgrade.
# Audit Logs
URL: https://docs.llmgateway.io/learn/audit-logs
The Audit Logs page provides a complete history of all actions performed within your organization, essential for compliance and security monitoring.
Audit Logs are available on the [**Enterprise
plan**](https://llmgateway.io/enterprise). Owner or Admin role is required.
## Filters [#filters]
Narrow down the log entries:
* **Action** — Filter by action type (create, delete, update, etc.)
* **Resource type** — Filter by resource (API, IAM, API Keys, etc.)
Both filters are populated dynamically based on the actions recorded in your organization.
## Audit Log Entries [#audit-log-entries]
Each log entry shows:
| Field | Description |
| ----------------- | ------------------------------------------------------------ |
| **Timestamp** | Exact time of the action (formatted as MMM d, yyyy HH:mm:ss) |
| **User** | Name and email of the person who performed the action |
| **Action** | What was done (e.g., "API Keys → create") |
| **Resource type** | The type of resource affected (shown as a badge) |
| **Resource ID** | Identifier of the affected resource (with copy button) |
| **Details** | Additional metadata about the action |
## Pagination [#pagination]
The log supports infinite scrolling with a **Load More** button to view older entries. Entries are sorted newest first.
# Billing
URL: https://docs.llmgateway.io/learn/billing
The Billing page is your central hub for managing credits, plans, and payment methods.
## Credits [#credits]
Displays your current credit balance. Credits are consumed as you make API requests through the gateway. Click **Top Up Credits** to add more credits to your account.
## Fees [#fees]
Top-ups are charged the credit amount plus the following fees:
* **Platform fee** — A flat 5% fee applied to every credit purchase.
* **International card fee** — An additional 1.5% fee applied when paying with a non-US issued card. This covers the higher processing cost charged by the card network for international transactions. Cards issued in the United States are not subject to this fee.
The full breakdown (credits, platform fee, and — when applicable — the international card fee) is shown in the top-up dialog before you confirm payment, so the total charge is always transparent.
## Plan Management [#plan-management]
View and manage your subscription:
* See your current plan (Free or Enterprise)
* Billing cycle information
* Click **Manage Subscription** to upgrade, downgrade, or cancel
## Payment Methods [#payment-methods]
Manage your saved payment methods:
* Add a new credit card or payment method
* View existing payment methods
* Update billing information
## Auto Top-up Settings [#auto-top-up-settings]
Configure automatic credit top-ups so you never run out:
* **Enable/disable** auto top-up
* **Threshold** — The credit balance that triggers a top-up
* **Amount** — How many credits to add when the threshold is reached
This ensures uninterrupted service by automatically replenishing your credits when they run low.
# Lounge Memberships
URL: https://docs.llmgateway.io/learn/chat-plans
Lounge memberships (formerly Chat Plans) are optional monthly subscriptions for [Lounge](https://chat.llmgateway.io), the LLM Gateway chat app. Instead of paying per request from your pay-as-you-go balance, a membership gives you a pool of monthly credits worth more than you pay — so heavy chat usage costs less.
## Plans [#plans]
There are three tiers, billed monthly:
| Plan | Price | Monthly value | Models |
| ----------- | ------ | ---------------- | ---------------------------------------------------------------------------- |
| **Starter** | $9/mo | \~2× the value | Most chat models — Claude Haiku & Sonnet, GPT-5-mini, Gemini Flash, and more |
| **Plus** | $19/mo | \~2.5× the value | Everything in Starter **plus** frontier models |
| **Pro** | $49/mo | \~3× the value | All models, highest monthly allowance |
The credit multiplier is tapered: the larger the plan, the more usage value each dollar buys at provider rates.
**Frontier models** — flagship models such as Claude Opus, GPT-5, Gemini 2.5
Pro, and Grok 4 are included on **Plus** and **Pro**. The Starter plan covers
the broad catalog of everyday chat models but does not include these frontier
models.
## How credits work [#how-credits-work]
* **Monthly reset** — Your plan credits refresh at the start of each billing cycle. Unused credits do **not** roll over to the next month.
* **Plan credits drain first** — Requests made from the chat app draw down your plan's monthly credits before anything else.
* **Pay-as-you-go fallback** — Once your monthly credits are used up, the chat app falls back to your regular pay-as-you-go balance, which never expires. You can keep chatting without interruption.
## Managing your plan [#managing-your-plan]
* Open the **Pricing** page from the Lounge sidebar to compare tiers and subscribe.
* Your active membership appears in the Lounge sidebar with a badge, alongside how many credits remain for the cycle.
* **Upgrading** takes effect immediately: you're charged the new tier's full price, your billing cycle restarts, and your credits reset to the new tier's full monthly allowance. Unspent credits from the old cycle don't carry over.
* **Downgrading** also takes effect immediately: you move to the lower tier's allowance right away, and the unused portion of what you already paid for the higher tier is credited against your next invoice.
* **Cancelling** takes effect at the end of the period you've already paid for — you keep access until then.
# Dashboard
URL: https://docs.llmgateway.io/learn/dashboard
The Dashboard is the first page you see after logging in. It provides a high-level overview of your project's LLM usage, costs, and performance at a glance.
## Date Range [#date-range]
At the top of the page, you can toggle the date range for all dashboard metrics:
* **7 days** — Last 7 days of data (default)
* **30 days** — Last 30 days of data
* **Custom** — Pick a custom start and end date
## Stat Cards [#stat-cards]
The dashboard displays eight metric cards in two rows:
### Top Row [#top-row]
| Card | Description |
| ------------------------ | ------------------------------------------------------------------------ |
| **Organization Credits** | Your current available credit balance |
| **Total Requests** | Number of API requests in the selected period, with cache hit percentage |
| **Total Cost** | Total inference cost for the period, including storage costs |
| **Total Savings** | Savings from discounts during the selected period |
### Bottom Row [#bottom-row]
| Card | Description |
| ------------------------ | ------------------------------------------------------------------- |
| **Input Tokens & Cost** | Total prompt tokens sent and their associated cost |
| **Output Tokens & Cost** | Total completion tokens received and their associated cost |
| **Cached Tokens & Cost** | Tokens served from cache (if caching is enabled) and the cost saved |
| **Most Used Model** | The model with the highest request count, along with its provider |
## Usage Overview Chart [#usage-overview-chart]
Below the stat cards, a chart visualizes your usage over time. You can toggle between two views using the dropdown:
* **Costs** — Shows input, output, and cached input costs as a stacked area chart
* **Requests** — Shows request volume over time
The chart is filtered by the currently selected project.
## Quick Actions [#quick-actions]
A sidebar panel provides shortcuts to common tasks:
* **Manage API Keys** — Go to the API Keys page
* **Provider Keys** — Configure your own provider keys
* **View Activity** — See detailed request logs
* **Usage & Metrics** — Dive into usage analytics
* **Model Usage** — View per-model usage breakdown
## Cost Breakdown [#cost-breakdown]
A donut chart showing how your costs are distributed across different models and providers. Each segment is color-coded and labeled with the model name and cost, making it easy to identify your biggest cost drivers.
## Errors & Reliability [#errors--reliability]
Displays two key reliability metrics:
* **Error Rate** — Percentage of failed requests over the selected period
* **Uptime** — Gateway availability percentage
## Recent Activity [#recent-activity]
A table showing your most recent API requests with key details like model, status, tokens, duration, and cost. Click any entry to view the full request detail.
## Header Actions [#header-actions]
Two buttons in the top-right corner:
* **Create API Key** — Quickly create a new API key for your project
* **Top Up Credits** — Add credits to your organization balance
# Guardrails
URL: https://docs.llmgateway.io/learn/guardrails
The Guardrails page lets you configure content safety rules that automatically scan and filter API requests before they reach the LLM provider.
Guardrails are available on the [**Enterprise
plan**](https://llmgateway.io/enterprise). Owner or Admin role is required.
## Main Toggle [#main-toggle]
A global toggle at the top enables or disables all guardrails for your organization. Click **Save Changes** to apply.
## System Rules [#system-rules]
Six built-in rules with individual enable/disable toggles:
| Rule | Description |
| ------------------------------- | -------------------------------------------------------------------- |
| **Prompt Injection Detection** | Detects attempts to override or manipulate system instructions |
| **Jailbreak Prevention** | Identifies attempts to bypass safety measures |
| **PII Detection** | Identifies personal information like emails, phone numbers, and SSNs |
| **Secrets Detection** | Detects API keys, passwords, and credentials |
| **File Type Restrictions** | Controls which file types can be uploaded |
| **Document Leakage Prevention** | Detects attempts to extract confidential documents |
Each rule has an action dropdown to configure the response:
* **Block** — Reject the request entirely
* **Redact** — Remove or mask sensitive content, then continue
* **Warn** — Log the violation but allow the request
## File Restrictions [#file-restrictions]
Configure file upload limits:
* **Max file size** — Set the maximum file size in MB
* **Allowed file types** — Add or remove permitted MIME types
## Custom Rules [#custom-rules]
Create organization-specific rules by clicking **Add Rule**:
* **Blocked Terms** — Block specific words or phrases
* **Custom Regex** — Match patterns with regular expressions
* **Topic Restriction** — Restrict content related to specific topics
Each custom rule can be individually enabled/disabled or deleted.
Learn more about guardrails in the [Guardrails feature docs](https://docs.llmgateway.io/features/guardrails).
# Introduction
URL: https://docs.llmgateway.io/learn
The LLM Gateway dashboard gives you full control over your LLM API usage, costs, and configuration. This section walks you through every page in the platform, grouped by product.
## AI Gateway [#ai-gateway]
Configure how requests flow through the gateway — keys, safety rules, and programmatic provisioning:
* [**API Keys**](https://docs.llmgateway.io/learn/api-keys) — Create and manage your API keys, plus per-key statistics
* [**Provider Keys**](https://docs.llmgateway.io/learn/provider-keys) — Bring your own provider API keys
* [**Preferences**](https://docs.llmgateway.io/learn/preferences) — Project-level settings like caching and mode
* [**Guardrails**](https://docs.llmgateway.io/learn/guardrails) — Content safety rules and filters
* [**Security Events**](https://docs.llmgateway.io/learn/security-events) — Monitor guardrail violations
* [**Payments SDK**](https://docs.llmgateway.io/learn/sdk-settings) — Embed end-user payments and credit purchases into your own app
* [**Master Keys**](https://docs.llmgateway.io/learn/master-keys) — Provision projects and API keys programmatically (Enterprise)
## Observability [#observability]
Monitor usage, spend, errors, and performance across every request:
* [**Dashboard**](https://docs.llmgateway.io/learn/dashboard) — Overview of your usage, costs, and performance
* [**Activity**](https://docs.llmgateway.io/learn/activity) — Detailed logs of every API request
* [**Model Usage**](https://docs.llmgateway.io/learn/model-usage) — Usage breakdown by model
* [**Usage & Metrics**](https://docs.llmgateway.io/learn/usage-metrics) — Requests, errors, cache rates, and cost trends
* [**Analytics**](https://docs.llmgateway.io/learn/analytics) — Cost, requests, and tokens broken down by model
* [**Organization Analytics**](https://docs.llmgateway.io/learn/org-analytics) — Cost and usage rolled up across every project
* [**Member Analytics**](https://docs.llmgateway.io/learn/member-analytics) — Per-member cost and usage breakdowns (Enterprise)
* [**Audit Logs**](https://docs.llmgateway.io/learn/audit-logs) — Complete history of organization actions
## DevPass [#devpass]
Flat-price dev plans for AI coding tools:
* [**Agents**](https://docs.llmgateway.io/learn/agents) — Monitor your AI coding agents and their activity
* [**Model Categories & Fair Use**](https://docs.llmgateway.io/learn/model-categories) — How models are categorized and premium fair-use caps
* [**Reset Passes**](https://docs.llmgateway.io/learn/reset-passes) — Instantly restore the DevPass weekly premium allowance
## Lounge [#lounge]
The members' lounge for AI — chat, media studios, and memberships:
* [**Lounge Chat**](https://docs.llmgateway.io/learn/playground) — Chat with 200+ models in one interface
* [**Group Chat**](https://docs.llmgateway.io/learn/playground-group) — Watch multiple models discuss and collaborate on your prompt
* [**Image Studio**](https://docs.llmgateway.io/learn/playground-image) — Generate images using AI models
* [**Video Studio**](https://docs.llmgateway.io/learn/playground-video) — Generate videos using AI models
* [**Audio Studio**](https://docs.llmgateway.io/learn/playground-audio) — Generate speech from text using AI voices
* [**Voice Calls**](https://docs.llmgateway.io/learn/playground-realtime) — Have a live speech-to-speech conversation with a model
* [**Lounge Memberships**](https://docs.llmgateway.io/learn/chat-plans) — Monthly membership plans for the Lounge chat app
## Account & Billing [#account--billing]
Manage your organization, team, and payments:
* [**Billing**](https://docs.llmgateway.io/learn/billing) — Credits, plans, and payment methods
* [**Transactions**](https://docs.llmgateway.io/learn/transactions) — Payment and credit history
* [**Referrals**](https://docs.llmgateway.io/learn/referrals) — Earn credits by referring others
* [**Policies**](https://docs.llmgateway.io/learn/policies) — Data retention configuration
* [**Org Preferences**](https://docs.llmgateway.io/learn/org-preferences) — Organization name and billing details
* [**Team**](https://docs.llmgateway.io/learn/team) — Manage team members and roles
# Master Keys
URL: https://docs.llmgateway.io/learn/master-keys
The Master Keys page lets you create and manage org-scoped bearer tokens for the `/v1/master/*` API — so your own backend can provision projects, gateway API keys, and IAM rules programmatically, without going through the dashboard.
Master Keys are available on the [**Enterprise
plan**](https://llmgateway.io/enterprise). Contact us at [contact@llmgateway.io](mailto:contact@llmgateway.io)
to enable them for your organization.
## Creating a Master Key [#creating-a-master-key]
Click **Create Master Key**, give the key a descriptive name (for example, "Provisioning backend"), and click create.
The plain token (prefixed `llmgmk_`) is shown **only once** at creation time.
Copy it immediately and store it securely — only an HMAC-SHA256 hash is kept
in the database.
## Key List [#key-list]
Each master key in the list shows:
| Field | Description |
| -------------- | ------------------------------------------------------ |
| **Name** | The description you gave the key |
| **Master Key** | Masked form of the token, for identification |
| **Status** | Active or inactive |
| **Created** | When the key was created |
| **Created By** | The team member who created it |
| **Last Used** | Timestamp of the key's most recent `/v1/master/*` call |
## Managing Keys [#managing-keys]
Use the actions menu on each row to:
* **Activate / Deactivate** — Temporarily suspend a key without deleting it. Inactive keys receive a 401 on every request.
* **Delete** — Permanently revoke the key. Any system using it immediately loses access to the `/v1/master/*` API.
Every create, delete, and status change is recorded in your organization's [audit log](https://docs.llmgateway.io/learn/audit-logs).
## Limits [#limits]
Each organization can have up to **10 active master keys**. A usage bar above the list shows how many you've used; contact us if you need more.
## Using a Master Key [#using-a-master-key]
Master keys authenticate against the programmatic provisioning API:
```bash
curl https://internal.llmgateway.io/v1/master/projects \
-H "Authorization: Bearer llmgmk_..."
```
See the [Master Keys feature documentation](https://docs.llmgateway.io/features/master-keys) for the full endpoint reference, including project management, gateway API key provisioning, per-key IAM rules, and [member-level IAM rules](https://docs.llmgateway.io/features/master-keys#member-iam-rules) (addressable by membership id or email).
# Member Analytics
URL: https://docs.llmgateway.io/learn/member-analytics
Member Analytics breaks your organization's usage down by person, so you can see who is spending what across every project. It lives on the **Team** page and is available on the **Enterprise** plan.
Member analytics require the **Enterprise plan** and an organization **owner**
or **admin** role. Non-enterprise organizations see an upgrade card, and
members without admin access see an access notice instead of the data.
## Members Table [#members-table]
The Team page adds a usage table sorted by spend, so the heaviest users surface first. Each row shows that member's totals for the selected date range:
| Column | Description |
| -------------- | -------------------------------------------- |
| **Member** | Name and email of the team member |
| **Cost** | Total spend attributed to the member, in USD |
| **Tokens** | Total tokens (input + output) |
| **Requests** | Number of requests |
| **Error rate** | Share of the member's requests that failed |
| **API keys** | How many API keys the member created |
Usage is attributed by **who created each API key** — spend lands on the member who owns the key that made the request, which is the only link between usage and a user.
## Member Detail [#member-detail]
Click a member to open their detail page, scoped to the same date range:
The detail view includes:
* **Summary cards** — the member's cost, tokens, requests, and error rate for the range.
* **Most used** — their top model, provider, and app.
* **Cost by model** — the same breakdown as the project [Analytics](https://docs.llmgateway.io/learn/analytics) page, scoped to this member.
* **Top providers and top apps** — tables ranking where the member's traffic goes.
This makes it easy to attribute cost to a team, investigate a spike, or confirm a member is using the models and providers you expect.
# Model Categories & Fair Use
URL: https://docs.llmgateway.io/learn/model-categories
Every model in the gateway is sorted into a category. Categories power dashboard filtering, analytics, and — for DevPass coding plans — the fair-use limits that keep flagship models available to everyone.
## Categories [#categories]
| Category | Description |
| ------------ | ---------------------------------------------------------------------------------------------------------------------------- |
| **Premium** | High-cost frontier / flagship models — priced at **$15+ per million output tokens** or **$5+ per million input tokens** |
| **Standard** | Every other model — the broad catalog of fast, cost-effective everyday models |
The classification is computed automatically from catalogue prices — there is no hand-picked list. To see exactly which models are premium right now, check the live [**Premium Models**](https://llmgateway.io/models/premium) page, or browse the full catalog on the [**Supported Models**](https://llmgateway.io/models) page and filter by use case, capabilities, provider, price, and context size. On the [DevPass models directory](https://devpass.llmgateway.io/models), you can additionally filter by pricing tier, since the premium/standard distinction only affects DevPass fair-use limits.
## Fair-use caps on premium models (DevPass only) [#fair-use-caps-on-premium-models-devpass-only]
Fair-use caps apply **only to DevPass** — the fixed-price monthly plans for
coding tools (Lite, Pro, Max). They do **not** apply to the LLM Gateway API or
pay-as-you-go credits: when you call the API directly, premium models are
limited only by your credit balance, with no weekly cap.
Premium models are the most expensive to run, so DevPass plans apply a **weekly fair-use cap** on premium usage. The cap works on a fixed 7-day window: the window opens with your first premium-model request, all premium usage during those 7 days counts against the cap, and the full allowance resets at once when the window ends. It sits on top of the plan's normal monthly credit allowance. The cap scales with each plan: it's a share of that plan's total monthly credits, so higher tiers get a larger weekly premium allowance.
| DevPass plan | Premium fair-use cap (per week) |
| ------------ | ------------------------------- |
| **Lite** | 12% of monthly credits |
| **Pro** | 15% of monthly credits |
| **Max** | 18% of monthly credits |
Within DevPass, the weekly cap applies only to **premium** models. Standard
models are limited only by the plan's credit balance, not by the fair-use
window.
Once a DevPass plan reaches its weekly premium cap, premium requests are paused until the current 7-day window ends — usage does not gradually free up over time. The reset countdown runs from when the window opened, not from when you hit the cap, so the full allowance can return anywhere from moments to 7 days after you reach the limit. Standard models keep working normally the whole time. Upgrading the DevPass plan raises the weekly cap.
## Reset Passes [#reset-passes]
You don't have to wait out the window: redeeming a [**Reset Pass**](https://docs.llmgateway.io/learn/reset-passes) instantly restores the full weekly premium allowance and starts a fresh 7-day window. A pass removes the weekly limit only — it grants no extra credits, so premium usage after a reset still draws from the plan's monthly allowance. Pro includes 1 pass per billing cycle and Max includes 2; extra passes are a one-time purchase from the DevPass dashboard. See the [Reset Passes page](https://docs.llmgateway.io/learn/reset-passes) for how redemption, included passes, and billing work.
# Model Usage
URL: https://docs.llmgateway.io/learn/model-usage
The Model Usage page shows how your API requests are distributed across different LLM models over time.
## Filters [#filters]
Two filters let you narrow down the data:
* **API Key** — Select a specific API key or view usage across all keys
* **Date range** — Choose a time period to analyze
## Usage Chart [#usage-chart]
The main chart displays a time-series breakdown of requests per model. Each model is represented by a different color, making it easy to see:
* Which models are used most frequently
* How usage patterns change over time
* Whether usage is concentrated on a single model or spread across many
This page is useful for understanding your model distribution and identifying opportunities to optimize costs by switching to more cost-effective models for certain workloads.
# Organization Analytics
URL: https://docs.llmgateway.io/learn/org-analytics
Organization Analytics rolls usage up across **every project in your organization** into one view. Where the project [Analytics](https://docs.llmgateway.io/learn/analytics) page answers "where does this project's spend go?", this page answers it for the whole org — and lets you pivot the breakdown by model, **project**, or API key.
Organization Analytics is an **Enterprise** feature, available to organization
**owners and admins**. On lower plans the page shows an upgrade prompt
instead, and Enterprise-only items are flagged in the sidebar.
Open it from the **Analytics** item under **Organization** in the sidebar. Like the rest of the dashboard, it respects the shared date-range picker, so every chart and stat reflects the same window.
## Summary [#summary]
Three cards at the top total the selected range across the whole organization:
| Card | What it totals |
| --------------- | -------------------------------------- |
| **Total spend** | Combined cost of every project, in USD |
| **Requests** | Total requests routed across the org |
| **Tokens** | Total tokens (input + output) |
## Breakdown [#breakdown]
A single **group-by** control switches what the two charts below break the usage down by:
| Group by | What each series represents |
| ----------- | ------------------------------------------------------------------------------- |
| **Model** | Canonical model, collapsed across providers (Qwen via any provider is one line) |
| **Project** | One project in the organization |
| **API key** | One API key (by its description) |
For each grouping you get the same two charts:
* **Over time** — a stacked area chart of the top series across the date range, with **Cost / Requests / Tokens** tabs.
* **Ranking** — a horizontal bar chart of the top series for the range, with the same metric tabs and the running totals for the window.
Switch to **Project** to see which teams or workloads drive the bill, **Model** for the org-wide model footprint, or **API key** when usage runs through services rather than people.
## How the data is computed [#how-the-data-is-computed]
Both charts read from the same pre-aggregated hourly rollups the rest of the dashboard uses — there is no separate analytics pipeline and no scan over raw request logs, so the page stays fast over any range. Aggregation happens per time bucket, so totals line up with the project [Analytics](https://docs.llmgateway.io/learn/analytics) and [Usage & Metrics](https://docs.llmgateway.io/learn/usage-metrics) pages for the same window.
For a single project's breakdown, see [Analytics](https://docs.llmgateway.io/learn/analytics). For a per-person view of org spend, see [Member Analytics](https://docs.llmgateway.io/learn/member-analytics).
# Org Preferences
URL: https://docs.llmgateway.io/learn/org-preferences
The Org Preferences page contains settings for your organization's identity and billing information.
## Organization Name [#organization-name]
Update your organization's display name. This name appears throughout the dashboard and in billing communications.
## Billing Email [#billing-email]
Set or update the email address used for billing-related communications, including receipts, invoices, and payment notifications.
## Billing Information [#billing-information]
Configure your organization's billing details for invoices:
| Field | Description |
| ---------------------------------- | ------------------------------------------------------------------------ |
| **Email Address** | Primary email for billing communications |
| **Company Name** (optional) | Your company or organization name for invoices |
| **Billing Address** | Street address, city, state/province, ZIP code, and country |
| **Tax ID / VAT Number** (optional) | Your tax identification or VAT number for tax-compliant invoices |
| **Invoice Notes** (optional) | Custom notes to include on invoices (e.g., PO numbers, department codes) |
# Audio Studio
URL: https://docs.llmgateway.io/learn/playground-audio
The Audio Studio turns text into speech using text-to-speech models from ElevenLabs, OpenAI, Gemini, and Qwen. Pick a model and a voice, type your text, and play or download the result.
## Model Selection [#model-selection]
Choose from the supported text-to-speech models in the dropdown. Each model has its own voice roster, output formats, and pricing — the newest models appear first.
## Generating Audio [#generating-audio]
1. Select a text-to-speech model
2. Pick a voice for the selected model
3. Type the text you want spoken — or click one of the sample prompts on the empty state
4. Click **Generate**
5. Generated clips appear in the gallery, where you can play or download them
## Voices [#voices]
Each provider ships its own voice catalog — for example OpenAI's `alloy`, `nova`, and `onyx`, Gemini's `Kore`, `Puck`, and `Zephyr`, or ElevenLabs voices like `Sarah`, `George`, and `Charlotte`. The voice picker only shows voices valid for the selected model.
## Comparison Mode [#comparison-mode]
Enable comparison mode to send the same text to multiple models at once and hear the results side by side — useful for choosing a voice and provider before wiring up the [Speech Generation API](https://docs.llmgateway.io/features/speech-generation).
## History [#history]
Generated clips are saved to your audio history so you can revisit, replay, or delete them later.
# Group Chat
URL: https://docs.llmgateway.io/learn/playground-group
The Group Chat page lets you add multiple AI models to a conversation where they discuss and build on each other's responses, creating a dynamic multi-model dialogue.
## How It Works [#how-it-works]
1. Add 2–5 different AI models to the conversation
2. Enter an initial prompt or question to kick off the discussion
3. Click **Start Conversation** to begin
4. Models take turns responding to each other in sequence
5. Each model builds on the previous responses, creating a dynamic conversation
6. You can stop the conversation at any time and start a new one
## Use Cases [#use-cases]
* **Model evaluation** — Compare how different models approach the same topic
* **Brainstorming** — Get diverse perspectives from multiple AI models
* **Debate** — Watch models discuss pros and cons of a topic
* **Research** — Gather multi-model analysis of complex questions
# Image Studio
URL: https://docs.llmgateway.io/learn/playground-image
The Image Studio lets you generate images using AI models through an intuitive interface. Select a model, describe what you want, and get results instantly.
## Model Selection [#model-selection]
Choose from supported image generation models in the dropdown. Each model has different capabilities, resolutions, and pricing.
## Generating Images [#generating-images]
1. Select an image generation model
2. Type a description of the image you want
3. Click send to generate
4. Generated images appear in the conversation
## Image Count [#image-count]
You can generate 1, 2, or 4 images at once. Multiple images are displayed in a grid layout.
## Resolution Options [#resolution-options]
Available resolutions depend on the selected model. Common options include 1K, 2K, and 4K.
# Voice Calls
URL: https://docs.llmgateway.io/learn/playground-realtime
Voice Calls turns Lounge into a phone line to a model. Pick a realtime model and a voice, start the call, and talk — the model listens, answers out loud, and the transcript builds as you go. Every call runs over the same [Realtime API](https://docs.llmgateway.io/features/realtime) your own apps can use.
## Starting a Call [#starting-a-call]
1. Pick a model from the selector — only models with an active realtime mapping appear, newest first
2. Pick a **Voice** — the voice list comes from the selected model, so it changes when you switch models
3. Click **Start call** and allow microphone access when the browser asks
The status label on the right walks through the handshake — preparing audio, requesting the microphone, authorizing, connecting, configuring — and settles on **Live** with a call timer next to it. The model and voice are locked for the duration of the call; end it to change either.
Your browser never sees an API key. The page mints a short-lived client secret server-side for the call, and the audio itself is streamed as 24 kHz PCM with echo cancellation and noise suppression on.
## During the Call [#during-the-call]
The model uses semantic voice activity detection, so there is no push-to-talk: stop speaking and it answers, start speaking again and it stops to listen. An interrupted answer stays in the transcript marked `(interrupted)`.
| Control | What it does |
| ------------------------ | ----------------------------------------------------------- |
| **Mute** / **Unmute** | Stops sending your microphone audio without ending the call |
| **End call** | Hangs up and saves the call to your history |
| Voice activity indicator | Shows who currently has the floor, and your mute state |
Below the controls, a usage line totals the call: how many responses it took, input and output tokens, and how many of those were audio tokens.
Voice calls are billed to a pay-as-you-go organization with credits, so the
organization switcher on this page only lists those — DevPass and Lounge
membership workspaces can't place calls. Without one selected, the page asks
you to create one in the dashboard first.
## Call History [#call-history]
Ended calls are saved per organization and listed in the sidebar, grouped by date, with each call's duration and time. Click one to reopen its transcript, along with the model and voice it used and its token totals. Use the **⋮** menu on a call to rename or delete it, and **New Call** to get back to a fresh screen.
Calls are titled from your opening line, so history reads like a list of topics. A call you leave mid-conversation — by navigating away or closing the tab — is still saved with whatever was said up to that point.
## Using It From Your Own App [#using-it-from-your-own-app]
The same endpoint backs the [Realtime API](https://docs.llmgateway.io/features/realtime): connect a WebSocket to `wss://api.llmgateway.io/v1/realtime`, authenticate with an [API key](https://docs.llmgateway.io/learn/api-keys), and use the standard OpenAI realtime event protocol. For browser clients, mint an ephemeral client secret from your backend instead of shipping a key:
```bash
curl -X POST "https://api.llmgateway.io/v1/realtime/client_secrets" \
-H "Authorization: Bearer $LLM_GATEWAY_API_KEY" \
-H "Content-Type: application/json" \
-d '{
"expires_after": { "anchor": "created_at", "seconds": 120 },
"session": { "type": "realtime", "model": "gpt-realtime" }
}'
```
Calls made here appear in your [activity feed](https://docs.llmgateway.io/learn/activity) and [analytics](https://docs.llmgateway.io/learn/analytics) like any other request, with audio input and output costs broken out.
# Video Studio
URL: https://docs.llmgateway.io/learn/playground-video
The Video Studio lets you generate videos using AI models. Select a model, describe what you want, and get video results.
## Model Selection [#model-selection]
Choose from supported video generation models in the dropdown. Each model has different capabilities, resolutions, and pricing.
## Generating Videos [#generating-videos]
1. Select a video generation model
2. Type a description of the video you want
3. Click send to generate
4. Generated videos appear in the conversation
## Resolution Options [#resolution-options]
Available resolutions depend on the selected model.
# Lounge Chat
URL: https://docs.llmgateway.io/learn/playground
Lounge is a standalone chat app for talking to any LLM through a conversational interface. You can select any supported model, adjust parameters, and see responses in real time.
## Model Selection [#model-selection]
Use the dropdown at the top to pick a model and provider. The **Auto Route** option automatically selects the best provider based on availability and cost.
## Chat Interface [#chat-interface]
* Type your message in the input field at the bottom
* Click the send button or press Enter to submit
* Responses stream in real time
* Previous conversations appear in the sidebar
## Prompt Suggestions [#prompt-suggestions]
When starting a new chat, category tabs help you pick a prompt:
* **Create** — Content generation prompts
* **Explore** — Research and analysis prompts
* **Code** — Programming and development prompts
* **Image gen** — Image generation prompts
## Sidebar [#sidebar]
The left sidebar shows your chat history. Click **+ New Chat** to start a fresh conversation, or select a previous chat to continue it.
## Comparison Mode [#comparison-mode]
Toggle **Comparison mode** in the top-right to send the same prompt to multiple models side by side. See the [Group Chat](https://docs.llmgateway.io/learn/playground-group) page for details.
## Image Studio [#image-studio]
Click **Image Studio** in the sidebar to switch to the image generation interface. See the [Image Studio](https://docs.llmgateway.io/learn/playground-image) page for details.
# Policies
URL: https://docs.llmgateway.io/learn/policies
The Policies page lets you configure organization-wide policies that govern how your data is handled.
## Data Retention [#data-retention]
Control how long your request logs and activity data are stored. The retention period depends on your plan:
| Plan | Retention Period |
| -------------- | ---------------- |
| **Free** | 30 days |
| **Enterprise** | Custom |
After the retention period expires, request logs and associated data are automatically deleted.
Learn more about data retention in the [Data Retention feature docs](https://docs.llmgateway.io/features/data-retention).
# Preferences
URL: https://docs.llmgateway.io/learn/preferences
The Preferences page contains project-level settings that control how your project behaves.
## Project Name [#project-name]
Update the display name for your project. This name appears in the sidebar and throughout the dashboard.
## Project Mode [#project-mode]
Configure how your organization handles projects. This setting determines the routing and isolation behavior for API requests within the project.
## Caching [#caching]
Enable or configure response caching for API requests. When enabled, identical requests will return cached responses instead of making new calls to the provider, saving both time and cost.
Learn more about caching in the [Caching feature docs](https://docs.llmgateway.io/features/caching).
## Danger Zone [#danger-zone]
The Danger Zone section contains irreversible actions:
* **Archive Project** — Permanently archive the project. This action cannot be undone. Archived projects stop processing requests and their API keys become inactive.
# Provider Keys
URL: https://docs.llmgateway.io/learn/provider-keys
The Provider Keys page lets you add your own API keys from LLM providers (OpenAI, Anthropic, Google, etc.) to route requests directly through your accounts without additional gateway fees.
## Adding a Provider Key [#adding-a-provider-key]
Click **Add Provider Key** to configure a new key:
* **Provider** — Select which provider this key belongs to
* **Custom name** — An optional label to identify the key
* **API key** — Your provider's API key
* **Base URL** — Optional custom endpoint (useful for Azure OpenAI or custom deployments)
## Provider Keys List [#provider-keys-list]
Each configured key shows:
| Field | Description |
| --------------- | -------------------------------------------------- |
| **Provider** | The LLM provider (e.g., OpenAI, Anthropic) |
| **Custom name** | Your label for the key |
| **Status** | Active, inactive, or deleted |
| **Base URL** | Custom endpoint if configured |
| **Token** | Masked key with only the last 4 characters visible |
## Actions [#actions]
For each provider key:
* **Edit** — Update the key name, value, or base URL
* **Deactivate** — Temporarily disable the key without deleting it
* **Delete** — Permanently remove the key
When you use your own provider keys, requests are routed directly to the
provider. You are only charged the provider's standard rates with no
additional gateway markup.
# Referrals
URL: https://docs.llmgateway.io/learn/referrals
The Referrals page lets you earn credits by inviting others to use LLM Gateway.
## Eligibility [#eligibility]
To unlock the referral program, your organization must have at least **$100 in total credit top-ups**. Before reaching this threshold, the page shows:
* A progress bar showing your progress toward $100
* The remaining amount needed to unlock
* An explanation of the 1% earnings model
## Referral Dashboard [#referral-dashboard]
Once eligible, the page shows:
### Your Referral Link [#your-referral-link]
A unique shareable link tied to your organization. Click the copy button to copy it to your clipboard and share it with others.
### Your Stats [#your-stats]
| Stat | Description |
| ------------------ | ----------------------------------------------------- |
| **Users Referred** | Total number of users who signed up through your link |
| **Total Earnings** | Total credit amount earned from referrals |
### How It Works [#how-it-works]
1. **Share Your Link** — Send your referral link to others
2. **They Sign Up** — They create an LLM Gateway account using your link
3. **Earn Credits** — You earn 1% of their spending as credits
Credits are automatically added to your organization balance.
# Reset Passes
URL: https://docs.llmgateway.io/learn/reset-passes
DevPass plans include a [weekly fair-use allowance](https://docs.llmgateway.io/learn/model-categories) for premium frontier models. A **Reset Pass** restores that full allowance the moment you redeem it — no waiting for the rolling 7-day window — and a fresh window starts with your next premium request. The pass card lives on the DevPass dashboard directly under the premium allowance meter, styled as a stamped visa extension: each pass you hold appears as a stamp.
A Reset Pass removes the weekly limit — it does **not** add credits. Premium
usage after a reset draws from your plan's monthly credit allowance exactly as
before; the pass just lets you keep using premium models now instead of
waiting for the window.
Reset Passes exist only on **DevPass** (Lite, Pro, Max). Pay-as-you-go API
usage has no weekly premium cap, so there is nothing to reset.
## Included and purchased passes [#included-and-purchased-passes]
| Plan | Included per billing cycle | Extra passes |
| -------- | -------------------------- | ------------ |
| **Lite** | — | $9 each |
| **Pro** | 1 | $29 each |
| **Max** | 2 | $79 each |
Two kinds of stamps appear on the card:
* **Included passes** come with Pro and Max. They refresh every billing cycle, don't roll over, and are always consumed before purchased passes.
* **Purchased passes** are one-time purchases at the tier's price, bound to the tier they were bought for — a pass purchased on Pro is redeemable while you're on Pro. They never expire, so an unused pass applies again whenever you're back on that tier, even after a cancelled plan.
## Redeeming a pass [#redeeming-a-pass]
Click **Use a pass** on the card. Your premium usage for the week is zeroed immediately and the 7-day window restarts with your next premium request. Redemption is deliberately explicit — a pass is never consumed automatically, and two guards stop a pass from being wasted: a redeem is rejected while your allowance is untouched, and also once you've used more than 90% of your monthly credit allowance (a reset then would restore a cap you have almost nothing left to spend against — the pass keeps until your credits renew).
Standard models are unaffected either way: they never count against the weekly cap.
## Renewal and the weekly window [#renewal-and-the-weekly-window]
Nothing about the weekly allowance carries over between billing cycles — every monthly renewal starts you completely fresh, all at once:
* **The weekly premium allowance resets in full.** Renewal zeroes your premium usage and starts a new 7-day window at the renewal moment, alongside the monthly credit reset. You never begin a cycle mid-window or with a partially used allowance.
* **Included passes replenish.** Pro's 1 and Max's 2 included passes are restored every cycle; unused ones don't roll over. Purchased passes are unaffected — they persist until redeemed.
An immediate tier upgrade restarts your billing cycle and performs the same full reset.
Between renewals the window is **rolling, not on a fixed schedule**. When a 7-day window ends, the next one starts with your next premium request — and a redeemed pass clears the window entirely, so your next premium request starts a fresh 7 days. There is no weekly reset schedule that redeeming late (or early) can shift into the next cycle.
In practice, a 30-day cycle of steady premium usage fits about five weekly windows (starting around days 0, 7, 14, 21, and 28) before any passes. On Max, whose weekly cap is 18% of the monthly allowance, those five windows plus a single included pass already unlock more than the entire monthly credit pool — so even spending exclusively on premium models needs no front-loaded pass redemptions or timing strategy. Redeem when you actually hit the cap.
If you hit the cap from a coding agent, the gateway's `402` response points here:
```json
{
"error": {
"message": "You've used your weekly allowance for premium-tier models on the pro plan. Redeem a Reset Pass from your dashboard for an instant reset, upgrade for a higher allowance, or use any standard model now. Resets in 6 days.",
"type": "invalid_request_error",
"code": "billing_error"
}
}
```
## Buying and billing [#buying-and-billing]
**Buy a pass** shows a confirmation dialog, then charges the payment method saved on your DevPass — no checkout redirect, no subscription change, no proration. Each purchase emails a PDF invoice and appears in the DevPass billing history alongside plan charges. Purchases are paused once you've used more than 95% of your monthly credit allowance — a pass would give you almost nothing to use at that point — and open up again when your credits renew.
An unused pass can be returned: for 7 days after purchase, a purchased pass that hasn't been redeemed can be self-refunded from the billing history. The refund goes back to your payment method, the pass is removed from your passport, and your DevPass plan itself is unaffected.
Reaching for a Reset Pass every week? Upgrading a tier is usually the better
deal — the next tier raises the weekly cap itself and brings a larger monthly
allowance. Compare on the [DevPass pricing
page](https://devpass.llmgateway.io/pricing).
# Payments SDK
URL: https://docs.llmgateway.io/learn/sdk-settings
The **Payments SDK** settings page lets you embed end-user payments and sessions into your own application — your end users get their own wallets, and you control markup and access. It is a payments feature, not a normal AI client SDK like the OpenAI SDK. You'll find it under **Settings → Payments SDK** for a project.
**Preview — opt-in only.** Embeddable Payments is in preview and enabled on an
opt-in basis per project. Until it is turned on for your project, this page is
read-only and shows a preview of the settings. [Contact
us](mailto:contact@llmgateway.io) to request access.
## End-user sessions [#end-user-sessions]
Turn on **Enable end-user sessions** to allow this project to mint short-lived browser session tokens for your users.
| Field | Description |
| ------------------- | -------------------------------------------------------------------------------------------------- |
| **Markup percent** | The percentage you add on top of provider cost for each end-user request (0–100%) |
| **Allowed origins** | The browser origins permitted to use session tokens, one per line (e.g. `https://app.example.com`) |
Click **Save Settings** to apply changes.
## Platform secret keys [#platform-secret-keys]
Platform secret keys are **server-side** keys used to mint end-user sessions. Keep them on your backend — never expose them in the browser.
* **Create Live Key** — A production key. Top-ups made with it use live billing.
* **Create Test Key** — A sandbox key. Top-ups use the Stripe sandbox, so you can build and test without real charges.
A secret key is shown **only once** at creation time. Copy it immediately — it
won't be displayed again. If you lose a key, revoke it and create a new one.
Each key in the list shows its description, a **test** badge when applicable, its status, and a masked token. Use **Revoke** to permanently disable a key.
For the full SDK integration guide — server, client, and React components —
see the [Embeddable Payments feature docs](https://docs.llmgateway.io/features/embeddable-payments).
# Security Events
URL: https://docs.llmgateway.io/learn/security-events
The Security Events page shows all guardrail violations detected across your organization, helping you monitor content safety and policy enforcement.
Security Events are available on the [**Enterprise
plan**](https://llmgateway.io/enterprise). Owner or Admin role is required.
## Stats Cards [#stats-cards]
Four summary cards at the top:
| Card | Description |
| -------------------- | --------------------------------------------- |
| **Total Violations** | All-time violation count |
| **Last 24 Hours** | Violations in the past day |
| **Blocked** | Number of requests that were blocked |
| **Redacted** | Number of requests where content was redacted |
## Filters [#filters]
Narrow down the events list:
* **Action** — Filter by Blocked, Redacted, Warned, or All actions
* **Category** — Filter by Prompt Injection, Jailbreak, PII Detection, Secrets, Blocked Terms, Custom Regex, or Topic Restriction
## Violations List [#violations-list]
Each violation entry shows:
| Field | Description |
| ------------------- | ---------------------------------------------------- |
| **Timestamp** | When the violation occurred |
| **Rule name** | Which guardrail rule was triggered |
| **Category** | The type of violation (shown as a badge) |
| **Action** | What action was taken (Blocked, Redacted, or Warned) |
| **Matched pattern** | The content that triggered the rule |
The list supports pagination with a **Load More** button for viewing older events.
# Team
URL: https://docs.llmgateway.io/learn/team
The Team page lets you invite team members, assign roles, and control access to your organization.
## Adding Members [#adding-members]
Click **Add Member** to invite someone by email. You'll need to:
1. Enter their email address
2. Select a role (Developer, Admin, or Owner)
Your plan includes up to **5 team seats**. The current count is displayed, and the Add button is disabled when all seats are used. Contact sales for additional seats.
## Team Members List [#team-members-list]
Each member shows:
| Field | Description |
| --------- | ------------------------------------------------ |
| **Name** | The member's display name |
| **Email** | Their email address |
| **Role** | Their current role (can be changed via dropdown) |
## Actions [#actions]
Each member row has an actions menu:
* **Details** — Open the member's detail page with their budget and usage
* **Manage access** — Change the member's role (owners and admins only)
* **Manage budget** — Set per-member spending limits (owners and admins only)
* **Manage IAM rules** — Restrict which models, providers, pricing tiers, or IP ranges the member can use (owners and admins only)
* **Remove** — Remove a member from the organization (requires confirmation)
## Member IAM Rules [#member-iam-rules]
Owners and admins can set IAM rules on a member — the same allow/deny rules for models, providers, pricing, and IP ranges that exist on individual API keys, applied organization-wide to that member. As with roles and budgets, admins cannot modify an owner's rules.
Member-level rules are a **ceiling**: they apply to every API key the member creates, and the member's own key rules can only narrow access further, never expand it. For example, if you restrict a member to a single approved [provider](https://llmgateway.io/providers), they can still create a key limited to one of that provider's models, but no key of theirs can reach any other provider.
Members can view (but not edit) their own rules — the per-key IAM page shows a notice when organization-level restrictions apply, and denied requests state that the restriction was set by the org admin.
For the full rule semantics, see [Member-Level IAM Rules](https://docs.llmgateway.io/features/api-keys#member-level-iam-rules). Rules can also be managed programmatically via the [master key API](https://docs.llmgateway.io/features/master-keys#member-iam-rules).
## Role Permissions [#role-permissions]
| Role | Permissions |
| ------------- | ----------------------------------------------------------------------------------------------------- |
| **Owner** | Full access to all settings, billing, team management, and all projects |
| **Admin** | Can manage team members, projects, and API keys, but cannot access billing or delete the organization |
| **Developer** | View and use resources only. Cannot modify settings or manage team |
Developers can also be given **restricted access** at the API key level, limiting which keys they can view and use.
# Transactions
URL: https://docs.llmgateway.io/learn/transactions
The Transactions page shows a complete history of all financial transactions in your organization.
## Transaction History [#transaction-history]
Each transaction entry includes:
| Field | Description |
| --------------- | ---------------------------------------- |
| **Date** | When the transaction occurred |
| **Type** | The transaction type (see below) |
| **Credits** | Number of credits added or deducted |
| **Total Paid** | The dollar amount charged |
| **Status** | Current state of the transaction |
| **Description** | Additional details about the transaction |
## Transaction Types [#transaction-types]
| Type | Description |
| ----------------------- | ----------------------------------- |
| **Credit Top-up** | Manual or automatic credit purchase |
| **Credit Refund** | Credits refunded to your account |
| **Subscription Start** | New plan subscription started |
| **Subscription Cancel** | Plan subscription canceled |
| **Subscription End** | Plan subscription period ended |
## Status Badges [#status-badges]
* **Completed** — Transaction processed successfully
* **Pending** — Transaction is being processed
* **Failed** — Transaction could not be completed
# Usage & Metrics
URL: https://docs.llmgateway.io/learn/usage-metrics
The Usage & Metrics page provides comprehensive analytics through five tabs, giving you deep insight into your LLM API usage patterns.
## Filters [#filters]
* **API Key** — Filter metrics by a specific API key or view all
* **Date range** — Select the time period (defaults to last 7 days)
## Tabs [#tabs]
### Requests [#requests]
A time-series chart showing request volume over the selected period. Use this to identify traffic patterns, peak usage times, and growth trends.
### Models [#models]
A table showing your top-used models ranked by request count. For each model you can see:
* Total requests
* Token consumption
* Associated costs
This helps you understand which models drive the most usage and cost.
### Errors [#errors]
A chart showing error rates over time. Track:
* Error frequency and trends
* Spikes that may indicate provider issues
* Overall reliability of your API calls
### Cache [#cache]
A chart showing your cache hit rate over time. Monitor:
* How effectively caching is reducing redundant requests
* Cache hit vs. miss ratios
* The cost savings from cached responses
### Costs [#costs]
A cost breakdown chart showing spending patterns. Analyze:
* Cost trends over time
* Cost distribution by provider or model
* Opportunities to reduce spending
# Migrate from LiteLLM
URL: https://docs.llmgateway.io/migrations/litellm
Running your own LiteLLM proxy works—until it doesn't. Scaling, monitoring, and keeping it running becomes another job. LLM Gateway gives you the same unified API with built-in analytics, caching, and a dashboard—without the infrastructure overhead.
## Quick Migration [#quick-migration]
Both services use OpenAI-compatible endpoints, so migration is a two-line change:
```diff
- const baseURL = "http://localhost:4000/v1"; // LiteLLM proxy
+ const baseURL = "https://api.llmgateway.io/v1";
- const apiKey = process.env.LITELLM_API_KEY;
+ const apiKey = process.env.LLM_GATEWAY_API_KEY;
```
## Why Teams Switch to LLM Gateway [#why-teams-switch-to-llm-gateway]
| What You Get | LiteLLM (Self-Hosted) | LLM Gateway |
| ------------------------ | --------------------- | ---------------------- |
| OpenAI-compatible API | Yes | Yes |
| Infrastructure to manage | Yes (you run it) | No (we run it) |
| Managed cloud option | No | Yes |
| Analytics dashboard | Basic | Per-request detail |
| Response caching | Manual setup | Built-in, automatic |
| Cost tracking | Via callbacks | Native, real-time |
| Provider key management | Config file | Web UI with rotation |
| Uptime & scaling | You handle it | 99.9% SLA (Enterprise) |
Still want to self-host? LLM Gateway is [open source under AGPLv3](https://llmgateway.io/blog/how-to-self-host-llm-gateway)—same features, your infrastructure.
For a detailed breakdown, see [LLM Gateway vs LiteLLM](https://llmgateway.io/compare/litellm).
## Migration Steps [#migration-steps]
### Get Your LLM Gateway API Key [#get-your-llm-gateway-api-key]
Sign up at [llmgateway.io/signup](https://llmgateway.io/signup) and create an API key from your dashboard.
### Map Your Models [#map-your-models]
LLM Gateway supports two model ID formats:
**Root Model IDs** (without provider prefix) - Uses smart routing to automatically select the best provider based on uptime, throughput, price, and latency:
```
gpt-5.2
claude-opus-4-5-20251101
gemini-3-flash-preview
```
**Provider-Prefixed Model IDs** - Routes to a specific provider with automatic failover if uptime drops below 90%:
```
openai/gpt-5.2
anthropic/claude-opus-4-5-20251101
google-ai-studio/gemini-3-flash-preview
```
This means many LiteLLM model names work directly with LLM Gateway:
| LiteLLM Model | LLM Gateway Model |
| -------------------------------- | ----------------------------------------------------------------- |
| gpt-5.2 | gpt-5.2 or openai/gpt-5.2 |
| claude-opus-4-5-20251101 | claude-opus-4-5-20251101 or anthropic/claude-opus-4-5-20251101 |
| gemini/gemini-3-flash-preview | gemini-3-flash-preview or google-ai-studio/gemini-3-flash-preview |
| bedrock/claude-opus-4-5-20251101 | claude-opus-4-5-20251101 or aws-bedrock/claude-opus-4-5-20251101 |
For more details on routing behavior, see the [routing documentation](https://docs.llmgateway.io/features/routing).
### Update Your Code [#update-your-code]
#### Python with OpenAI SDK [#python-with-openai-sdk]
```python
from openai import OpenAI
# Before (LiteLLM proxy)
client = OpenAI(
base_url="http://localhost:4000/v1",
api_key=os.environ["LITELLM_API_KEY"]
)
response = client.chat.completions.create(
model="gpt-4",
messages=[{"role": "user", "content": "Hello!"}]
)
# After (LLM Gateway) - model name can stay the same!
client = OpenAI(
base_url="https://api.llmgateway.io/v1",
api_key=os.environ["LLM_GATEWAY_API_KEY"]
)
response = client.chat.completions.create(
model="gpt-4", # or "openai/gpt-4" to target a specific provider
messages=[{"role": "user", "content": "Hello!"}]
)
```
#### Python with LiteLLM Library [#python-with-litellm-library]
If you're using the LiteLLM library directly, you can point it to LLM Gateway:
```python
import litellm
# Before (direct LiteLLM)
response = litellm.completion(
model="gpt-4",
messages=[{"role": "user", "content": "Hello!"}]
)
# After (via LLM Gateway) - same model name works
response = litellm.completion(
model="gpt-4", # or "openai/gpt-4" to target a specific provider
messages=[{"role": "user", "content": "Hello!"}],
api_base="https://api.llmgateway.io/v1",
api_key=os.environ["LLM_GATEWAY_API_KEY"]
)
```
#### TypeScript/JavaScript [#typescriptjavascript]
```typescript
import OpenAI from "openai";
// Before (LiteLLM proxy)
const client = new OpenAI({
baseURL: "http://localhost:4000/v1",
apiKey: process.env.LITELLM_API_KEY,
});
// After (LLM Gateway) - same model name works
const client = new OpenAI({
baseURL: "https://api.llmgateway.io/v1",
apiKey: process.env.LLM_GATEWAY_API_KEY,
});
const completion = await client.chat.completions.create({
model: "gpt-4", // or "openai/gpt-4" to target a specific provider
messages: [{ role: "user", content: "Hello!" }],
});
```
#### cURL [#curl]
```bash
# Before (LiteLLM proxy)
curl http://localhost:4000/v1/chat/completions \
-H "Authorization: Bearer $LITELLM_API_KEY" \
-H "Content-Type: application/json" \
-d '{
"model": "gpt-4",
"messages": [{"role": "user", "content": "Hello!"}]
}'
# After (LLM Gateway) - same model name works
curl https://api.llmgateway.io/v1/chat/completions \
-H "Authorization: Bearer $LLM_GATEWAY_API_KEY" \
-H "Content-Type: application/json" \
-d '{
"model": "gpt-4",
"messages": [{"role": "user", "content": "Hello!"}]
}'
# Use "openai/gpt-4" to target a specific provider
```
### Migrate Configuration [#migrate-configuration]
#### LiteLLM Config (Before) [#litellm-config-before]
```yaml
# litellm_config.yaml
model_list:
- model_name: gpt-4
litellm_params:
model: gpt-4
api_key: sk-...
- model_name: claude-3
litellm_params:
model: claude-3-sonnet-20240229
api_key: sk-ant-...
```
#### LLM Gateway (After) [#llm-gateway-after]
With LLM Gateway, you don't need a config file. Provider keys are managed in the web dashboard, or you can use the default LLM Gateway keys.
If you want to use your own provider keys, configure them in the dashboard under Settings > Provider Keys.
## Streaming Support [#streaming-support]
LLM Gateway supports streaming identically to LiteLLM:
```python
from openai import OpenAI
client = OpenAI(
base_url="https://api.llmgateway.io/v1",
api_key=os.environ["LLM_GATEWAY_API_KEY"]
)
stream = client.chat.completions.create(
model="openai/gpt-4",
messages=[{"role": "user", "content": "Write a story"}],
stream=True
)
for chunk in stream:
if chunk.choices[0].delta.content:
print(chunk.choices[0].delta.content, end="")
```
## Function/Tool Calling [#functiontool-calling]
LLM Gateway supports function calling:
```python
from openai import OpenAI
client = OpenAI(
base_url="https://api.llmgateway.io/v1",
api_key=os.environ["LLM_GATEWAY_API_KEY"]
)
tools = [{
"type": "function",
"function": {
"name": "get_weather",
"description": "Get the weather for a location",
"parameters": {
"type": "object",
"properties": {
"location": {"type": "string"}
},
"required": ["location"]
}
}
}]
response = client.chat.completions.create(
model="openai/gpt-4",
messages=[{"role": "user", "content": "What's the weather in Tokyo?"}],
tools=tools
)
```
## Removing LiteLLM Infrastructure [#removing-litellm-infrastructure]
After verifying LLM Gateway works for your use case, you can decommission your LiteLLM proxy:
1. Update all clients to use LLM Gateway endpoints
2. Monitor the LLM Gateway dashboard for successful requests
3. Shut down your LiteLLM proxy server
4. Remove LiteLLM configuration files
## What Changes After Migration [#what-changes-after-migration]
* **No servers to babysit** — We handle scaling, uptime, and updates
* **Real-time cost visibility** — See what every request costs, broken down by model
* **Automatic caching** — Repeated requests hit cache, reducing your spend
* **Web-based management** — No more editing YAML files for config changes
* **New models immediately** — Access new releases within 48 hours, no deployment needed
## Self-Hosting LLM Gateway [#self-hosting-llm-gateway]
If you prefer self-hosting like LiteLLM, LLM Gateway is available under AGPLv3:
```bash
git clone https://github.com/llmgateway/llmgateway
cd llmgateway
pnpm install
pnpm setup
pnpm dev
```
This gives you the same benefits as LiteLLM's self-hosted proxy with LLM Gateway's analytics and caching features.
## Full Comparison [#full-comparison]
Want to see a detailed breakdown of all features? Check out our [LLM Gateway vs LiteLLM comparison page](https://llmgateway.io/compare/litellm).
# Migrate from OpenRouter
URL: https://docs.llmgateway.io/migrations/openrouter
LLM Gateway works just like OpenRouter—same API format, same model names—but with built-in analytics and the option to self-host. Migration takes two lines of code.
## Quick Migration [#quick-migration]
Change your base URL and API key:
```diff
- const baseURL = "https://openrouter.ai/api/v1";
- const apiKey = process.env.OPENROUTER_API_KEY;
+ const baseURL = "https://api.llmgateway.io/v1";
+ const apiKey = process.env.LLM_GATEWAY_API_KEY;
```
## Migration Steps [#migration-steps]
### Get Your LLM Gateway API Key [#get-your-llm-gateway-api-key]
Sign up at [llmgateway.io/signup](https://llmgateway.io/signup) and create an API key from your dashboard.
### Update Environment Variables [#update-environment-variables]
```bash
# Remove OpenRouter credentials
# OPENROUTER_API_KEY=sk-or-...
# Add LLM Gateway credentials
LLM_GATEWAY_API_KEY=llmgtwy_your_key_here
```
### Update Your Code [#update-your-code]
#### Using fetch/axios [#using-fetchaxios]
```typescript
// Before (OpenRouter)
const response = await fetch("https://openrouter.ai/api/v1/chat/completions", {
method: "POST",
headers: {
Authorization: `Bearer ${process.env.OPENROUTER_API_KEY}`,
"Content-Type": "application/json",
},
body: JSON.stringify({
model: "openai/gpt-5.2",
messages: [{ role: "user", content: "Hello!" }],
}),
});
// After (LLM Gateway)
const response = await fetch("https://api.llmgateway.io/v1/chat/completions", {
method: "POST",
headers: {
Authorization: `Bearer ${process.env.LLM_GATEWAY_API_KEY}`,
"Content-Type": "application/json",
},
body: JSON.stringify({
model: "gpt-5.2",
messages: [{ role: "user", content: "Hello!" }],
}),
});
```
#### Using OpenAI SDK [#using-openai-sdk]
```typescript
import OpenAI from "openai";
// Before (OpenRouter)
const client = new OpenAI({
baseURL: "https://openrouter.ai/api/v1",
apiKey: process.env.OPENROUTER_API_KEY,
});
// After (LLM Gateway)
const client = new OpenAI({
baseURL: "https://api.llmgateway.io/v1",
apiKey: process.env.LLM_GATEWAY_API_KEY,
});
// Usage remains the same
const completion = await client.chat.completions.create({
model: "anthropic/claude-3-5-sonnet-20241022",
messages: [{ role: "user", content: "Hello!" }],
});
```
#### Using Vercel AI SDK [#using-vercel-ai-sdk]
Both OpenRouter and LLM Gateway have native AI SDK providers, making migration straightforward:
```typescript
import { generateText } from "ai";
// Before (OpenRouter AI SDK Provider)
import { createOpenRouter } from "@openrouter/ai-sdk-provider";
const openrouter = createOpenRouter({
apiKey: process.env.OPENROUTER_API_KEY,
});
const { text } = await generateText({
model: openrouter("gpt-5.2"),
prompt: "Hello!",
});
// After (LLM Gateway AI SDK Provider)
import { createLLMGateway } from "@llmgateway/ai-sdk-provider";
const llmgateway = createLLMGateway({
apiKey: process.env.LLMGATEWAY_API_KEY,
});
const { text } = await generateText({
model: llmgateway("gpt-5.2"),
prompt: "Hello!",
});
```
## Model Name Mapping [#model-name-mapping]
Most model names are compatible, but here are some common mappings:
| OpenRouter Model | LLM Gateway Model |
| -------------------------------- | ----------------------------------------------------------------- |
| openai/gpt-5.2 | gpt-5.2 or openai/gpt-5.2 |
| gemini/gemini-3-flash-preview | gemini-3-flash-preview or google-ai-studio/gemini-3-flash-preview |
| bedrock/claude-opus-4-5-20251101 | claude-opus-4-5-20251101 or aws-bedrock/claude-opus-4-5-20251101 |
Check the [models page](https://llmgateway.io/models) for the full list of available models.
## Streaming Support [#streaming-support]
LLM Gateway supports streaming responses identically to OpenRouter:
```typescript
const stream = await client.chat.completions.create({
model: "anthropic/claude-3-5-sonnet-20241022",
messages: [{ role: "user", content: "Write a story" }],
stream: true,
});
for await (const chunk of stream) {
process.stdout.write(chunk.choices[0]?.delta?.content || "");
}
```
## Full Comparison [#full-comparison]
Want to see a detailed breakdown of all features? Check out our [LLM Gateway vs OpenRouter comparison page](https://llmgateway.io/compare/open-router).
# Migrate from Vercel AI Gateway
URL: https://docs.llmgateway.io/migrations/vercel-ai-gateway
## Quick Migration [#quick-migration]
Swap your provider imports—your AI SDK code stays the same:
```diff
- import { openai } from "@ai-sdk/openai";
- import { anthropic } from "@ai-sdk/anthropic";
+ import { generateText } from "ai";
+ import { createLLMGateway } from "@llmgateway/ai-sdk-provider";
+ const llmgateway = createLLMGateway({
+ apiKey: process.env.LLM_GATEWAY_API_KEY
+ });
const { text } = await generateText({
- model: openai("gpt-5.2"),
+ model: llmgateway("gpt-5.2"),
prompt: "Hello!"
});
```
The key difference: one provider, one API key, all models—with caching and analytics built in.
## Migration Steps [#migration-steps]
### Get Your LLM Gateway API Key [#get-your-llm-gateway-api-key]
Sign up at [llmgateway.io/signup](https://llmgateway.io/signup) and create an API key from your dashboard.
### Install the LLM Gateway AI SDK Provider [#install-the-llm-gateway-ai-sdk-provider]
Install the native LLM Gateway provider for the Vercel AI SDK:
```bash
pnpm add @llmgateway/ai-sdk-provider
```
This package provides full compatibility with the Vercel AI SDK and supports all LLM Gateway features.
### Update Your Code [#update-your-code]
#### Basic Text Generation [#basic-text-generation]
```typescript
// Before (Vercel AI Gateway with native providers)
import { openai } from "@ai-sdk/openai";
import { anthropic } from "@ai-sdk/anthropic";
import { generateText } from "ai";
const { text: openaiText } = await generateText({
model: openai("gpt-4o"),
prompt: "Hello!",
});
const { text: claudeText } = await generateText({
model: anthropic("claude-3-5-sonnet-20241022"),
prompt: "Hello!",
});
// After (LLM Gateway - single provider for all models)
import { createLLMGateway } from "@llmgateway/ai-sdk-provider";
import { generateText } from "ai";
const llmgateway = createLLMGateway({
apiKey: process.env.LLM_GATEWAY_API_KEY,
});
const { text: openaiText } = await generateText({
model: llmgateway("openai/gpt-4o"),
prompt: "Hello!",
});
const { text: claudeText } = await generateText({
model: llmgateway("anthropic/claude-3-5-sonnet-20241022"),
prompt: "Hello!",
});
```
#### Streaming Responses [#streaming-responses]
```typescript
import { createLLMGateway } from "@llmgateway/ai-sdk-provider";
import { streamText } from "ai";
const llmgateway = createLLMGateway({
apiKey: process.env.LLM_GATEWAY_API_KEY,
});
const { textStream } = await streamText({
model: llmgateway("anthropic/claude-3-5-sonnet-20241022"),
prompt: "Write a poem about coding",
});
for await (const text of textStream) {
process.stdout.write(text);
}
```
#### Using in Next.js API Routes [#using-in-nextjs-api-routes]
```typescript
// app/api/chat/route.ts
import { createLLMGateway } from "@llmgateway/ai-sdk-provider";
import { streamText } from "ai";
const llmgateway = createLLMGateway({
apiKey: process.env.LLM_GATEWAY_API_KEY,
});
export async function POST(req: Request) {
const { messages } = await req.json();
const result = await streamText({
model: llmgateway("openai/gpt-4o"),
messages,
});
return result.toDataStreamResponse();
}
```
#### Alternative: Using OpenAI SDK Adapter [#alternative-using-openai-sdk-adapter]
If you prefer not to install a new package, you can use `@ai-sdk/openai` with a custom base URL:
```typescript
import { createOpenAI } from "@ai-sdk/openai";
import { generateText } from "ai";
const llmgateway = createOpenAI({
baseURL: "https://api.llmgateway.io/v1",
apiKey: process.env.LLM_GATEWAY_API_KEY,
});
const { text } = await generateText({
model: llmgateway("openai/gpt-4o"),
prompt: "Hello!",
});
```
### Update Environment Variables [#update-environment-variables]
```bash
# Remove individual provider keys (optional - can keep as backup)
# OPENAI_API_KEY=sk-...
# ANTHROPIC_API_KEY=sk-ant-...
# Add LLM Gateway key
export LLM_GATEWAY_API_KEY=llmgtwy_your_key_here
```
## Model Name Format [#model-name-format]
LLM Gateway supports two model ID formats:
**Root Model IDs** (without provider prefix) - Uses smart routing to automatically select the best provider based on uptime, throughput, price, and latency:
```
gpt-4o
claude-3-5-sonnet-20241022
gemini-1.5-pro
```
**Provider-Prefixed Model IDs** - Routes to a specific provider with automatic failover if uptime drops below 90%:
```
openai/gpt-4o
anthropic/claude-3-5-sonnet-20241022
google-ai-studio/gemini-1.5-pro
```
For more details on routing behavior, see the [routing documentation](https://docs.llmgateway.io/features/routing).
### Model Mapping Examples [#model-mapping-examples]
| Vercel AI SDK | LLM Gateway |
| ----------------------------------------- | -------------------------------------------------------------------------------------------------- |
| `openai("gpt-4o")` | `llmgateway("gpt-4o")` or `llmgateway("openai/gpt-4o")` |
| `anthropic("claude-3-5-sonnet-20241022")` | `llmgateway("claude-3-5-sonnet-20241022")` or `llmgateway("anthropic/claude-3-5-sonnet-20241022")` |
| `google("gemini-1.5-pro")` | `llmgateway("gemini-1.5-pro")` or `llmgateway("google-ai-studio/gemini-1.5-pro")` |
Check the [models page](https://llmgateway.io/models) for the full list of available models.
## Tool Calling [#tool-calling]
LLM Gateway supports tool calling through the AI SDK:
```typescript
import { createLLMGateway } from "@llmgateway/ai-sdk-provider";
import { generateText, tool } from "ai";
import { z } from "zod";
const llmgateway = createLLMGateway({
apiKey: process.env.LLM_GATEWAY_API_KEY,
});
const { text, toolResults } = await generateText({
model: llmgateway("openai/gpt-4o"),
tools: {
weather: tool({
description: "Get the weather for a location",
parameters: z.object({
location: z.string(),
}),
execute: async ({ location }) => {
return { temperature: 72, condition: "sunny" };
},
}),
},
prompt: "What's the weather in San Francisco?",
});
```
## Self-Hosting LLM Gateway [#self-hosting-llm-gateway]
If you prefer self-hosting, LLM Gateway is available under AGPLv3:
```bash
git clone https://github.com/llmgateway/llmgateway
cd llmgateway
pnpm install
pnpm setup
pnpm dev
```
This gives you the same managed experience with full control over your infrastructure.
# Error Handling
URL: https://docs.llmgateway.io/resources/error-handling
# Error Handling [#error-handling]
On the OpenAI-compatible endpoints, LLMGateway returns errors in the same format as the OpenAI API, so existing OpenAI SDKs and tooling can parse gateway errors without changes. This applies to errors forwarded from upstream providers as well as errors raised by the gateway itself (authentication failures, usage limits, validation problems, timeouts, and so on). The Anthropic-compatible Messages endpoint (`/v1/messages`) instead returns Anthropic-native errors — see [Anthropic Endpoint](#anthropic-endpoint) below.
## Error Format [#error-format]
Errors on the OpenAI-compatible endpoints (`/v1/chat/completions`, `/v1/embeddings`, `/v1/images`, `/v1/models`, `/v1/moderations`, `/v1/rerank`, `/v1/responses`, `/v1/videos`) use the standard OpenAI error envelope:
```json
{
"error": {
"message": "Unauthorized: LLMGateway API key reached its usage limit.",
"type": "invalid_request_error",
"param": null,
"code": "invalid_api_key"
}
}
```
| Field | Description |
| --------------- | ----------------------------------------------------------------------------------- |
| `error.message` | Human-readable description of what went wrong. |
| `error.type` | High-level error category (see the table below). |
| `error.param` | The request parameter that caused the error, or `null` when not parameter-specific. |
| `error.code` | A more specific machine-readable code, or `null` when no specific code applies. |
The HTTP status code on the response always matches the error and is the authoritative signal — read it from the response status line rather than the body.
## Status Codes [#status-codes]
The gateway maps HTTP status codes to OpenAI error types and codes as follows:
| Status | `type` | `code` |
| ------ | ----------------------- | ------------------------ |
| 400 | `invalid_request_error` | *(varies / `null`)* |
| 401 | `invalid_request_error` | `invalid_api_key` |
| 402 | `invalid_request_error` | `billing_error` |
| 403 | `invalid_request_error` | `permission_denied` |
| 404 | `invalid_request_error` | `not_found` |
| 408 | `timeout_error` | `timeout` |
| 413 | `invalid_request_error` | `request_too_large` |
| 415 | `invalid_request_error` | `unsupported_media_type` |
| 429 | `rate_limit_error` | `rate_limit_exceeded` |
| 499 | `invalid_request_error` | `request_cancelled` |
| 504 | `timeout_error` | `timeout` |
| 5xx | `api_error` | *(`null`)* |
Validation errors raised before a request reaches a provider often include a
more specific `code` and a `param` pointing at the offending field — for
example `invalid_json`, `model_not_found`, or
`unsupported_parameter_combination`.
## Streaming Errors [#streaming-errors]
For streaming requests (`"stream": true`), an error that occurs **after** the stream has started is delivered as an SSE `error` event whose payload uses the same `{ "error": { ... } }` envelope. Errors that occur **before** streaming begins (such as authentication failures) are returned as a normal JSON error response with the appropriate status code.
## Anthropic Endpoint [#anthropic-endpoint]
The Anthropic-compatible Messages endpoint (`/v1/messages`) returns errors in Anthropic's native format instead, so the Anthropic SDK can parse them:
```json
{
"type": "error",
"error": {
"type": "authentication_error",
"message": "Unauthorized: invalid API key."
}
}
```
## Related [#related]
* [Rate Limits](https://docs.llmgateway.io/resources/rate-limits) — details on `429` responses and rate limit headers.
# Rate Limits
URL: https://docs.llmgateway.io/resources/rate-limits
# Rate Limits [#rate-limits]
LLMGateway implements rate limits to ensure fair usage and optimal performance for all users. The rate limits differ based on your account status and the type of models you're using.
## Free Models [#free-models]
Free models (models with zero input and output pricing) have rate limits that depend on your account's credit status:
### Base Rate Limits [#base-rate-limits]
For organizations with **zero credits**:
* **5 requests per 10 minutes**
* Applies to all free model requests
* Resets every 10 minutes
### Elevated Rate Limits [#elevated-rate-limits]
For organizations that have **purchased at least some credits**:
* **20 requests per minute**
* Applies to all free model requests
* Resets every minute
When using free models with elevated limits, your credits will **not** be
deducted. The elevated rate limits are simply a benefit for users who have
added credits to their account.
## Paid Models [#paid-models]
**Paid AI models are not currently rate limited.** You can make as many requests as needed to paid models, subject only to your account's credit balance and any provider-specific limits.
## Rate Limit Headers [#rate-limit-headers]
All API responses include rate limit information in the headers:
```http
X-RateLimit-Limit: 20
X-RateLimit-Remaining: 19
X-RateLimit-Reset: 1640995200
```
* `X-RateLimit-Limit`: Maximum number of requests allowed in the current window
* `X-RateLimit-Remaining`: Number of requests remaining in the current window
* `X-RateLimit-Reset`: Unix timestamp when the rate limit window resets
## Rate Limit Exceeded [#rate-limit-exceeded]
When you exceed your rate limit, you'll receive a `429 Too Many Requests` response:
```json
{
"error": {
"message": "Rate limit exceeded. Try again later.",
"type": "rate_limit_error",
"code": "rate_limit_exceeded"
}
}
```
This uses the standard OpenAI-compatible error envelope — see [Error Handling](https://docs.llmgateway.io/resources/error-handling) for the full format and status-code reference.
## Best Practices [#best-practices]
### Upgrading Your Limits [#upgrading-your-limits]
To unlock elevated rate limits for free models:
1. Add credits to your account through the dashboard
2. Your rate limits will automatically increase to 20 requests per minute
3. Free model usage will still not deduct from your credits
### Handling Rate Limits [#handling-rate-limits]
* Implement exponential backoff when you receive 429 responses
* Monitor the `X-RateLimit-Remaining` header to avoid hitting limits
* Consider using paid models for high-volume applications
### Cost Optimization [#cost-optimization]
* Use free models for development and testing
* Switch to paid models for production workloads requiring higher throughput
* Monitor your usage patterns through the dashboard
Adding even a small amount of credits to your account (e.g., $10) will
immediately upgrade your free model rate limits from 5 requests per 10 minutes
to 20 requests per minute.
# AWS
URL: https://docs.llmgateway.io/self-host/aws
**Deploy in one command.** Our [Enterprise
plan](https://llmgateway.io/enterprise) includes Terraform modules that
provision the cluster, database, cache, networking, and secrets and deploy LLM
Gateway on AWS — no manual setup required. [Learn
more](https://llmgateway.io/enterprise).
This guide covers a production deployment of LLM Gateway on AWS using EKS for the application services and managed AWS services for the backing stores.
## Architecture [#architecture]
| Component | AWS service |
| ---------- | ---------------------------- |
| Compute | Amazon EKS (Kubernetes) |
| PostgreSQL | Amazon RDS for PostgreSQL |
| Redis | Amazon ElastiCache for Redis |
| Secrets | AWS Secrets Manager |
| Ingress | AWS Load Balancer Controller |
## What to configure [#what-to-configure]
### 1. PostgreSQL — Amazon RDS [#1-postgresql--amazon-rds]
Create an RDS for PostgreSQL instance in a private subnet. Enable automated backups and Multi-AZ for high availability. Note the connection string for `DATABASE_URL`.
### 2. Redis — Amazon ElastiCache [#2-redis--amazon-elasticache]
Create an ElastiCache for Redis cluster in the same VPC. Use it for `REDIS_URL`. A single-node cluster is fine to start; enable replication for production.
### 3. Compute — Amazon EKS [#3-compute--amazon-eks]
Create an EKS cluster with a managed node group sized for your traffic. Install the [AWS Load Balancer Controller](https://kubernetes-sigs.github.io/aws-load-balancer-controller/) to expose the gateway through an Application Load Balancer.
### 4. Networking [#4-networking]
Run RDS and ElastiCache in private subnets and allow inbound traffic only from the EKS node security group. Expose only the gateway (and optionally the UI) to the internet through the load balancer.
### 5. Secrets — AWS Secrets Manager [#5-secrets--aws-secrets-manager]
Store `AUTH_SECRET`, `GATEWAY_API_KEY_HASH_SECRET`, and your provider API keys in Secrets Manager. Sync them into the cluster with the [External Secrets Operator](https://external-secrets.io/) or the AWS Secrets and Configuration Provider (ASCP).
## Deploy the Helm chart [#deploy-the-helm-chart]
With the backing services in place, deploy LLM Gateway with the [Helm chart](https://docs.llmgateway.io/self-host/kubernetes), pointing it at your RDS and ElastiCache endpoints:
```bash
helm install llmgateway oci://ghcr.io/theopenco/charts/llmgateway -f values.yaml
```
```yaml
config:
DATABASE_URL: "postgres://user:password@your-rds-endpoint:5432/llmgateway"
REDIS_URL: "redis://your-elasticache-endpoint:6379"
AUTH_SECRET: "from-secrets-manager"
GATEWAY_API_KEY_HASH_SECRET: "from-secrets-manager"
```
See the [Kubernetes guide](https://docs.llmgateway.io/self-host/kubernetes) for the full set of configurable values and how to scale the gateway.
**Prefer not to wire this up by hand?** The [Enterprise
plan](https://llmgateway.io/enterprise) ships Terraform modules that stand up
the entire AWS stack — EKS, RDS, ElastiCache, networking, and secrets — and
deploy LLM Gateway in one command. [Talk to
us](https://llmgateway.io/enterprise#contact).
# Azure
URL: https://docs.llmgateway.io/self-host/azure
**Deploy in one command.** Our [Enterprise
plan](https://llmgateway.io/enterprise) includes Terraform modules that
provision the cluster, database, cache, networking, and secrets and deploy LLM
Gateway on Azure — no manual setup required. [Learn
more](https://llmgateway.io/enterprise).
This guide covers a production deployment of LLM Gateway on Azure using AKS for the application services and managed Azure services for the backing stores.
## Architecture [#architecture]
| Component | Azure service |
| ---------- | --------------------------------- |
| Compute | Azure Kubernetes Service (AKS) |
| PostgreSQL | Azure Database for PostgreSQL |
| Redis | Azure Cache for Redis |
| Secrets | Azure Key Vault |
| Ingress | Application Gateway / AKS Ingress |
## What to configure [#what-to-configure]
### 1. PostgreSQL — Azure Database for PostgreSQL [#1-postgresql--azure-database-for-postgresql]
Create an Azure Database for PostgreSQL Flexible Server with private access. Enable automated backups and zone-redundant high availability. Note the connection details for `DATABASE_URL`.
### 2. Redis — Azure Cache for Redis [#2-redis--azure-cache-for-redis]
Create an Azure Cache for Redis instance in the same virtual network and use its endpoint for `REDIS_URL`. Choose a Standard or Premium tier for replication in production.
### 3. Compute — AKS [#3-compute--aks]
Create an AKS cluster with a node pool sized for your traffic. Use the [Application Gateway Ingress Controller](https://learn.microsoft.com/en-us/azure/application-gateway/ingress-controller-overview) or an NGINX ingress to expose the gateway.
### 4. Networking [#4-networking]
Deploy the database and cache with private endpoints inside your virtual network and restrict access to the AKS subnet. Expose only the gateway (and optionally the UI) to the internet.
### 5. Secrets — Azure Key Vault [#5-secrets--azure-key-vault]
Store `AUTH_SECRET`, `GATEWAY_API_KEY_HASH_SECRET`, and your provider API keys in Key Vault. Sync them into the cluster with the [Azure Key Vault Provider for Secrets Store CSI Driver](https://learn.microsoft.com/en-us/azure/aks/csi-secrets-store-driver).
## Deploy the Helm chart [#deploy-the-helm-chart]
With the backing services in place, deploy LLM Gateway with the [Helm chart](https://docs.llmgateway.io/self-host/kubernetes), pointing it at your Azure Database and Azure Cache endpoints:
```bash
helm install llmgateway oci://ghcr.io/theopenco/charts/llmgateway -f values.yaml
```
```yaml
config:
DATABASE_URL: "postgres://user:password@your-postgres-host:5432/llmgateway"
REDIS_URL: "redis://your-redis-host:6380"
AUTH_SECRET: "from-key-vault"
GATEWAY_API_KEY_HASH_SECRET: "from-key-vault"
```
See the [Kubernetes guide](https://docs.llmgateway.io/self-host/kubernetes) for the full set of configurable values and how to scale the gateway.
**Prefer not to wire this up by hand?** The [Enterprise
plan](https://llmgateway.io/enterprise) ships Terraform modules that stand up
the entire Azure stack — AKS, Azure Database for PostgreSQL, Azure Cache for
Redis, networking, and secrets — and deploy LLM Gateway in one command. [Talk
to us](https://llmgateway.io/enterprise#contact).
# Docker Compose
URL: https://docs.llmgateway.io/self-host/docker-compose
Docker Compose runs each service in its own container, giving you more control over scaling and configuration than the [single Docker image](https://docs.llmgateway.io/self-host/docker). It's a good fit for a single production host. For multi-node, high-availability deployments, use [Kubernetes](https://docs.llmgateway.io/self-host/kubernetes).
## Prerequisites [#prerequisites]
* Latest Docker with Compose
* API keys for the LLM providers you want to use (OpenAI, Anthropic, etc.)
## Option A: Unified image with Compose [#option-a-unified-image-with-compose]
Run the all-in-one image under Compose for easy lifecycle management:
```bash
# Download the compose file
curl -O https://raw.githubusercontent.com/theopenco/llmgateway/main/infra/docker-compose.unified.yml
curl -O https://raw.githubusercontent.com/theopenco/llmgateway/main/.env.unified.example
# Configure environment
cp .env.unified.example .env
# Edit .env with your configuration
# Start the service
docker compose -f docker-compose.unified.yml up -d
```
## Option B: Separate services [#option-b-separate-services]
Run each service in its own container for the most flexibility:
```bash
# Clone the repository
git clone https://github.com/theopenco/llmgateway.git
cd llmgateway
# Configure environment
cp .env.example .env
# Edit .env with your configuration
# Start the services
docker compose -f infra/docker-compose.split.yml up -d
```
Pin to a specific version by replacing the `latest` image tags with the [latest release](https://github.com/theopenco/llmgateway/releases). To build the images from source, use the `*.local.yml` compose files in the `infra` directory.
## Accessing your instance [#accessing-your-instance]
* **Web Interface**: [http://localhost:3002](http://localhost:3002)
* **Chat Playground**: [http://localhost:3003](http://localhost:3003)
* **Documentation**: [http://localhost:3005](http://localhost:3005)
* **API Endpoint**: [http://localhost:4002](http://localhost:4002)
* **Gateway Endpoint**: [http://localhost:4001](http://localhost:4001)
## Required configuration [#required-configuration]
At minimum, set these environment variables:
```bash
# Database (change the password!)
POSTGRES_PASSWORD=your_secure_password_here
# Authentication
AUTH_SECRET=your-secret-key-here
GATEWAY_API_KEY_HASH_SECRET=your-api-key-hash-secret-here
# LLM Provider API Keys (add the ones you need)
LLM_OPENAI_API_KEY=sk-...
LLM_ANTHROPIC_API_KEY=sk-ant-...
```
## Management commands [#management-commands]
```bash
# View logs
docker compose -f infra/docker-compose.split.yml logs -f
# Restart services
docker compose -f infra/docker-compose.split.yml restart
# Stop services
docker compose -f infra/docker-compose.split.yml down
```
## Multiple API keys and load balancing [#multiple-api-keys-and-load-balancing]
LLM Gateway supports multiple API keys per provider for load balancing and increased availability. Provide comma-separated values:
```bash
# Multiple OpenAI keys for load balancing
LLM_OPENAI_API_KEY=sk-key1,sk-key2,sk-key3
# Multiple Anthropic keys
LLM_ANTHROPIC_API_KEY=sk-ant-key1,sk-ant-key2
```
### Health-aware routing [#health-aware-routing]
The gateway tracks the health of each API key and routes requests to healthy keys. If a key returns consecutive errors, it's temporarily skipped. Keys that return authentication errors (401/403) are blacklisted until restart.
### Related configuration values [#related-configuration-values]
For providers that require additional configuration (like Google Vertex), specify multiple values that correspond to each API key. The gateway uses the matching index:
```bash
# Multiple Google Vertex configurations
LLM_GOOGLE_VERTEX_API_KEY=key1,key2,key3
LLM_GOOGLE_CLOUD_PROJECT=project-a,project-b,project-c
LLM_GOOGLE_VERTEX_REGION=us-central1,europe-west1,asia-east1
```
When the gateway selects `key2`, it automatically uses `project-b` and `europe-west1`. If you have fewer configuration values than keys, the last value is reused for the remaining keys.
## Enterprise and plan provider env overrides [#enterprise-and-plan-provider-env-overrides]
Any provider env var — API keys, base URLs, regions, Google Cloud projects, Azure resources, and other provider-specific settings — supports optional per-audience overrides:
* `__ENTERPRISE` suffix: used instead of the base var for organizations on the enterprise plan
* `__PLANS` suffix: used instead of the base var for plan-based (non-PAYG) organizations — DevPass coding plans and Chat plans
```bash
# Shared key for all organizations
LLM_OPENAI_API_KEY=sk-shared-key
# Used instead of the shared key, but only for enterprise-plan organizations
LLM_OPENAI_API_KEY__ENTERPRISE=sk-enterprise-key
# Used instead of the shared key, but only for plan-based (DevPass/Chat plan)
# organizations
LLM_OPENAI_API_KEY__PLANS=sk-plans-key
# Companion settings can be overridden the same way, e.g. a dedicated
# Google Cloud project and base URL per audience
LLM_GOOGLE_CLOUD_PROJECT__ENTERPRISE=enterprise-gcp-project
LLM_OPENAI_BASE_URL__PLANS=https://plans-proxy.internal
```
Notes:
* Overrides are optional — matching organizations fall back to the base var when an override is unset. All other organizations never read the override vars.
* The base API key is still what makes a provider available for routing, so set it even when you route all enterprise or plan traffic through dedicated keys.
* Comma-separated values, load balancing, and health-aware routing work exactly like the base key; each override key list gets its own independent health tracking.
* A set override replaces the base var wholesale, including its comma-separated list. Indexed companion values (like `LLM_GOOGLE_CLOUD_PROJECT`) resolve at the selected key index from the override list when one is set, otherwise from the base list — so keep an override key list index-compatible with its companion lists (or use single values).
* Region-specific overrides compose with the variant suffix. For matching organizations the API-key lookup order is `{BASE}__ENTERPRISE__{REGION}` → `{BASE}__{REGION}` → `{BASE}__ENTERPRISE` → `{BASE}` (same pattern with `__PLANS`).
* If an organization is both on the enterprise plan and a plan-based org, the enterprise overrides win.
# Docker
URL: https://docs.llmgateway.io/self-host/docker
The unified Docker image bundles every service — UI, API, Gateway, PostgreSQL, and Redis — into a single container. It's the fastest way to get a working instance and is ideal for trying LLM Gateway out or running a single low-traffic deployment.
For production, run each service separately with [Docker Compose](https://docs.llmgateway.io/self-host/docker-compose) or deploy to [Kubernetes](https://docs.llmgateway.io/self-host/kubernetes) with managed Postgres and Redis.
## Prerequisites [#prerequisites]
* Latest Docker
* API keys for the LLM providers you want to use (OpenAI, Anthropic, etc.)
## Run the container [#run-the-container]
```bash
# Set a strong secret first
export LLM_GATEWAY_SECRET="your-secret-key-here"
export GATEWAY_API_KEY_HASH_SECRET="your-api-key-hash-secret-here"
# Run the container
docker run -d \
--name llmgateway \
--restart unless-stopped \
-p 3002:3002 \
-p 3003:3003 \
-p 3005:3005 \
-p 3006:3006 \
-p 4001:4001 \
-p 4002:4002 \
-v llmgateway_postgres:/var/lib/postgresql/data \
-v llmgateway_redis:/var/lib/redis \
-e AUTH_SECRET="$LLM_GATEWAY_SECRET" \
-e GATEWAY_API_KEY_HASH_SECRET="$GATEWAY_API_KEY_HASH_SECRET" \
ghcr.io/theopenco/llmgateway-unified:latest
```
Docker creates the named volumes automatically on first run. Do not bind-mount a host directory directly to `/var/lib/postgresql/data`, because PostgreSQL initialization inside the container needs to manage permissions on that path.
Pin to a specific version instead of `latest` using the [latest release tag](https://github.com/theopenco/llmgateway/releases).
## Accessing your instance [#accessing-your-instance]
* **Web Interface**: [http://localhost:3002](http://localhost:3002)
* **Chat Playground**: [http://localhost:3003](http://localhost:3003)
* **Documentation**: [http://localhost:3005](http://localhost:3005)
* **API Endpoint**: [http://localhost:4002](http://localhost:4002)
* **Gateway Endpoint**: [http://localhost:4001](http://localhost:4001)
## Management commands [#management-commands]
```bash
# View logs
docker logs llmgateway
# Restart the container
docker restart llmgateway
# Stop the container
docker stop llmgateway
```
## Required configuration [#required-configuration]
At minimum, set these environment variables:
```bash
# Authentication
AUTH_SECRET=your-secret-key-here
GATEWAY_API_KEY_HASH_SECRET=your-api-key-hash-secret-here
# LLM Provider API Keys (add the ones you need)
LLM_OPENAI_API_KEY=sk-...
LLM_ANTHROPIC_API_KEY=sk-ant-...
```
LLM Gateway supports multiple API keys per provider for load balancing — provide comma-separated values. See [Docker Compose](https://docs.llmgateway.io/self-host/docker-compose#multiple-api-keys-and-load-balancing) for details. Provider env vars also support optional `__ENTERPRISE` / `__PLANS` suffix overrides used only for enterprise-plan or plan-based (DevPass/Chat plan) organizations — see [Enterprise and plan provider env overrides](https://docs.llmgateway.io/self-host/docker-compose#enterprise-and-plan-provider-env-overrides).
## Next steps [#next-steps]
Once your instance is running:
1. **Open the web interface** at [http://localhost:3002](http://localhost:3002)
2. **Create your first organization** and project
3. **Generate API keys** for your applications
4. **Test the gateway** by making API calls to [http://localhost:4001](http://localhost:4001)
# Google Cloud
URL: https://docs.llmgateway.io/self-host/gcp
**Deploy in one command.** Our [Enterprise
plan](https://llmgateway.io/enterprise) includes Terraform modules that
provision the cluster, database, cache, networking, and secrets and deploy LLM
Gateway on Google Cloud — no manual setup required. [Learn
more](https://llmgateway.io/enterprise).
This guide covers a production deployment of LLM Gateway on Google Cloud using GKE for the application services and managed Google Cloud services for the backing stores.
## Architecture [#architecture]
| Component | Google Cloud service |
| ---------- | ---------------------------------- |
| Compute | Google Kubernetes Engine (GKE) |
| PostgreSQL | Cloud SQL for PostgreSQL |
| Redis | Memorystore for Redis |
| Secrets | Secret Manager |
| Ingress | GKE Ingress / Cloud Load Balancing |
## What to configure [#what-to-configure]
### 1. PostgreSQL — Cloud SQL [#1-postgresql--cloud-sql]
Create a Cloud SQL for PostgreSQL instance with a private IP. Enable automated backups and high availability. Note the connection details for `DATABASE_URL`.
### 2. Redis — Memorystore [#2-redis--memorystore]
Create a Memorystore for Redis instance in the same VPC and use its endpoint for `REDIS_URL`. Enable a read replica for production.
### 3. Compute — GKE [#3-compute--gke]
Create a GKE cluster (Autopilot or Standard) sized for your traffic. GKE provisions an HTTP(S) load balancer automatically when you create an Ingress for the gateway.
### 4. Networking [#4-networking]
Use a private VPC and connect Cloud SQL via Private Service Access and Memorystore via its private endpoint. Restrict access so only the GKE workloads can reach the database and cache, and expose only the gateway to the internet.
### 5. Secrets — Secret Manager [#5-secrets--secret-manager]
Store `AUTH_SECRET`, `GATEWAY_API_KEY_HASH_SECRET`, and your provider API keys in Secret Manager. Sync them into the cluster with the [External Secrets Operator](https://external-secrets.io/) or the Secret Manager CSI driver.
## Deploy the Helm chart [#deploy-the-helm-chart]
With the backing services in place, deploy LLM Gateway with the [Helm chart](https://docs.llmgateway.io/self-host/kubernetes), pointing it at your Cloud SQL and Memorystore endpoints:
```bash
helm install llmgateway oci://ghcr.io/theopenco/charts/llmgateway -f values.yaml
```
```yaml
config:
DATABASE_URL: "postgres://user:password@your-cloud-sql-ip:5432/llmgateway"
REDIS_URL: "redis://your-memorystore-ip:6379"
AUTH_SECRET: "from-secret-manager"
GATEWAY_API_KEY_HASH_SECRET: "from-secret-manager"
```
See the [Kubernetes guide](https://docs.llmgateway.io/self-host/kubernetes) for the full set of configurable values and how to scale the gateway.
**Prefer not to wire this up by hand?** The [Enterprise
plan](https://llmgateway.io/enterprise) ships Terraform modules that stand up
the entire Google Cloud stack — GKE, Cloud SQL, Memorystore, networking, and
secrets — and deploy LLM Gateway in one command. [Talk to
us](https://llmgateway.io/enterprise#contact).
# Self Host LLM Gateway
URL: https://docs.llmgateway.io/self-host
LLM Gateway is a self-hostable platform that provides a unified API gateway for multiple LLM providers. Run it on your own infrastructure to keep full control over your data and avoid platform fees.
Pick the deployment path that matches where you're running it.
Self-hosting guides are documented under https://docs.llmgateway.io/self-host and included in full in this file.
## Which option should I choose? [#which-option-should-i-choose]
* **Trying it out or running a single low-traffic instance?** Start with [Docker](https://docs.llmgateway.io/self-host/docker) or [Docker Compose](https://docs.llmgateway.io/self-host/docker-compose) on one machine.
* **Running in production?** Deploy to [Kubernetes](https://docs.llmgateway.io/self-host/kubernetes) with our Helm chart, and use a managed Postgres and Redis from your cloud.
* **On a specific cloud?** Follow the [AWS](https://docs.llmgateway.io/self-host/aws), [Google Cloud](https://docs.llmgateway.io/self-host/gcp), or [Azure](https://docs.llmgateway.io/self-host/azure) guide for the exact managed services to provision.
## What you'll need [#what-youll-need]
Every deployment is built from the same pieces:
* **Stateless services** — the gateway, API, UI, and a background worker. Scale these freely; they hold no data between requests.
* **PostgreSQL** — the source of truth for users, projects, keys, and usage records.
* **Redis** — response caching and the queue that feeds the worker.
* **Provider API keys** — the OpenAI, Anthropic, Google, and other credentials the gateway uses, injected as secrets.
In production, run PostgreSQL and Redis as managed services from your cloud provider so backups, failover, and patching are handled for you.
# Kubernetes
URL: https://docs.llmgateway.io/self-host/kubernetes
Kubernetes is the deployment model we recommend for production. The gateway is stateless, so it scales horizontally with no coordination; pods self-heal; and the same manifests run on any cluster — EKS, GKE, AKS, or your own.
We publish an official **Helm chart** that deploys the gateway, API, UI, and worker with sane defaults and lets you wire in a managed Postgres and Redis through values.
## Prerequisites [#prerequisites]
* A Kubernetes cluster and `kubectl` configured to reach it
* [Helm 3](https://helm.sh/docs/intro/install/)
* A PostgreSQL database and Redis instance (use a managed service in production)
## Install the chart [#install-the-chart]
The chart is published as an OCI artifact on GitHub Container Registry:
```bash
helm install llmgateway oci://ghcr.io/theopenco/charts/llmgateway
```
This installs the latest published version. To pin to a specific release, append `--version `, matching a published release tag without the `v` prefix (e.g. `1.2.3`).
## Configure with values [#configure-with-values]
Provide a `values.yaml` to point the chart at your managed database and cache and to set your secrets:
```yaml
config:
AUTH_SECRET: "your-secret-key-here"
GATEWAY_API_KEY_HASH_SECRET: "your-api-key-hash-secret-here"
DATABASE_URL: "postgres://user:password@your-managed-host:5432/llmgateway"
REDIS_URL: "redis://your-managed-host:6379"
LLM_OPENAI_API_KEY: "sk-..."
LLM_ANTHROPIC_API_KEY: "sk-ant-..."
```
```bash
helm install llmgateway oci://ghcr.io/theopenco/charts/llmgateway -f values.yaml
```
Provider keys support comma-separated values for load balancing and optional `__ENTERPRISE` / `__PLANS` suffix overrides used only for enterprise-plan or plan-based (DevPass/Chat plan) organizations — see [Enterprise and plan provider env overrides](https://docs.llmgateway.io/self-host/docker-compose#enterprise-and-plan-provider-env-overrides).
In production, store secrets in your cluster's secret manager rather than committing them to `values.yaml`. The cloud guides cover the recommended approach for each provider:
* [AWS](https://docs.llmgateway.io/self-host/aws) — EKS with RDS, ElastiCache, and Secrets Manager
* [Google Cloud](https://docs.llmgateway.io/self-host/gcp) — GKE with Cloud SQL, Memorystore, and Secret Manager
* [Azure](https://docs.llmgateway.io/self-host/azure) — AKS with Azure Database for PostgreSQL, Azure Cache for Redis, and Key Vault
## Scaling the gateway [#scaling-the-gateway]
Because the gateway is stateless, scale it horizontally to match traffic — either by setting the replica count in values or with a `HorizontalPodAutoscaler` that targets CPU or request load. The API, UI, and worker serve your team rather than your traffic and rarely need more than one or two replicas.
See the [Helm chart README](https://github.com/theopenco/llmgateway/tree/main/infra/helm) for the full list of configurable values and the [list of available versions](https://github.com/theopenco/llmgateway/pkgs/container/charts%2Fllmgateway).
# Gateway Caching
URL: https://docs.llmgateway.io/features/caching/gateway-caching
# Gateway Caching [#gateway-caching]
Gateway caching serves a previously-seen, byte-identical request entirely from LLM Gateway without forwarding it to the upstream provider. Repeated identical calls cost **$0** — there is no inference and no provider charge. It is most useful for API workloads with deterministic inputs (classification, batch jobs, FAQ lookups, retries) rather than free-form chat.
If you want to reduce the cost of long, partially-shared prompts in chat apps
or coding tools, you want [Provider Cache
Control](https://docs.llmgateway.io/features/caching/provider-cache-control) instead. That discounts the
cached portion of your prompt on every call — it does not require
byte-identical requests. See the [Caching Overview](https://docs.llmgateway.io/features/caching) for a
side-by-side comparison.
## How It Works [#how-it-works]
When you make an API request:
1. LLM Gateway generates a cache key based on the request parameters
2. If a matching cached response exists, it's returned immediately
3. If no cache exists, the request is forwarded to the provider
4. The response is cached for future identical requests
This means repeated identical requests are served instantly from cache without incurring additional provider costs.
## Cost Savings [#cost-savings]
Caching can dramatically reduce costs for applications with repetitive requests:
| Scenario | Without Caching | With Caching | Savings |
| --------------------------- | --------------- | ------------ | ------- |
| 1,000 identical requests | $10.00 | $0.01 | 99.9% |
| 50% duplicate rate | $10.00 | $5.00 | 50% |
| Retry after transient error | $0.02 | $0.01 | 50% |
Cached responses are free from provider costs. You only pay for the initial
request that populates the cache.
## Requirements [#requirements]
Caching is **free** and **independent** of [Data
Retention](https://docs.llmgateway.io/features/data-retention). Cached responses live in a short-lived
cache (TTL-bound, typically seconds to minutes) and are not stored as
long-term request data — you do not need to enable data retention to use
caching.
To use caching:
1. Enable **Caching** in your project settings under Preferences
2. Configure the cache duration (TTL) as needed
3. Make requests as normal—caching is automatic
## Cache Key Generation [#cache-key-generation]
The cache key is generated from these request parameters:
* Model identifier
* Messages array (roles and content)
* Temperature
* Max tokens
* Top P
* Tools/functions
* Tool choice
* Response format
* System prompt
* Other model-specific parameters
Requests with different parameter values, even slight variations, will not
share cache entries.
## Cache Behavior [#cache-behavior]
### Cache Hits [#cache-hits]
When a cache hit occurs:
* Response is returned immediately (sub-millisecond latency)
* No provider API call is made
* No inference costs are incurred
### Cache Misses [#cache-misses]
When a cache miss occurs:
* Request is forwarded to the LLM provider
* Response is stored in cache
* Normal inference costs apply
* Future identical requests will hit the cache
## Streaming and Caching [#streaming-and-caching]
Caching works with both streaming and non-streaming requests:
* **Non-streaming**: Full response is cached and returned
* **Streaming**: The complete response is reconstructed from cache and streamed back
## Cache TTL (Time-to-Live) [#cache-ttl-time-to-live]
Cache duration is configurable per project in your project settings. You can set the cache TTL from 10 seconds up to 1 year (31,536,000 seconds).
The default cache duration is 60 seconds. Adjust this based on your use case—longer durations work well for static content, while shorter durations are better for frequently changing data.
## Identifying Cached Responses [#identifying-cached-responses]
A cache hit replays the stored response body, so it is byte-identical to the original — same `id`, same content. Two markers tell you it was a replay:
* the `x-llmgateway-cache: HIT` response header (set on every lane, including `/v1/messages`, which has no metadata envelope)
* `metadata.cached: true` on the response body (and on the final metadata chunk of a streamed replay)
All cost fields are zeroed on a replay, because no upstream call was made:
```json
{
"usage": {
"prompt_tokens": 12,
"completion_tokens": 48,
"total_tokens": 60,
"cost": 0,
"cost_details": {
"total_cost": 0,
"input_cost": 0,
"output_cost": 0
}
},
"metadata": {
"cached": true
}
}
```
Token counts are **not** zeroed — they still describe the completion you are receiving, and are what the dashboard records for analytics. Note that any prompt-caching fields (`prompt_tokens_details.cached_tokens`, `cache_write_tokens`) describe the *original* upstream call, not the replay.
## Bypassing the Cache for a Single Request [#bypassing-the-cache-for-a-single-request]
Send `x-no-cache: true` to skip the cache for one request — the call goes upstream and its response is not stored. Useful when a client retries an identical request and expects a fresh sample (for example an agent loop) without disabling caching for the whole project.
```bash
curl https://api.llmgateway.io/v1/chat/completions \
-H "Authorization: Bearer $LLM_GATEWAY_API_KEY" \
-H "Content-Type: application/json" \
-H "x-no-cache: true" \
-d '{"model":"gpt-4o-mini","messages":[{"role":"user","content":"Hello"}]}'
```
## Use Cases [#use-cases]
### Development and Testing [#development-and-testing]
During development, you often send the same prompts repeatedly:
```typescript
// This prompt will only incur costs once
const response = await client.chat.completions.create({
model: "gpt-4o",
messages: [{ role: "user", content: "Explain quantum computing" }],
});
```
### Chatbots with Common Questions [#chatbots-with-common-questions]
FAQ-style interactions often have repeated questions:
```typescript
// Common questions are served from cache
const faqs = [
"What are your business hours?",
"How do I reset my password?",
"What is your return policy?",
];
```
### Batch Processing [#batch-processing]
Processing large datasets with potentially duplicate items:
```typescript
// Duplicate items in batch are served from cache
for (const item of items) {
const response = await client.chat.completions.create({
model: "gpt-4o",
messages: [{ role: "user", content: `Classify: ${item}` }],
});
}
```
## Best Practices [#best-practices]
### Maximize Cache Hits [#maximize-cache-hits]
* Use consistent prompt formatting
* Normalize input data before sending
* Use deterministic parameters (temperature: 0)
* Avoid including timestamps or random values in prompts
### Appropriate Use Cases [#appropriate-use-cases]
Caching is most effective for:
* Static knowledge queries
* Classification tasks
* FAQ responses
* Development/testing
* Retry scenarios
### When to Avoid Caching [#when-to-avoid-caching]
Caching may not be suitable for:
* Real-time data requirements
* Highly personalized responses
* Time-sensitive information
* Creative tasks requiring variety
* Chat or coding tools where prompts overlap but are not byte-identical — use [Provider Cache Control](https://docs.llmgateway.io/features/caching/provider-cache-control) instead
## Pricing [#pricing]
Caching is **completely free**. Cached responses are held in a short-lived
in-memory cache (bounded by your configured TTL) and do not incur storage
charges. Storage costs only apply if you separately enable [Data
Retention](https://docs.llmgateway.io/features/data-retention) for full request/response payloads.
Caching reduces both inference cost and latency at no additional charge.
# Caching
URL: https://docs.llmgateway.io/features/caching
# Caching [#caching]
LLM Gateway supports **two distinct kinds of caching**, and they solve different problems. Pick the one that matches your workload — they can also be used together.
## Provider / Model Caching [#provider--model-caching]
The provider performs the caching. When your request reuses a long prefix from a previous call (a system prompt, conversation history, tool definitions, a long document), the model serves that prefix from its prompt cache and bills it at a reduced rate. New input tokens and **all output tokens are still billed at the normal rate** — only the cached portion is discounted.
This is the type of caching that powers efficient chat-based and assistant-based interactions, including chat apps and coding tools (Cursor, Cline, Claude Code, etc.) where the same context is reused turn after turn.
You see it in your usage as `prompt_tokens_details.cached_tokens`. For most providers it works automatically; some (notably Anthropic) also let you mark blocks explicitly with `cache_control` and choose a longer TTL.
→ **[Read the Provider Cache Control docs](https://docs.llmgateway.io/features/caching/provider-cache-control)**
## Gateway Caching [#gateway-caching]
LLM Gateway performs the caching. When a request is **byte-identical** to a previous one (same model, same messages, same parameters), the response is served from the gateway's cache without any provider call. Repeated identical calls cost **$0**.
This is most useful for deterministic API workloads — classification, batch jobs, FAQ lookups, retries — rather than free-form chat, because chat prompts almost always differ on the latest turn.
→ **[Read the Gateway Caching docs](https://docs.llmgateway.io/features/caching/gateway-caching)**
## Which one do I want? [#which-one-do-i-want]
| If you… | Use |
| --------------------------------------------------------------- | --------------------------------------------------------------------------------------------- |
| Build a chat app, assistant, or coding tool | [Provider Cache Control](https://docs.llmgateway.io/features/caching/provider-cache-control) |
| Send long system prompts or growing conversation history | [Provider Cache Control](https://docs.llmgateway.io/features/caching/provider-cache-control) |
| Want longer cache lifetimes than the provider default | [Provider Cache Control](https://docs.llmgateway.io/features/caching/provider-cache-control) (explicit `cache_control`) |
| Send the exact same request many times (batches, retries, FAQs) | [Gateway Caching](https://docs.llmgateway.io/features/caching/gateway-caching) |
| Want $0 on repeated calls instead of a discount | [Gateway Caching](https://docs.llmgateway.io/features/caching/gateway-caching) |
The two are not mutually exclusive. A coding tool can rely on provider caching
for its long system prompt **and** enable gateway caching so that
deterministic tool calls (e.g., file lookups) cost nothing on retry.
# Provider Cache Control
URL: https://docs.llmgateway.io/features/caching/provider-cache-control
# Provider Cache Control [#provider-cache-control]
Most modern LLM providers offer **prompt caching**: when a request reuses a long prefix from a previous request (for example, a multi-thousand-token system prompt or a growing conversation history), the provider stores that prefix and serves it back at a steep discount on subsequent calls. Only the cached portion is discounted — new input tokens and all output tokens are still billed at the normal rate.
This is the behavior you see surfaced as `cached_tokens` in your usage payloads, and it is what makes chat apps, assistants, and coding tools (Cursor, Cline, Claude Code, etc.) economically viable on long contexts.
Looking for $0 on repeated calls instead of a discount on the cached portion?
That is [Gateway Caching](https://docs.llmgateway.io/features/caching/gateway-caching), which serves
byte-identical requests entirely from LLM Gateway without hitting the
provider. It is a better fit for deterministic API workloads than for chat.
See the [Caching Overview](https://docs.llmgateway.io/features/caching) for a side-by-side comparison.
## Automatic caching [#automatic-caching]
For most users, prompt caching just works — you do not need to change your request payloads.
Providers including OpenAI, Anthropic (when prompts cross the provider's minimum size), Google, DeepSeek, xAI, and Alibaba inspect incoming requests for shared prefixes and cache them automatically. LLM Gateway forwards the provider's cache metadata back to you in the response, and bills the cached portion at the model's `cached_input` rate.
For **Anthropic** and **AWS Bedrock Claude**, prompt caching is strictly opt-in via `cache_control` / `cachePoint` markers on the request body. To get automatic cache benefits without rewriting your requests, LLM Gateway injects those markers for you on long system and user messages by default. If you send long prompts sporadically — with gaps wider than the 5-minute TTL — you may want to disable this entirely, since you would otherwise pay the cache-write premium (1.25× input for 5m, 2× for 1h) without ever benefiting from a cache read.
To disable, open **Project Settings → Caching → Provider Cache Writes** and turn off "Allow provider cache writes". When disabled, the gateway strips **all** `cache_control` markers from outgoing requests for the project — both the ones it adds automatically and any markers your client sends. This covers callers that always emit markers regardless of the user's request cadence (e.g. Claude Code, Cursor, Cline). The change takes up to 5 minutes to take effect due to the project-settings cache.
To take advantage of automatic caching:
* Put stable content (system prompt, instructions, tool definitions, long documents) at the **start** of your messages
* Keep the variable portion (the latest user turn) at the **end**
* Reuse the same prefix across requests — even minor changes invalidate the cache
You can confirm the cache is working by inspecting `usage.prompt_tokens_details.cached_tokens` on the response. See [Cost Breakdown](https://docs.llmgateway.io/features/cost-breakdown) for the full list of usage fields.
```json
{
"usage": {
"prompt_tokens": 8200,
"completion_tokens": 150,
"prompt_tokens_details": {
"cached_tokens": 8000
},
"cost_details": {
"input_cost": 0.0006,
"cached_input_cost": 0.0008
}
}
}
```
In this example, 8,000 of the 8,200 prompt tokens were served from the provider's cache and billed at the cached rate.
### Pricing and routing [#pricing-and-routing]
Cached input tokens are billed at the model's published `cached_input` price (typically 10–25% of the regular input price, depending on the provider and model). Output tokens and any non-cached input tokens are billed at the normal rate.
When the [Smart Routing](https://docs.llmgateway.io/features/routing) algorithm selects a provider for a large prompt (≥ 5,000 estimated tokens), it gives extra weight to providers that advertise cache support, since caching can substantially reduce the cost of repeated large prompts.
## Explicit caching with `cache_control` [#explicit-caching-with-cache_control]
Some providers — most notably **Anthropic** — also support *explicit* cache control, where you mark specific content blocks as cacheable using a `cache_control` field. This gives you precise control over what gets cached and lets you opt into longer cache lifetimes than the default.
Explicit caching is provider-specific. Supported providers and TTLs at the time of writing:
| Provider | Models | Supported TTLs |
| -------------------- | ------------------------------ | -------------------- |
| Anthropic (Claude) | All Claude models | `5m` (default), `1h` |
| AWS Bedrock (Claude) | All Claude models | `5m` (default), `1h` |
| Alibaba (Qwen) | Qwen models with cache support | Provider-defined |
To mark content as cacheable, send the message content as an array of blocks and add a `cache_control` field to the block you want to cache:
```json
{
"model": "claude-haiku-4-5",
"messages": [
{
"role": "system",
"content": [
{
"type": "text",
"text": "You are a helpful assistant. ",
"cache_control": { "type": "ephemeral", "ttl": "1h" }
}
]
},
{
"role": "user",
"content": "What is the capital of France?"
}
]
}
```
Use `ttl: "5m"` (the default if omitted) for short-lived caches that match a single user's session, and `ttl: "1h"` when the same prefix will be reused over a longer window (for example, a coding agent that keeps the same project context warm across many requests).
The same `cache_control` markers work on the native [`/v1/messages` endpoint](https://docs.llmgateway.io/features/anthropic-endpoint) (Anthropic request format), where cache usage comes back in Anthropic's own fields: `usage.cache_creation_input_tokens` (written this request) and `usage.cache_read_input_tokens` (served from cache).
### Minimum cacheable prompt length [#minimum-cacheable-prompt-length]
Every Claude model has a **minimum prompt length below which nothing is cached**. A `cache_control` marker on a shorter prompt is accepted without error, but the provider silently skips the cache write — the response reports `cache_creation_input_tokens: 0` and `cache_read_input_tokens: 0` on every call, no matter how often you repeat the request. This is Anthropic's documented behavior, not a dropped breakpoint; you would see exactly the same result calling Anthropic directly.
The threshold counts **all tokens up to and including the marked block** (tools, system, and preceding messages), and it varies by model generation:
| Models | Minimum cacheable tokens |
| ----------------------------------------------------- | ------------------------ |
| Opus 4.5+, Sonnet 5, Haiku 4.5 | 4,096 |
| Sonnet 4.6, Haiku 3.5 | 2,048 |
| Sonnet 4.5 and earlier, Opus 4.1 and earlier, Haiku 3 | 1,024 |
The models endpoint (`GET https://api.llmgateway.io/v1/models`) exposes the exact threshold as `min_cacheable_tokens` on each provider entry, so clients can check it programmatically. LLM Gateway's automatic marker injection uses the same threshold, which is why short system prompts never trigger automatic cache writes either.
### Verifying cache writes and the write premium [#verifying-cache-writes-and-the-write-premium]
The first request that creates a cache entry is billed at the provider's cache-write rate (1.25× input for `5m`, 2× for `1h`). On the OpenAI-compatible `/v1/chat/completions` endpoint, LLM Gateway surfaces the write side in extended usage fields — OpenAI's standard format only has `cached_tokens` for reads, so these are gateway extensions:
```json
{
"usage": {
"prompt_tokens": 5232,
"prompt_tokens_details": {
"cached_tokens": 0,
"cache_write_tokens": 5222,
"cache_creation_tokens": 5222,
"cache_creation": {
"ephemeral_5m_input_tokens": 5222,
"ephemeral_1h_input_tokens": 0
}
},
"cost_details": {
"input_cost": 0.00003,
"cache_write_input_cost": 0.0065275,
"cached_input_cost": 0
}
}
}
```
`cache_write_tokens` (and its alias `cache_creation_tokens`) counts the prompt tokens written into the provider cache this request, `cache_creation` breaks the write down by TTL when both rates are in play, and `cost_details.cache_write_input_cost` is the exact USD amount billed at the write premium. A successful cache write on call 1 shows up as `cache_write_tokens > 0`; the matching read on call 2 shows up as `cached_tokens > 0` with `cached_input_cost` at the discounted rate.
### Mixing explicit markers with automatic injection [#mixing-explicit-markers-with-automatic-injection]
Anthropic requires cache breakpoints with longer TTLs to appear before shorter ones (blocks are processed in the order `tools`, `system`, `messages`). The markers LLM Gateway injects automatically use the default 5-minute TTL, so they could never legally precede an explicit `ttl: "1h"` marker in your messages. To keep both features compatible:
* When your request contains an explicit `ttl: "1h"` marker in the **messages**, LLM Gateway skips its automatic marker injection for that request entirely and forwards only your markers — the same behavior you would get calling the provider directly.
* A `ttl: "1h"` marker only on the **system** prompt does not disable automatic injection, since 5-minute breakpoints after it still satisfy the ordering rule.
* Explicit markers that use the default 5-minute TTL coexist with automatic injection (capped at 4 breakpoints total per Anthropic's limit).
Cache writes are billed at a premium (typically 1.25x for 5m and 2x for 1h on
Anthropic) the first time a cached block is created. After that, cache reads
cost roughly 10% of the regular input price. The break-even point is usually
one or two reuses — explicit caching is worth it whenever a marked block will
be sent more than once within its TTL.
Anthropic returns a per-TTL breakdown of cache writes when you mix `5m` and `1h` blocks:
```json
{
"usage": {
"cache_creation": {
"ephemeral_5m_input_tokens": 0,
"ephemeral_1h_input_tokens": 8000
},
"cache_read_input_tokens": 0
}
}
```
For providers that publish a separate explicit-cache read rate (for example, Alibaba Qwen charges 10% for explicit cache reads vs. 20% for automatic cache reads), LLM Gateway detects the `cache_control` markers on your request and applies the explicit rate automatically.
## Related [#related]
* [Gateway Caching](https://docs.llmgateway.io/features/caching/gateway-caching) — serve byte-identical requests entirely from LLM Gateway at $0 cost
* [Caching Overview](https://docs.llmgateway.io/features/caching) — side-by-side comparison of provider caching vs. gateway caching
* [Cost Breakdown](https://docs.llmgateway.io/features/cost-breakdown) — full reference for the usage and cost fields on every response
* [Smart Routing](https://docs.llmgateway.io/features/routing) — how cache support influences provider selection for large prompts
# Microsoft Entra ID
URL: https://docs.llmgateway.io/features/sso/entra
# Microsoft Entra ID [#microsoft-entra-id]
This guide walks an organization admin through connecting **Microsoft Entra ID** (formerly Azure Active Directory) to LLM Gateway for SAML single sign-on and SCIM provisioning.
SSO & SCIM require the **Enterprise** plan and an organization **owner** or
**admin**. See the [SSO overview](https://docs.llmgateway.io/features/sso) for prerequisites and how the
URLs are derived.
## Finding "Enterprise applications" in Entra [#finding-enterprise-applications-in-entra]
An **Enterprise application** is a registered instance of an app that your tenant trusts for sign-in. You'll create one to represent LLM Gateway; its **Single sign-on (SAML)** page is where you exchange URLs and download the certificate.
This is **not** the same as **App registrations** (that section is for apps
you are developing). Use **Enterprise applications**. They are siblings under
**Applications** and easy to confuse.
### Open the Entra admin center [#open-the-entra-admin-center]
Go to [entra.microsoft.com](https://entra.microsoft.com) and sign in with an account that has at least the **Cloud Application Administrator** or **Application Administrator** role (Global Administrator also works). A regular member account won't see these options.
### Navigate to Enterprise applications [#navigate-to-enterprise-applications]
In the left-hand navigation, click **Entra ID** (older tenants label this group **Identity**), then expand **Applications** and click **Enterprise applications** (older label: **Enterprise apps**).
You're now on the **All applications** list.
Prefer the classic Azure portal? Go to
[portal.azure.com](https://portal.azure.com) → search **Microsoft Entra ID** →
open it → left menu **Enterprise applications**. Both portals reach the same
app.
### Create the application [#create-the-application]
Click **+ New application** → **+ Create your own application**. Name it (e.g. `LLM Gateway`), choose **"Integrate any other application you don't find in the gallery (Non-gallery)"**, then **Create**. Wait a few seconds for it to provision.
Don't search the Entra **gallery** for "LLM Gateway" — there is no gallery
listing, so always use **Create your own application → Non-gallery**. You
configure SAML and SCIM manually with the URLs from your **SSO** page; the
steps below cover everything.
### Open the SAML SSO page [#open-the-saml-sso-page]
On the app's **Overview**, use the app's own left menu → **Single sign-on**. On the **Select a single sign-on method** screen, choose **SAML**.
This opens the 5-section **Set up Single Sign-On with SAML** page referenced throughout the rest of this guide.
## Configure SAML SSO [#configure-saml-sso]
Because Entra needs LLM Gateway's URLs and LLM Gateway needs Entra's Login URL and certificate, the two systems exchange values. Follow this order.
### Choose a connection slug [#choose-a-connection-slug]
In LLM Gateway (**Organization → SSO → Add a connection**), set **Identity provider** to **Microsoft Entra ID**, then pick a **connection slug** (lowercase letters, numbers, hyphens; `^[a-z0-9-]+$`, up to 64 chars). We recommend the format `-`, e.g. `acme-entra` — the form pre-fills this from your organization name and the selected provider, so you can accept it or edit it. It must be unique across all LLM Gateway organizations, and each organization has exactly one SSO connection. Keep it stable: your SP URLs are built from it.
As soon as the slug is set, the form shows your two SP URLs (with the hosted default `https://internal.llmgateway.io`) — copy them from there:
* **Identifier (Entity ID):** `https://internal.llmgateway.io/auth/sso/saml2/sp/metadata?providerId=acme-entra`
* **Reply URL (ACS):** `https://internal.llmgateway.io/auth/sso/saml2/sp/acs/acme-entra`
You'll paste these into Entra next — no need to create the connection yet.
### Set Basic SAML Configuration in Entra [#set-basic-saml-configuration-in-entra]
On the Entra **Single sign-on (SAML)** page, **Section 1 – Basic SAML Configuration** → **Edit**:
* Under **Identifier (Entity ID)**, click **Add identifier** and paste your metadata URL from the previous step.
* Under **Reply URL (Assertion Consumer Service URL)**, click **Add reply URL** and paste your ACS URL.
* Leave **Sign on URL**, **Relay State**, and **Logout Url** blank.
Click **Save** (the button enables once both required fields are filled), then close the panel.
The Reply URL row has a small numeric **Index** column next to the URL field.
Paste the ACS URL into the **Enter a reply URL** box only — if it lands in the
Index box you'll see *"The value must be a valid number."* Leave Index blank.
### Confirm the claims [#confirm-the-claims]
**Section 2 – Attributes & Claims**: the Entra defaults are fine. In **Microsoft Entra ID** mode, LLM Gateway reads email/name from the standard claim URIs Entra sends by default (`.../emailaddress`, `.../givenname`, `.../surname`, `.../name`), so you don't need to force the Name ID to be the email — just make sure users have a real `mail`/UPN.
### Grab the certificate and Login URL [#grab-the-certificate-and-login-url]
* **Section 3 – SAML Certificates** → next to **Certificate (Base64)**, click **Download**. The `.cer` file's contents are a PEM block (`-----BEGIN CERTIFICATE----- … -----END CERTIFICATE-----`). Use **Certificate (Base64)**, not Raw or the Federation Metadata XML.
* **Section 4 – Set up \** → copy the **Login URL** (looks like `https://login.microsoftonline.com//saml2`).
Keep both values handy for the next step.
The certificate **Download** links stay greyed out until Section 1's required
fields are filled and saved — so complete the previous step first. The
auto-generated signing certificate is valid for three years; its thumbprint
and expiry are shown in Section 3.
### Create the connection in LLM Gateway [#create-the-connection-in-llm-gateway]
Back on the **SSO → Add a connection** form:
* **Identity provider:** **Microsoft Entra ID** — important, this switches on the Entra claim mapping and relaxes the NameID format
* **Connection slug:** `acme-entra` (must match the slug whose URLs you pasted into Entra)
* **Email domains:** your corporate domain(s), e.g. `acme.com` (comma-separate for several)
* **Identity Provider Single Sign-On URL:** the Entra **Login URL**
* **X.509 signing certificate:** paste the PEM block
Save. The connection card then shows the exact SP metadata + ACS URLs — confirm they match what you entered in Entra **Section 1**. You can edit the email domain list on the connection card later without re-creating the connection.
The domain list must include **every domain Entra may send as a user's
email**. LLM Gateway signs a user in from the `emailaddress` claim, which
Entra fills from the **`mail`** attribute — and that domain can differ from
the sign-in (userPrincipalName) domain, e.g. UPN `jane@acme.local` with mail
`jane@acme.com`. If they differ, list **both** (`acme.local, acme.com`);
otherwise sign-in bounces back to the login page with an `account_not_linked`
error even though Entra authenticated the user.
## Assign users to the app [#assign-users-to-the-app]
Configuring SAML isn't enough on its own — Entra only issues a SAML assertion for users who are **assigned** to the application. On the Enterprise App → **Users and groups → + Add user/group**, add the people (or groups) who should be able to sign in, then **Assign**.
If you skip this, sign-in fails at Entra with *"…is not assigned to a role for
the application"* (error `AADSTS50105`) — even though the SAML config is
correct. Assign at least your own account before testing.
If you also set up SCIM below, assigning users there covers this same requirement; but for SSO **without** SCIM this assignment step is mandatory.
## Configure SCIM provisioning [#configure-scim-provisioning]
SSO only signs people in. SCIM is what actually adds members to the organization. Set it up on the **same** Enterprise App.
### Generate a SCIM token [#generate-a-scim-token]
In LLM Gateway, on **Organization → SSO → Directory sync (SCIM)**, click **Generate SCIM token** and copy it (shown once). The SCIM base URL is shown in the same card — it's `https://internal.llmgateway.io/scim/v2` on the hosted default.
### Add admin credentials in Entra [#add-admin-credentials-in-entra]
In Entra, on your Enterprise App → **Provisioning → Automatic → Admin Credentials**:
* **Authentication method:** choose the token option — labelled **"Long-lived bearer token"** (or **"Secret token"**). **Do not** pick "OAuth 2.0 code grant flow": LLM Gateway's SCIM endpoint authenticates a plain static bearer token (`Authorization: Bearer `), not an OAuth code exchange. The presence of a **Tenant URL + Secret token** pair on the form confirms you're on the right method.
* **Tenant URL:** the SCIM base URL, e.g. `https://internal.llmgateway.io/scim/v2`
* **Secret Token:** the token from the previous step
* Click **Test Connection** (Entra calls `/ServiceProviderConfig` with the bearer token), then **Save**.
A green check confirms the credentials are valid.
Entra rolled out a redesigned provisioning UX that adds the **"Select
authentication method"** dropdown shown above. The classic UX has no dropdown
and just shows Tenant URL + Secret token (which is the bearer method). Either
is fine — pick the bearer/secret-token option and the steps are identical.
### Assign users and start provisioning [#assign-users-and-start-provisioning]
* **Mappings:** the Entra SCIM defaults are fine (`userPrincipalName → userName`, `mail → emails[work]`, `givenName/surname → name.*`, `accountEnabled → active`, group provisioning on).
* **Settings → Scope:** "Sync only assigned users and groups".
* Under **Users and groups**, assign the people/groups who should get access.
* Set **Provisioning Status = On** and Save. Use **Provision on demand** to test a single user instantly.
Entra then begins syncing assigned users on its provisioning cycle.
Assigned users are created in LLM Gateway and added to the organization (default role **developer**). Deactivating or unassigning a user in Entra removes their membership.
## Group → role mapping (optional) [#group--role-mapping-optional]
On the **SSO** page, add mappings such as `Acme Admins → admin`. When Entra pushes group membership over SCIM, each member gets the **highest** mapped role among their groups (default `developer`). Owners are never auto-demoted, so you can't accidentally lock yourself out of the owner role.
## Default project access (optional) [#default-project-access-optional]
Provisioned members join as **developers**, who only see the projects they're granted (owners/admins always see every project). Use the **Default project access** card on the **SSO** page to choose which projects newly provisioned SSO/SCIM developers get by default. If you leave it unconfigured, new members get your organization's first (default) project so they can see something out of the box; select an empty set to instead grant nothing and manage project access manually per member.
Default project access applies only to members provisioned **after** you set
it — it doesn't retroactively change existing members' project grants. Adjust
an existing member's projects from the **Team** page.
## Test the login [#test-the-login]
Log out → login page → **Sign in with SSO** → enter a work email (`someone@acme.com`). LLM Gateway resolves the connection by email domain, redirects to Entra, and on return the (SCIM-provisioned) user is signed in and lands in the enterprise organization.
## Enforce SSO (optional, do this last) [#enforce-sso-optional-do-this-last]
Flip **Require SSO** on the connection to require SSO for that email domain — password, social, and passkey sign-in are then rejected for it.
Only enable **Require SSO** after the test above passes, and remember it also
applies to the admin setting it up if their email is on that domain — verify
your own SSO login works first.
## Troubleshooting: login bounces back to the login page [#troubleshooting-login-bounces-back-to-the-login-page]
If the Entra sign-in itself succeeds but the user lands back on the LLM Gateway login page (with a 401 in the browser console), the SAML response was received but LLM Gateway refused to attach it to the provisioned user — almost always an `account_not_linked` domain mismatch:
* **The asserted email's domain isn't in the connection's Email domains list.** Entra sends the user's `mail` attribute as the email; if its domain differs from the one you registered (e.g. you registered the UPN domain), edit the connection's **Email domains** on the SSO page to include both.
* **Wrong Identity provider type.** If the connection was created as **Other (SAML 2.0)** instead of **Microsoft Entra ID**, the Entra claim mapping isn't applied and the email falls back to the NameID (usually the UPN), which may again be off-list — and creates duplicate users instead of matching the SCIM-provisioned ones.
## Troubleshooting: can't find "Enterprise applications" [#troubleshooting-cant-find-enterprise-applications]
* **Insufficient role** — you need Application Administrator, Cloud Application Administrator, or Global Administrator. Ask whoever administers your Microsoft 365 / Entra tenant.
* **Wrong menu** — you're in **App registrations** (for developers) instead of **Enterprise applications**.
* **Wrong tenant** — if you belong to multiple tenants, use **Settings (gear) → Directories + subscriptions** (top-right) to switch to the tenant you administer.
# Google Workspace
URL: https://docs.llmgateway.io/features/sso/google
# Google Workspace [#google-workspace]
Google Workspace works differently from the SAML providers: employees already sign in to LLM Gateway with the standard **Sign in with Google** button using their Workspace-managed Google account. Instead of registering a SAML application, you configure an **auto-join email domain** — anyone who signs in with a Google account on that domain is added to your organization automatically.
Google Workspace auto-join requires the **Enterprise** plan and is configured
by an organization **owner** or **admin**. See the [SSO
overview](https://docs.llmgateway.io/features/sso) for the other connection types.
## How it works [#how-it-works]
1. An admin sets the organization's auto-join domain (e.g. `acme.com`) on the **SSO** page.
2. A user signs in (or signs up) with **Sign in with Google** using their `@acme.com` Workspace account.
3. LLM Gateway matches the verified email domain and adds them to the organization with the **developer** role.
4. The user receives an email letting them know they've been added.
This applies to **new signups and existing users** alike — an existing LLM Gateway user on your domain joins the organization on their next Google sign-in. Members are never added twice, and members you've already invited are unaffected.
Auto-join is **just-in-time provisioning**: users join when they sign in.
Google Workspace does not support SCIM provisioning to custom apps, so there
is no directory sync — removing someone from your Workspace does not remove
them from the organization. Offboard members on the **Team** page.
## Setting it up [#setting-it-up]
### Open the SSO page [#open-the-sso-page]
In the dashboard, go to your organization's **SSO** page and find the **Connections** card.
### Add a Google Workspace connection [#add-a-google-workspace-connection]
Under **Add a connection**, choose **Google Workspace** as the identity provider. There are no SAML URLs or certificates to exchange — only your email domain.
### Enter your email domain [#enter-your-email-domain]
Enter the corporate domain your Workspace accounts use, e.g. `acme.com`, and click **Enable auto-join**.
* Only **one domain** per organization.
* A domain can be claimed by **only one organization** — if another organization already uses it, you'll get a conflict error.
* **Consumer email domains** (`gmail.com`, `outlook.com`, `yahoo.com`, …) are rejected.
### Verify with a test account [#verify-with-a-test-account]
Sign in with a Google account on your domain that isn't yet a member. After signing in, it should appear on the **Team** page with the **developer** role, and receive a notification email.
## Managing the connection [#managing-the-connection]
The Google Workspace connection appears as a card in the **Connections** list:
* **Edit** the domain with the pencil icon — existing members are unaffected; the new domain applies to future sign-ins.
* **Remove** the connection to stop auto-joining. Existing members stay in the organization.
Auto-joined members get the **developer** role and receive the organization's **Default project access** selection, exactly like SSO/SCIM-provisioned members. Promote them or adjust project access on the **Team** page if they need more.
## What's not available with Google Workspace [#whats-not-available-with-google-workspace]
With a Google-only setup, the **Directory sync (SCIM)** and **Group role mapping** cards on the SSO page are disabled:
* **SCIM** — Google Workspace doesn't support SCIM provisioning for custom apps, so there's no directory sync to configure.
* **Group role mapping** — role mappings apply to groups pushed via SCIM, so they can't take effect either. Auto-joined members always start as **developer**.
**Default project access** works as usual and applies to auto-joined members.
## Interaction with SAML and Require SSO [#interaction-with-saml-and-require-sso]
An organization has **one connection** for now — either a SAML connection or Google Workspace auto-join. To switch providers, remove the existing connection first.
For context on why they don't mix: a SAML connection's **Require SSO** toggle blocks password, social, **and Google** sign-in for its domains, so Google sign-in would be rejected before auto-join could run. Pick the model that fits:
* **Google Workspace auto-join** — zero IdP setup, members use the Google button, join on first sign-in.
* **SAML with Require SSO** — stricter control (blocks all non-SSO sign-in), needs a SAML app in your IdP. Google Workspace can also act as a SAML 2.0 IdP via a custom SAML app if you need enforcement; use the **Other (SAML 2.0)** connection type for that.
# SSO
URL: https://docs.llmgateway.io/features/sso
# SSO [#sso]
LLM Gateway supports per-organization **SAML 2.0 single sign-on (SSO)** and **SCIM 2.0 directory provisioning**, so an enterprise team can let members sign in with their corporate identity provider and keep membership in sync automatically.
SSO & SCIM are available on the **Enterprise** plan only, and can be
configured by an organization **owner** or **admin**. Until the organization
is on the Enterprise plan, the **SSO** page shows a contact-sales card.
Contact us at [contact@llmgateway.io](mailto:contact@llmgateway.io) to enable it.
## What each part does [#what-each-part-does]
* **SSO (authentication)** — lets your members sign in with your identity provider (Microsoft Entra ID, Okta, or any SAML 2.0 IdP). Sign-in is routed by **email domain**: a user clicks **Sign in with SSO**, enters their work email, and is redirected to the correct provider. A connection can list **multiple domains** (comma-separated, editable on the connection card) — the list must cover every domain the IdP may assert as a user's email, e.g. both the UPN and `mail` domains on Entra when they differ. SSO only *authenticates* existing members — it does not create the organization.
* **SCIM (provisioning)** — pushes user and group create / update / deactivate / delete from your directory into the organization, so people are added and removed automatically. Provisioned members default to the **developer** role.
* **Group → role mapping** *(optional)* — map directory groups to organization roles (`admin` / `developer`). On any membership change, a member receives the **highest** mapped role among their groups. Owners are never auto-demoted.
* **Default project access** *(optional)* — choose which projects newly provisioned SSO/SCIM members (the `developer` role) can access by default. Owners/admins always see every project, so this only affects developers. Left unconfigured, new members get the organization's first (default) project. Applies to members provisioned after you set it, not retroactively.
## Prerequisites [#prerequisites]
1. **Members exist first.** SSO authenticates existing members. People join the organization either through normal signup/invite or by being pushed via SCIM.
2. **The organization is on the Enterprise plan.** An admin flips the org to `enterprise` to unlock the feature.
3. **`SSO_ENABLED=true` on the deployment.** This global env flag controls whether the **Sign in with SSO** button appears on the login page. The admin config page works without it, but end users can't log in via SSO until it's on.
## The URLs LLM Gateway gives your IdP [#the-urls-llm-gateway-gives-your-idp]
Everything your identity provider needs is derived from the **management API base URL** and a **Connection ID** you choose. On the hosted service the base URL defaults to `https://internal.llmgateway.io` (overridable via `API_URL`); self-hosted deployments use whatever `API_URL` is set to.
The management API base URL is **not** `api.llmgateway.io` — that host serves
the `/v1` chat-completions gateway. SSO/SAML and SCIM live on the management
API. You don't need to construct these URLs by hand: the exact,
fully-qualified values are shown with copy buttons on the **SSO** page and on
each connection card.
With `API_URL = https://internal.llmgateway.io` and a connection slug of `acme-entra`:
| Value | URL |
| --------------------------------- | --------------------------------------------------------------------------------- |
| Identifier (Entity ID) / Audience | `https://internal.llmgateway.io/auth/sso/saml2/sp/metadata?providerId=acme-entra` |
| Reply URL (ACS) | `https://internal.llmgateway.io/auth/sso/saml2/sp/acs/acme-entra` |
| SCIM Tenant URL | `https://internal.llmgateway.io/scim/v2` |
## SCIM authentication [#scim-authentication]
SCIM uses a **static bearer token**, not OAuth. You generate the token once on the **SSO → Directory sync (SCIM)** card, and your IdP sends it as `Authorization: Bearer ` on every request. In your IdP's provisioning config, that means:
* **Authentication method:** the **bearer token** option — Entra labels it **"Long-lived bearer token"** / **"Secret token"**; Okta calls it an **API token**. Do **not** choose an OAuth 2.0 authorization-code flow — LLM Gateway does not implement one, and the connection test will fail.
* **Tenant / base URL:** the SCIM Tenant URL above (`…/scim/v2`).
* **Secret token:** the value from the SCIM card (shown once; rotate to reissue).
The token is scoped to a single organization, so every user and group your IdP pushes lands in that org.
## Provider guides [#provider-guides]
* [Microsoft Entra ID](https://docs.llmgateway.io/features/sso/entra) — set up SAML SSO and SCIM provisioning with Entra ID (formerly Azure AD).
* [Okta](https://docs.llmgateway.io/features/sso/okta) — set up SAML SSO and SCIM provisioning with a custom Okta app integration.
* [Google Workspace](https://docs.llmgateway.io/features/sso/google) — no SAML app needed: members sign in with the standard **Sign in with Google** button and auto-join your organization by email domain.
Any other SAML 2.0 IdP follows the same flow; pick the matching **Identity provider** type when you create the connection so the correct claim mapping is applied.
## End-user sign-in flow [#end-user-sign-in-flow]
1. On the login page the user clicks **Sign in with SSO** (visible when `SSO_ENABLED=true`).
2. They enter their work email, e.g. `jane@acme.com`.
3. LLM Gateway resolves the domain `acme.com` → finds the org's SSO connection → redirects to the org's IdP.
4. The user authenticates at their IdP (usually instant if already signed in).
5. They return signed in, landing in the enterprise organization.
## Enforcing SSO (optional, do this last) [#enforcing-sso-optional-do-this-last]
Each connection has a **Require SSO** toggle. When on, anyone whose email domain matches the connection can *only* sign in via SSO — password, social, and passkey sign-in are all rejected for that domain.
Only turn on **Require SSO** after you've confirmed SSO login works
end-to-end. Enforcing before the IdP works can lock out the whole domain —
including the admin setting it up if their own email is on that domain.
# Okta
URL: https://docs.llmgateway.io/features/sso/okta
# Okta [#okta]
This guide walks an organization admin through connecting **Okta** to LLM Gateway for SAML single sign-on and SCIM provisioning.
SSO & SCIM require the **Enterprise** plan and an organization **owner** or
**admin**. See the [SSO overview](https://docs.llmgateway.io/features/sso) for prerequisites and how the
URLs are derived.
## Create the SAML app integration [#create-the-saml-app-integration]
You'll create a custom SAML 2.0 app integration in the Okta Admin Console to represent LLM Gateway. There is no OIN (Okta Integration Network) catalog listing — the custom app is the supported path, and the steps below cover everything.
### Choose a connection slug in LLM Gateway [#choose-a-connection-slug-in-llm-gateway]
In LLM Gateway (**Organization → SSO → Add a connection**), set **Identity provider** to **Okta**, then pick a **connection slug** (lowercase letters, numbers, hyphens; `^[a-z0-9-]+$`, up to 64 chars). We recommend the format `-`, e.g. `acme-okta` — the form pre-fills this from your organization name and the selected provider. It must be unique across all LLM Gateway organizations, and each organization has exactly one SSO connection. Keep it stable: your SP URLs are built from it.
As soon as the slug is set, the form shows your two SP URLs (with the hosted default `https://internal.llmgateway.io`) — copy them from there:
* **Audience URI (SP Entity ID):** `https://internal.llmgateway.io/auth/sso/saml2/sp/metadata?providerId=acme-okta`
* **Single sign-on URL (ACS):** `https://internal.llmgateway.io/auth/sso/saml2/sp/acs/acme-okta`
You'll paste these into Okta next — no need to create the connection yet.
### Open the Okta Admin Console [#open-the-okta-admin-console]
Go to your Okta admin console (`https://-admin.okta.com`) with an account that has the **Application Administrator** role (or Super Admin). In the left navigation, open **Applications → Applications**.
### Create the app integration [#create-the-app-integration]
Click **Create App Integration**, choose **SAML 2.0** as the sign-in method, and click **Next**. On **General Settings**, set the **App name** (e.g. `LLM Gateway`) and click **Next**.
Pick **SAML 2.0**, not **OIDC**: LLM Gateway's per-organization SSO speaks
SAML. Don't use **Browse App Catalog** either — there is no gallery listing,
so always go through **Create App Integration**.
### Configure SAML settings [#configure-saml-settings]
On the **Configure SAML** step, fill in **Section A – SAML Settings → General**:
* **Single sign-on URL:** your ACS URL from step 1. Keep **"Use this for Recipient URL and Destination URL"** checked.
* **Audience URI (SP Entity ID):** your metadata URL from step 1.
* **Default RelayState:** leave blank.
* **Name ID format:** **EmailAddress** — required, see below.
* **Application username:** **Email**.
* **Update application username on:** Create and update (the default).
The **Show Advanced Settings** defaults are correct (Response **Signed**, Assertion Signature **Signed**, RSA-SHA256) — LLM Gateway requires signed assertions, which Okta does by default.
Click **Next**, and on the **Feedback** step select **"This is an internal app that we have created"**, then **Finish**.
**Name ID format = EmailAddress** and **Application username = Email** are
what make sign-in work: in **Okta** mode, LLM Gateway reads the user's email
from the SAML **NameID**. You don't need any attribute statements (recent
versions of the wizard don't even show that section — that's fine); if you do
add them, `displayName`, `givenName` and `surname` are picked up for the
user's profile name.
### Grab the Sign-on URL and certificate [#grab-the-sign-on-url-and-certificate]
After the wizard finishes you land on the app's **Sign On** tab. Under **Settings → Sign on methods → SAML 2.0 → Metadata details**, click **More details** to reveal:
* **Sign on URL** — looks like `https://.okta.com/app///sso/saml`, where `` starts with `exk`. Copy it.
* **Signing Certificate** — click **Copy** (or **Download**; the file contents are a PEM block `-----BEGIN CERTIFICATE----- … -----END CERTIFICATE-----`).
Use this exact app-specific **Sign on URL** — LLM Gateway derives the SAML
issuer it expects (`http://www.okta.com/`) from the `exk…` segment of
the URL. Pasting some other Okta URL (your org homepage, the metadata URL,
an Identity-Provider route) makes every SAML response fail issuer
validation.
### Create the connection in LLM Gateway [#create-the-connection-in-llm-gateway]
Back on the **SSO → Add a connection** form:
* **Identity provider:** **Okta** — this selects the email-NameID mapping and issuer derivation described above
* **Connection slug:** `acme-okta` (must match the slug whose URLs you pasted into Okta)
* **Email domains:** your corporate domain(s), e.g. `acme.com` (comma-separate for several)
* **Identity Provider Single Sign-On URL:** the Okta **Sign on URL**
* **X.509 signing certificate:** paste the PEM block
Save. The connection card then shows the exact SP metadata + ACS URLs — confirm they match what you entered in Okta. You can edit the email domain list on the connection card later without re-creating the connection.
The domain list must include **every domain Okta may send as a user's email**.
With **Application username = Email**, that's the domain of each user's Okta
email address. If some users sign in with a different domain (e.g. a
subsidiary), list all of them — otherwise those users bounce back to the login
page with an `account_not_linked` error even though Okta authenticated them.
## Assign users to the app [#assign-users-to-the-app]
Configuring SAML isn't enough on its own — Okta only lets **assigned** users sign in to the app. On the app's **Assignments** tab, click **Assign → Assign to People** (or **Assign to Groups**), add the people who should be able to sign in, and confirm. The **Applications** page's **Assign Users to App** bulk flow works too.
If you skip this, sign-in fails at Okta with *"Sorry, you can't access LLM
Gateway because you are not assigned this application in Okta."* — even though
the SAML config is correct. Assign at least your own account before testing.
If you also set up SCIM below, assignment doubles as the provisioning trigger: assigned users are pushed to LLM Gateway.
## Configure SCIM provisioning [#configure-scim-provisioning]
SSO only signs people in. SCIM is what actually adds members to the organization. Set it up on the **same** app integration.
### Generate a SCIM token [#generate-a-scim-token]
In LLM Gateway, on **Organization → SSO → Directory sync (SCIM)**, click **Generate SCIM token** and copy it (shown once). The SCIM base URL is shown in the same card — it's `https://internal.llmgateway.io/scim/v2` on the hosted default.
### Enable SCIM on the app [#enable-scim-on-the-app]
On the app's **General** tab → **App Settings** → **Edit**, set **Provisioning** to **SCIM** and **Save**. A new **Provisioning** tab appears on the app.
### Configure the SCIM connection [#configure-the-scim-connection]
On **Provisioning → Integration** → **Edit**:
* **SCIM connector base URL:** the SCIM base URL, e.g. `https://internal.llmgateway.io/scim/v2`
* **Unique identifier field for users:** `userName`
* **Supported provisioning actions:** check **Push New Users**, **Push Profile Updates**, and **Push Groups** (leave the two *Import* options unchecked — LLM Gateway doesn't support importing users into Okta)
* **Authentication Mode:** **HTTP Header** — Okta then shows an **Authorization: Bearer** field; paste the SCIM token there. **Do not** pick Basic Auth or OAuth 2: LLM Gateway's SCIM endpoint authenticates a plain static bearer token.
Click **Test Connector Configuration** — a green **"Connector configured successfully"** panel should list **Create Users**, **Update User Attributes** and **Push Groups** as detected (the *Import* rows show a red ✗, which is expected). Then **Save**.
### Enable provisioning to the app [#enable-provisioning-to-the-app]
On **Provisioning → To App** → **Edit**, enable **Create Users**, **Update User Attributes**, and **Deactivate Users**, then **Save**. Leave **Sync Password** off.
From now on, assigning a user (or an assigned group's member) pushes them to LLM Gateway; unassigning or deactivating them removes their membership.
Users who were **assigned before provisioning was enabled** are not pushed
automatically — they show a red warning icon on the **Assignments** tab. Click
the **Provision User** button there and confirm with **OK**; Okta runs a job
that provisions all such users.
Provisioned users are created in LLM Gateway and added to the organization (default role **developer**). Deactivating or unassigning a user in Okta removes their membership.
## Group → role mapping (optional) [#group--role-mapping-optional]
On the app's **Push Groups** tab, push the Okta groups whose membership should matter. Then on the LLM Gateway **SSO** page, add mappings such as `Acme Admins → admin`. When Okta pushes group membership, each member gets the **highest** mapped role among their groups (default `developer`). Owners are never auto-demoted, so you can't accidentally lock yourself out of the owner role.
## Default project access (optional) [#default-project-access-optional]
Provisioned members join as **developers**, who only see the projects they're granted (owners/admins always see every project). Use the **Default project access** card on the **SSO** page to choose which projects newly provisioned SSO/SCIM developers get by default. If you leave it unconfigured, new members get your organization's first (default) project so they can see something out of the box; select an empty set to instead grant nothing and manage project access manually per member.
Default project access applies only to members provisioned **after** you set
it — it doesn't retroactively change existing members' project grants. Adjust
an existing member's projects from the **Team** page.
## Test the login [#test-the-login]
Log out → login page → **Sign in with SSO** → enter a work email (`someone@acme.com`). LLM Gateway resolves the connection by email domain and redirects to Okta; if the user is already signed in to Okta the round-trip is instant. On return they're signed in as the (SCIM-provisioned) user — if the dashboard opens in the user's own personal organization, the enterprise organization is one click away in the organization switcher.
## Enforce SSO (optional, do this last) [#enforce-sso-optional-do-this-last]
Flip **Require SSO** on the connection to require SSO for that email domain — password, social, and passkey sign-in are then rejected for it.
Only enable **Require SSO** after the test above passes, and remember it also
applies to the admin setting it up if their email is on that domain — verify
your own SSO login works first.
## Troubleshooting [#troubleshooting]
* **Okta says "you are not assigned this application"** — the SAML config is fine; the user just isn't on the app's **Assignments** tab. Assign them (or their group).
* **Okta sign-in succeeds but the user lands back on the LLM Gateway login page** — the SAML response was received but refused, almost always an `account_not_linked` domain mismatch: the asserted email's domain isn't in the connection's **Email domains** list. Edit the list on the connection card to cover every domain Okta may assert.
* **Every SSO attempt fails after the Okta redirect** — check that the connection's **Identity Provider Single Sign-On URL** is the app-specific **Sign on URL** containing the `exk…` app id (Sign On tab → Metadata details → More details). Other URLs break issuer validation. Also confirm the connection was created with **Identity provider = Okta** and that the certificate is the app's current **SHA-2 Active** signing certificate.
* **Assigned users never appear in the organization** — provisioning was probably enabled after they were assigned. Use **Provision User** on the **Assignments** tab, and confirm **Provisioning → To App → Create Users** is enabled and the connector test passes.